RFC 4072S
156 / 272
PHOENIX CONTACT 108580_en_02
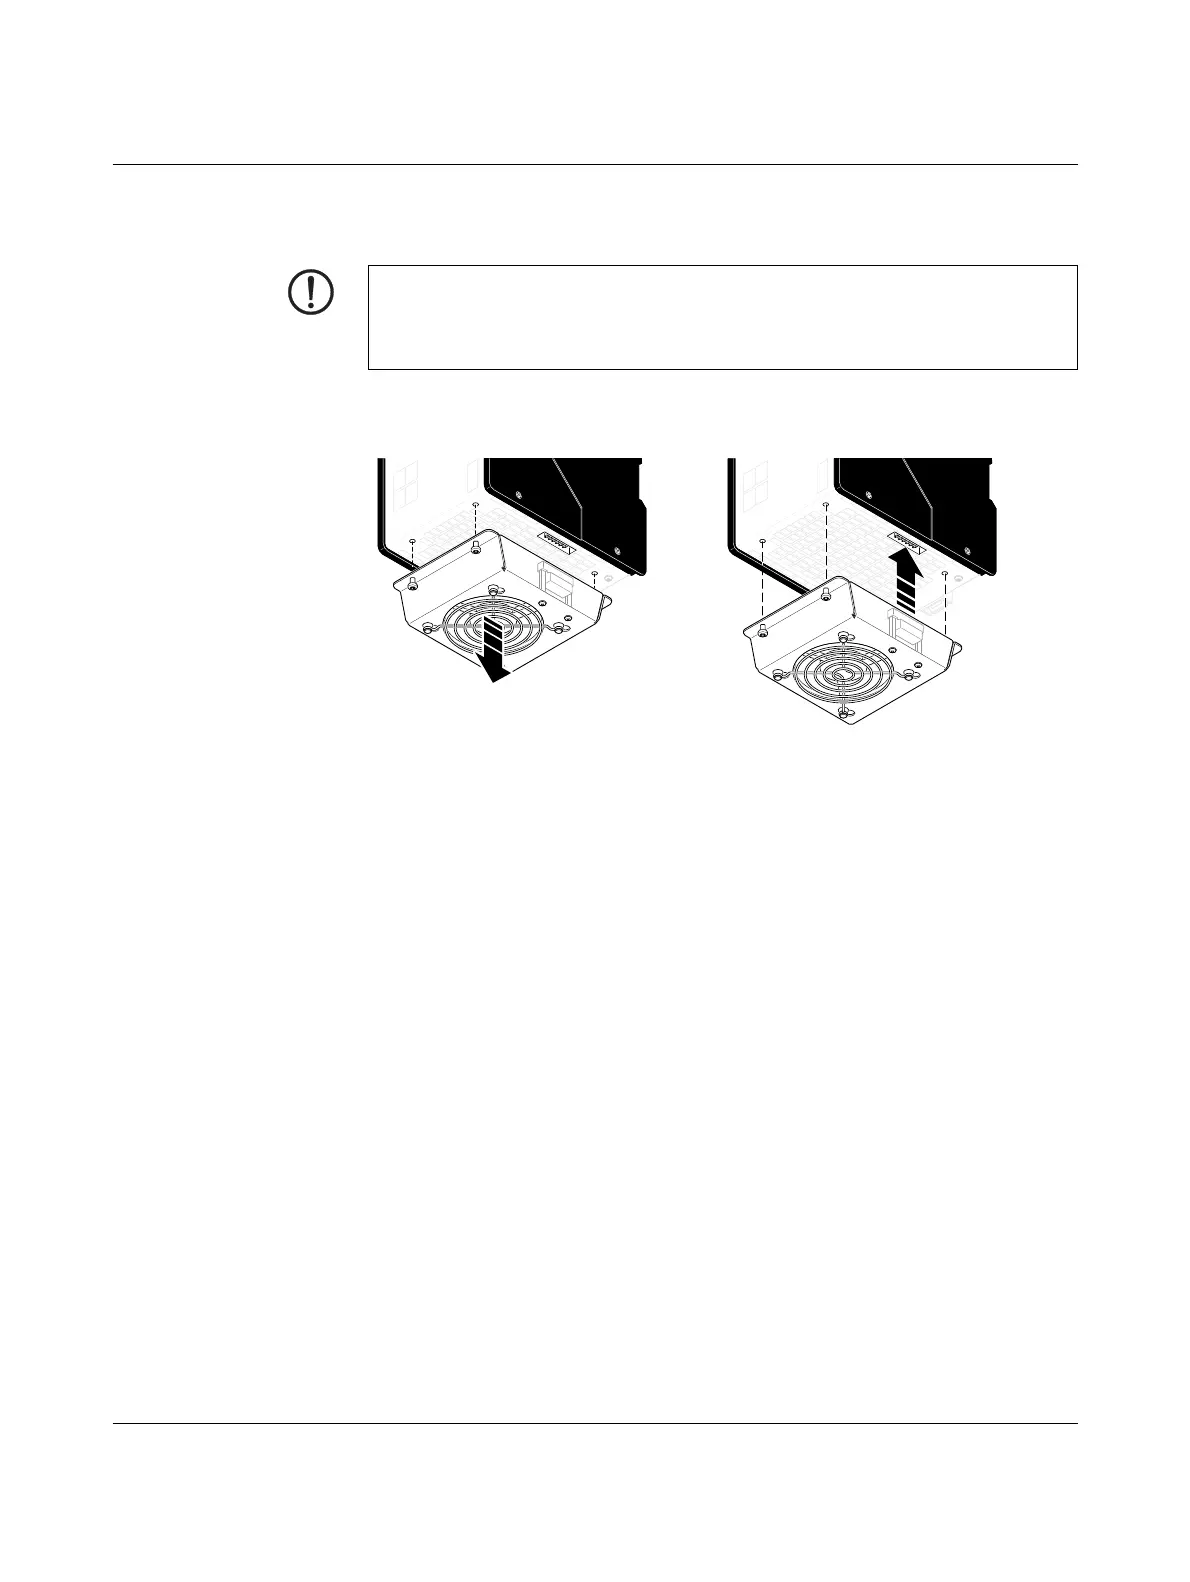
6.4 Replacing the RFC FAN MODULE fan module
The procedure for installing and removing the RFC is described in Section “Replacing the
RFC 4072S” on page 77.
Figure 6-1 Replacing the RFC FAN MODULE fan module
(removal (A), mounting (B))
• Position the fan module on the bottom of the RFC according to Figure 6-1 (B).
• Make sure that the COMBICON connector and the four screws fit properly. Upon deliv-
ery of the fan module, the four screws are premounted in the fan module housing.
• Tighten all four M4 screws equally with a recommended tightening torque of 2.2 Nm
(3 Nm, maximum).
NOTE: Potential RFC 4072S malfunction
The fan module must not be replaced during operation. The RFC must be switched off
before the fan module can be replaced. To replace the fan module, remove the RFC from
the DIN rail.
 Loading...