Do you have a question about the Phoenix Power Rower MR900 and is the answer not in the manual?
Contact Customer Service for questions or issues before starting assembly.
Gather tools, clear work area, invite a friend, and open boxes carefully before assembly.
Identifies hardware used in assembly, shown at full size for easy identification.
Attach Stabilizer Bar (3) to Main Frame (1). Secure with Bolts (44), Washers (52) and Nuts (55).
Attach the Rear Support (8) to the Sliding Rail (2). Secure with Bolt (40), and Nut (56).
Slide the Seat Support (16) over the Sliding Rail (2) and reassemble components.
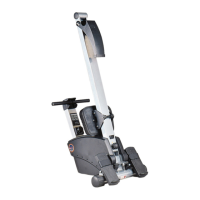
Remove Knob (24), position Seat (15) forward, pull Sliding Rail (2) out, fold it up, and secure with Knob (24).
Begin with knees bent, lean forward slightly, grip handlebar. Extend back smoothly using legs and arms.
Details on MODE, SET, and RESET buttons for time, distance, calorie, and pulse functions.
Explanation of TIME, SPEED, DISTANCE, and CALORIES count-up/down modes.
Guidance for display issues, sensor count problems, and battery replacement.
Covers defects in workmanship and material for 90 days. Requires original receipt.
Procedure to contact Customer Service for replacement parts and assistance.
Excludes damage from misuse, accident, improper assembly, alterations, and rental use.
Instructions and form for ordering replacement parts, including contact information.
Consult physician, stop if discomfort, keep children away, wear appropriate clothing, tighten bolts.
Start slowly, set realistic goals, supplement with other aerobic activities, drink fluids.
Monitor heart rate to stay in target zone. Aerobic exercise uses large muscle groups for fitness.
Diagram showing upper and lower body muscle groups developed by the exercise routine.
Guide to warming up muscles and cooling down to reduce soreness after exercise.
Instructions for various stretches like Head Roll, Hamstring Stretch, Toe Touch, etc.
List of all parts with numbers, descriptions, quantities, and order numbers.
Visual representation of parts and their placement on the assembled unit.