1 2
3
4
Unpacking
Remove all packaging from the unit. Retain the packaging.
If you dispose of it please do so according to any local regulations.
Batteries in the remote control
Attaching the TV stand
Connecting the TV
Quick Start Guide
46” & 55” Smart 3D TV
L46S3D13N / L55S3D13N
1 2 3
Best connection
speed
Wireless Router Wireless Router
Wireless Connection
3
1
2
Your TV has a wireless connection
built in, so connecting an ethernet
cable is optional, however this
will give you the quickest internet
connection.
AC IN ~
3
1
2
1. Slide the battery
cover to open
the battery
compartment
of the remote
control.
2. Insert two AAA
size batteries.
Make sure the
(+) and ( - ) ends
of the batteries
match the (+) and
( - ) ends indicated
in the battery
compartment.
3. Slide the battery
cover back onto
the remote
control to close
the battery
compartment.
The LCD display is very fragile, and must be
protected at all times when installing and removing
the TV stand. Be sure that no hard or sharp object,
or anything that could scratch or damage the LCD
display, comes into contact with it. DO NOT exert
pressure on the front of the TV at any time because
the screen could crack.
1. Disconnect all cables connected to the TV.
2. Lay the TV down on a flat surface
preferably a table with the back side
facing up. Make sure the neck of the
TV stand over hangs the edge of the
table. Please make sure a soft cushioned
material (such as a pillow or thick piece of
foam) is placed beneath the screen.
3. Carefully place the glass stand onto the
neck of the stand. Then fix into position
using the 3 screws provided as shown.
1x YPbPr adapter cable
1x Audio in adapter cable
1x Scart adapter cable
3 x TV stand screws
2 x 3D glasses
1 x power cable
1 x cable tidy strap
2 x AAA batteries
1 x Remote
control
1 x TV stand
Thank you for purchasing your new Pioneer TV.
Your new TV incorporates the latest technology to
enhance your viewing experience. We would suggest
that you allow about 20 mins for initial setup.
Please follow this guide for a successful rst time
installation.
GB
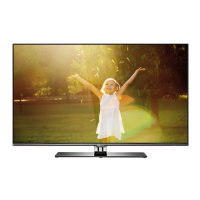
Image for indication only
1. Connect the Aerial cable.
2. Connect the Ethernet cable
(optional).
3. Connect the Power cable and
switch on at the mains.
Make sure you remove all protective tape and film from the TV and stand, before using your TV.
L55S3D13N_QSG.indd 1 27/11/2013 12:16