EasyManua.ls Logo

Pioneer S-J11D User Manual

Pioneer S-J11D
24 pages
To Next Page IconTo Next Page
Page #1 background imageLoading...
Page #1 background image
Operating
Instructions
COMPACT
STEREO
CD
CASSETTE
DECK
RECEIVER
XR-J11/XK-J22
AUTO
RETURN
STEREO
TURNTABLE
PL-J210
SPEAKER
SYSTEM
S-J11D/S-J120/S-J220
DIGITAL
AUDIO
Thank
you
for
buying
this
Pioneer
product.
Please
read
through
these
operating
instructions
so
you
will
know
how
to
operate
your
model
properly.
After
you
have
finished
reading
the
instructions,
put
them
away
in
a
safe
place
for
future
reference.
In
some
countries
or
regions,
the
shape
of
the
power
plug
and
power
outlet
may
sometimes
differ
from
that
shown
in
the
explanatory
drawings.
However,
the
method
of
connecting
and
operating
the
unit
is
the
same.
WARNING
:
TO
PREVENT
FIRE
OR
SHOCK
HAZARD,
DO
NOT
EXPOSE
THIS
APPLIANCE
TO
RAIN
OR
MOISTURE.
"This
product
complies
with
the
Radio
Interference
require¬
ments
of
the
EC
(European
Community)
Directive
871308)EEC."
*The
S-J11D
is
not
sold
in
Europe.
The
S-J120
and
S-J220
are
sold
only
in
Europe.
The
S-J120
speaker
system
is
for
use
with
the
XR-J11
only
and
the
S-J220
Speaker
system
is
for
use
with
the
XR-J22
only.
Operating
instructions
for
S-J220
are
attached
to
the
side
of
speakers.
LINE
VOLTAGE
SELECTOR
SWITCH
Only
multi-voltage
models
are
provided
with
this
switch.
U.S.,
Canadian,
European,
U.K.,
and
Australian
models
are
not
provided
with
this
switch.
Main
voltages
in
Saudi
Arabia
are
127
V
and
220
V
only.
Never
use
this
model
with
110
V
setting
in
Saudi
Arabia.
Before
your
model
is
shipped
from
the
factory,
this
switch
is
set
to
the
power
requirements
of
the
destination;
nevertheless,
you
should
check
that
it
is
set
properly
before
plugging
the
power
cord
into
the
wall
outlet.
[For
Mufti-voltage
model]
CAUTION
Use
of
controls
or
adjustments
or
performance
of
procedures
other
than
those
specified
herein
may
result
in
hazardous
radiation
exposure.
The
use
of
optical
instruments
with
this
produnt
will
increase
eye
hazard.
1.
Disconnect
the
power
cord.
2.
Use
a
screwdriver
with
a
tip
that
fits
neatly
in
the
groove.
3.
Insert
the
screwdriver
into
the
groove
on
the
voltage
selector
and
adjust
according
to
the
voltage
value
of
your
area.
VOLTAGE
SELECTOR
CONTENTS
CAUTIONS
REGARDING
HANDLING
.
3
CONNECTIONS
.
3
LOADING
BATTERIES
INTO
REMOTE
CONTROL
UNIT
.
6
PL-J210
TURNTABLE
SET
UP
.
6
PANEL
FACILITIES
.
7
CAUTIONS
REGARDING
COMPACT
DISC
HANDLING.
12
HOW
TO
HANDLE
CASSETTE
TAPES
.
13
BASIC
OPERATIONS.
14
CD
APPLICATION
GUIDE.
18
EDIT
RECORDING
.
..
20
MICROPHONE
MIXING
(XR-J22
only)
.
20
MAINTENANCE
.
21
TROUBLESHOOTING
.
22
SPECIFICATIONS.
24
[For
Multi-voltage
model]
FM/AM
CHANNEL
STEP
SWITCH
Adjustment
is
only
necessary
when
there
is
a
CHANNEL
STEP
switch
at
the
rear
panel.
The
CHANNEL
STEP
switch
is
located
on
the
rear
panel
of
the
CD
deck
receiver.
Before
the
CD
deck
receiver
leaves
the
factory,
this
switch
is
set
to
the
channel
step
standard
of
the
area
where
the
CD
deck
receiver
is
sold.
Depending
on
the
position
of
this
switch,
each
time
TUNING
button
is
pressed,
the
frequency
display
changes
by
the
following
amount:
[100
kHz/10
kHz]
position
For
areas
with
channel
step
of
100
kHz
for
FM
and
10
kHz
for
AM.
[50
kHz/9
kHz]
position
For
areas
with
channel
step
of
50
kHz
for
FM
and
9
kHz
for
AM.
NOTE:
ff
the
switch
is
set
to
the
wrong
position,
correct
tuning
may
not
be
possible.
Consult
your
dealer
if
you
are
not
sure
about
the
radio
channel
step
standard
in
your
area.
PIONEER'
The
Art
of
Entertainment
Question and Answer IconNeed help?

Do you have a question about the Pioneer S-J11D and is the answer not in the manual?

Pioneer S-J11D Specifications

General IconGeneral
BrandPioneer
ModelS-J11D
CategoryStereo System
LanguageEnglish

Summary

Compact Disc Handling and Care

Disc Care and Cleaning Procedures

Guidelines for handling, cleaning, and avoiding damage to compact discs.

Cassette Tape Handling and Usage

Basic Operations Guide

Radio Tuning and Tape Operations

Memorizing and Selecting Radio Stations

Guide to storing and recalling up to 24 FM/AM stations using preset tuning.

Cassette Tape Playback and Recording

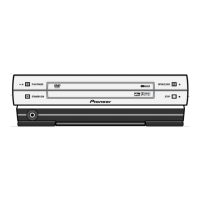
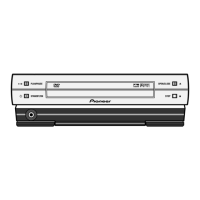
Instructions for playing tapes and recording onto Deck II, including source selection.

Recording Features and CD Playback

Recording, Copying, and Dolby NR

Details on recording, synchro copy, Dolby NR system function, and playing video components.

CD Playback Introduction

Procedures for inserting a disc and initiating playback operations on the CD player.

CD Player Modes and Search Functions

Standard Playback and Pause

How to play all tracks, stop, and temporarily pause playback on the CD player.

Disc Track Search Operations

Methods for quickly finding a desired track using manual/track search and fast forward/reverse functions.

CD Application Guide

Repeat and Random Playback

How to use repeat modes (single, all, programmed) and random playback.

Hi-Lite Scan and Programmed Playback

How to preview tracks with Hi-Lite Scan and program playback sequences.

Programming and Pause Operations

Entering Tracks into Program Memory

Detailed steps and examples for entering tracks into memory for programmed playback.

Edit Recording and Mixing

Edit Recording Functionality

How to automatically select and record tracks onto a tape within a designated time.

Maintenance Procedures

Troubleshooting Guide

Cassette Deck and Amplifier Issues

Lists common symptoms, causes, and remedies for cassette deck and amplifier section problems.

System Troubleshooting

Tuner, CD Player, and Remote Issues

Solutions for reception, playback, and remote control problems across system components.

Related product manuals