Trebuchet User Guide 58670 V0313 3
Building the Lever Arm
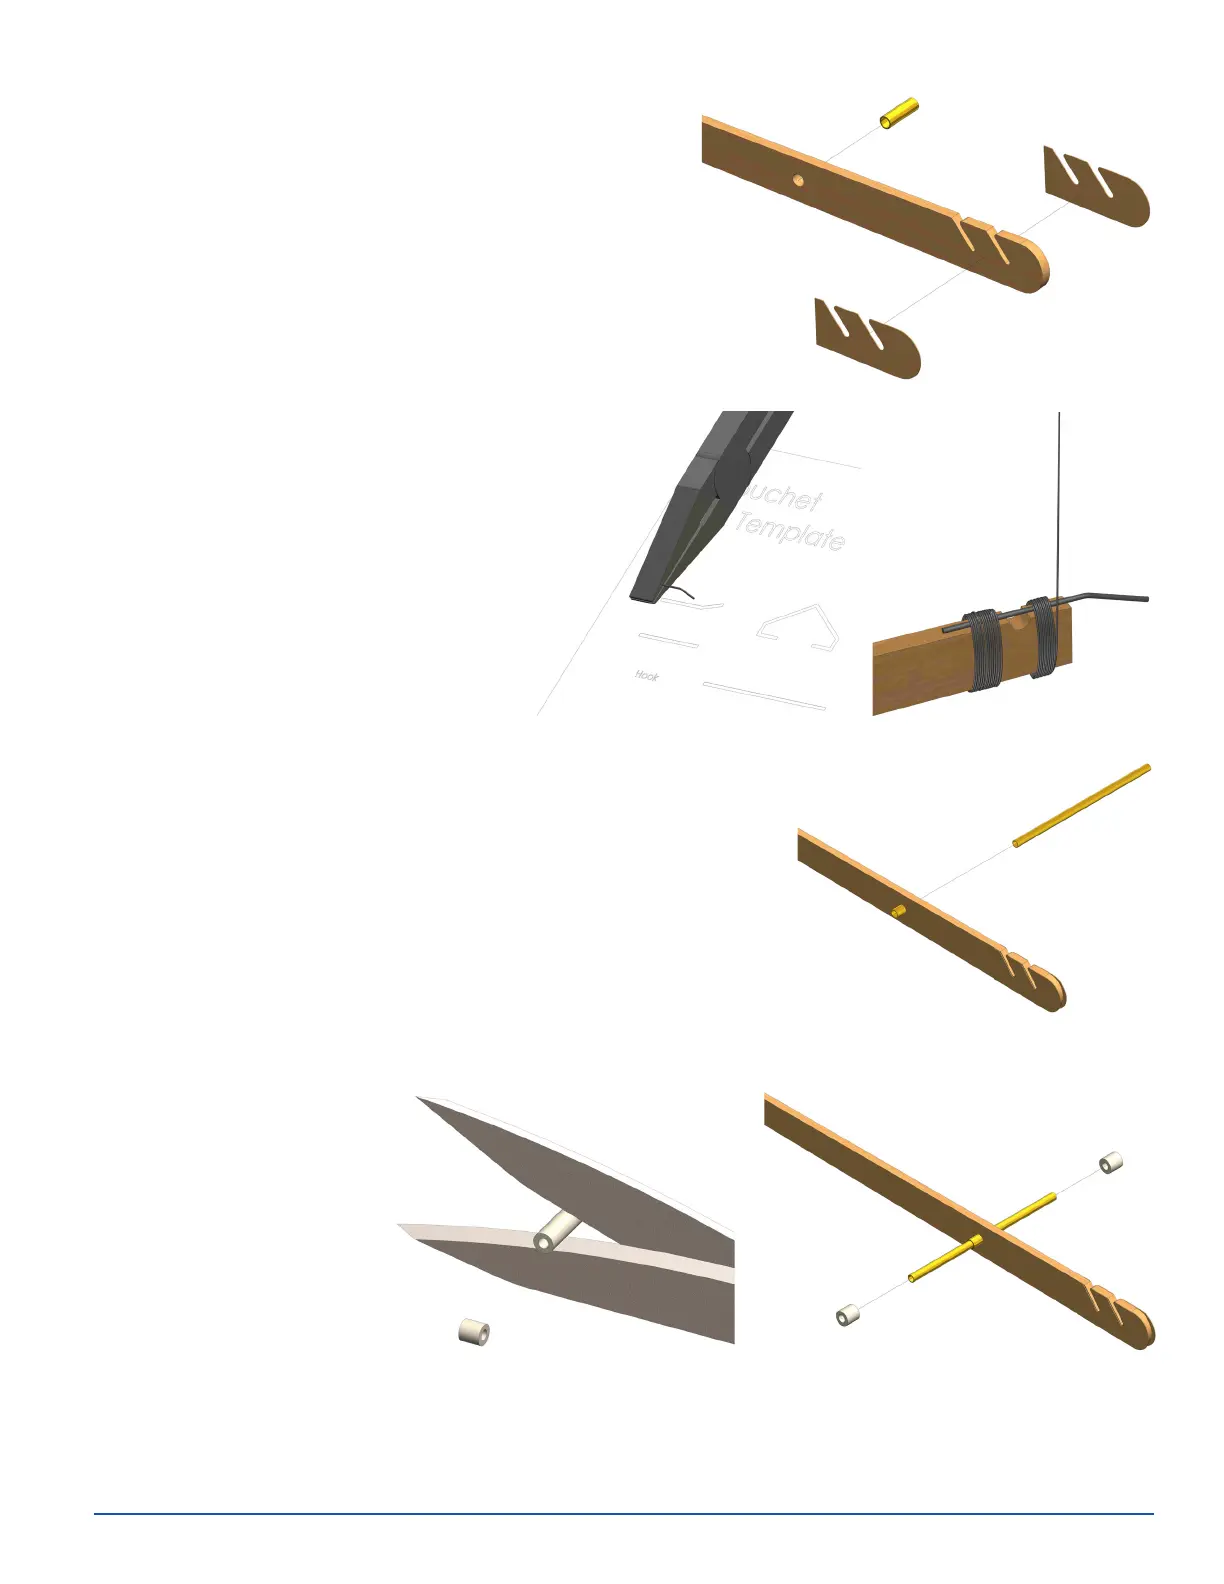
1. Find the long basswood piece with the rounded end.
This is the lever arm. The two diagonal cuts at one
end are identical to the small end caps on the separate
1-1/2" x 2" piece. Glue the end caps to each side of
the lever arm’s curved end. The curved end caps may
extend a little past the lever arm, but make sure the
diagonal cuts are lined up.
2. The lever arm has a small hole near its center;
locate the short brass tube. Center the
tube in the hole and glue it in place so
it doesn’t spin.
3. Take what is left of the paper clip and
cut o 1-1/4" with the needle-nose
pliers. Bend the piece with the pliers to
match the shape where the template
says “Hook.” Make sure both ends
are smooth; remove any burrs with
sandpaper. This will be the hook.
4. Line up the hook against the square end of the lever so that it
is over the notch and hanging over the end of the lever about
1/2". Glue the hook to the arm. Let it dry for a few minutes,
locate the 36" piece of string, and cut o 12". Holding the
(nearly dry) hook in place, wrap the string around it so the hook
is bound to the lever arm. Put a layer of glue over the string so
it does not come unwound. Be sure not to glue the notch.
5. Locate the long brass tube, and slide it through the short brass
tube glued into the lever.
6. Using scissors, cut the
exible tubing into four
1/4" pieces.
7. Slide a brass washer
onto each end of the
long brass tube, and
push one of the tubing
pieces onto either end.
Step 3
Steps 1-2
Step 4
Step 5
Step 6 Step 7
 Loading...