3A - 14 Fuel Metering System 5.0/5.7L
MEFI 4 - PCM
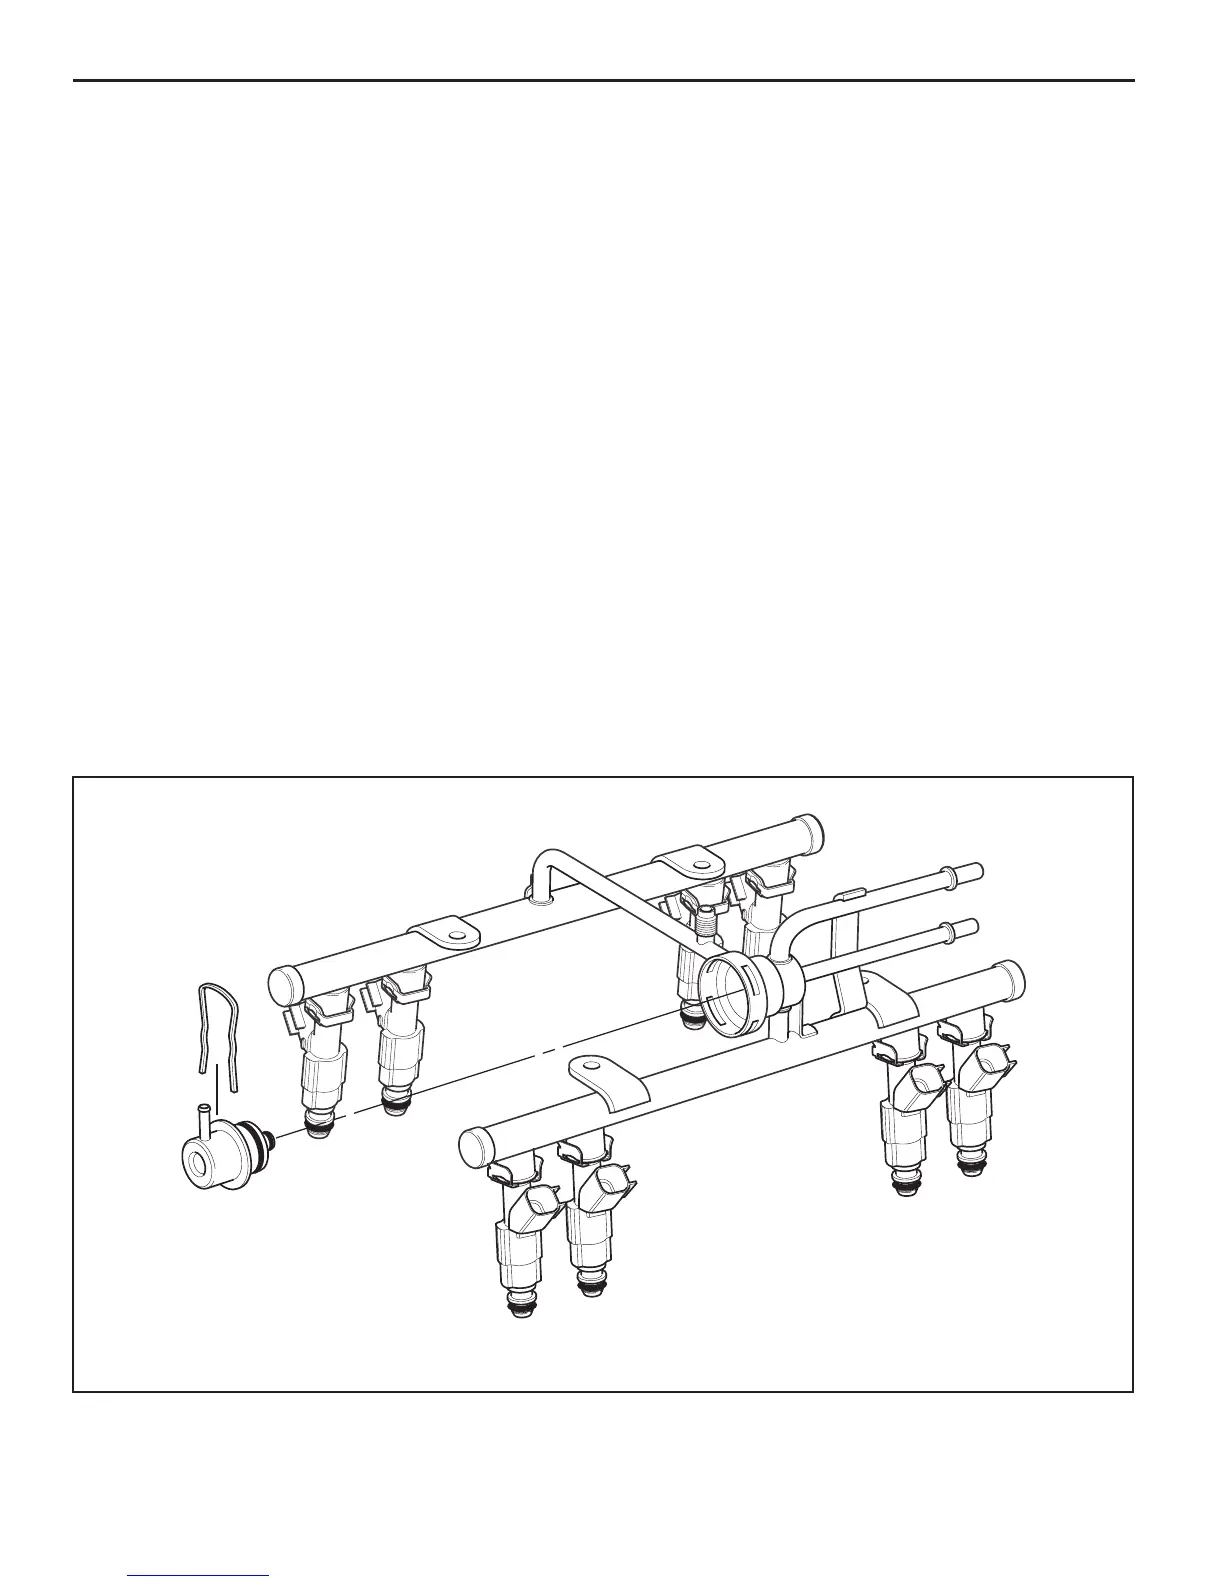
Fuel Pressure Regulator Assembly
Important
•
The fuel pressure regulator is serviced as a complete
assembly only.
•
Fuel pressure must be relieved before servicing the
fuel system.
•
Refer to “Fuel Pressure Relief Procedure.”
Remove or Disconnect
1. Negative battery cable.
2. Vacuum hose from regulator.
3. Fuel outlet line nut.
•
Use back up wrench to hold pressure regulator to
keep from turning and damage.
•
Discard outlet line nut O-ring.
4. Pressure regulator attaching screw.
5. Pressure regulator from fuel rail.
6. Pressure regulator O-ring and discard.
Inspect
•
The fuel input port of the pressure regulator may
contain a fi lter screen. Inspect the screen for dirt and
debris. If dirty, use a pick to remove fi lter screen and
discard. Replace with new fi lter screen supplied in
service package.
Fuel Pressure Regulator
Install or Connect
1. Lubricate new fuel pressure regulator O-ring with clean
engine oil and install on regulator.
2. Push pressure regulator into rail.
3. Pressure regulator attaching screw. Finger tighten
only.
4. Lubricate new outlet line O-ring and install on end
of line.
5. Outlet line assembly with nut to pressure regulator.
Finger tighten only.
6. Torque pressure regulator attaching screw to 9.5
N•m (84 lb.in.).
7. Torque outlet line nut to 17.5 N•m (13 lb.ft.).
•
Use backup wrench to keep pressure regulator
from turning and damage.
8. Vacuum line to pressure regulator.
9. Negative battery cable.
Inspect
•
Turn ignition switch to the “ON” position for 2 seconds,
then turn to the “OFF” position for 10 seconds. Turn
the ignition switch back to the “ON” position and check
for fuel leaks.
 Loading...