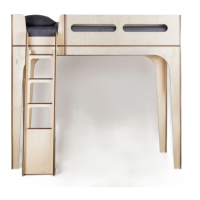
ASSEMBLY INSTRUCTIONS
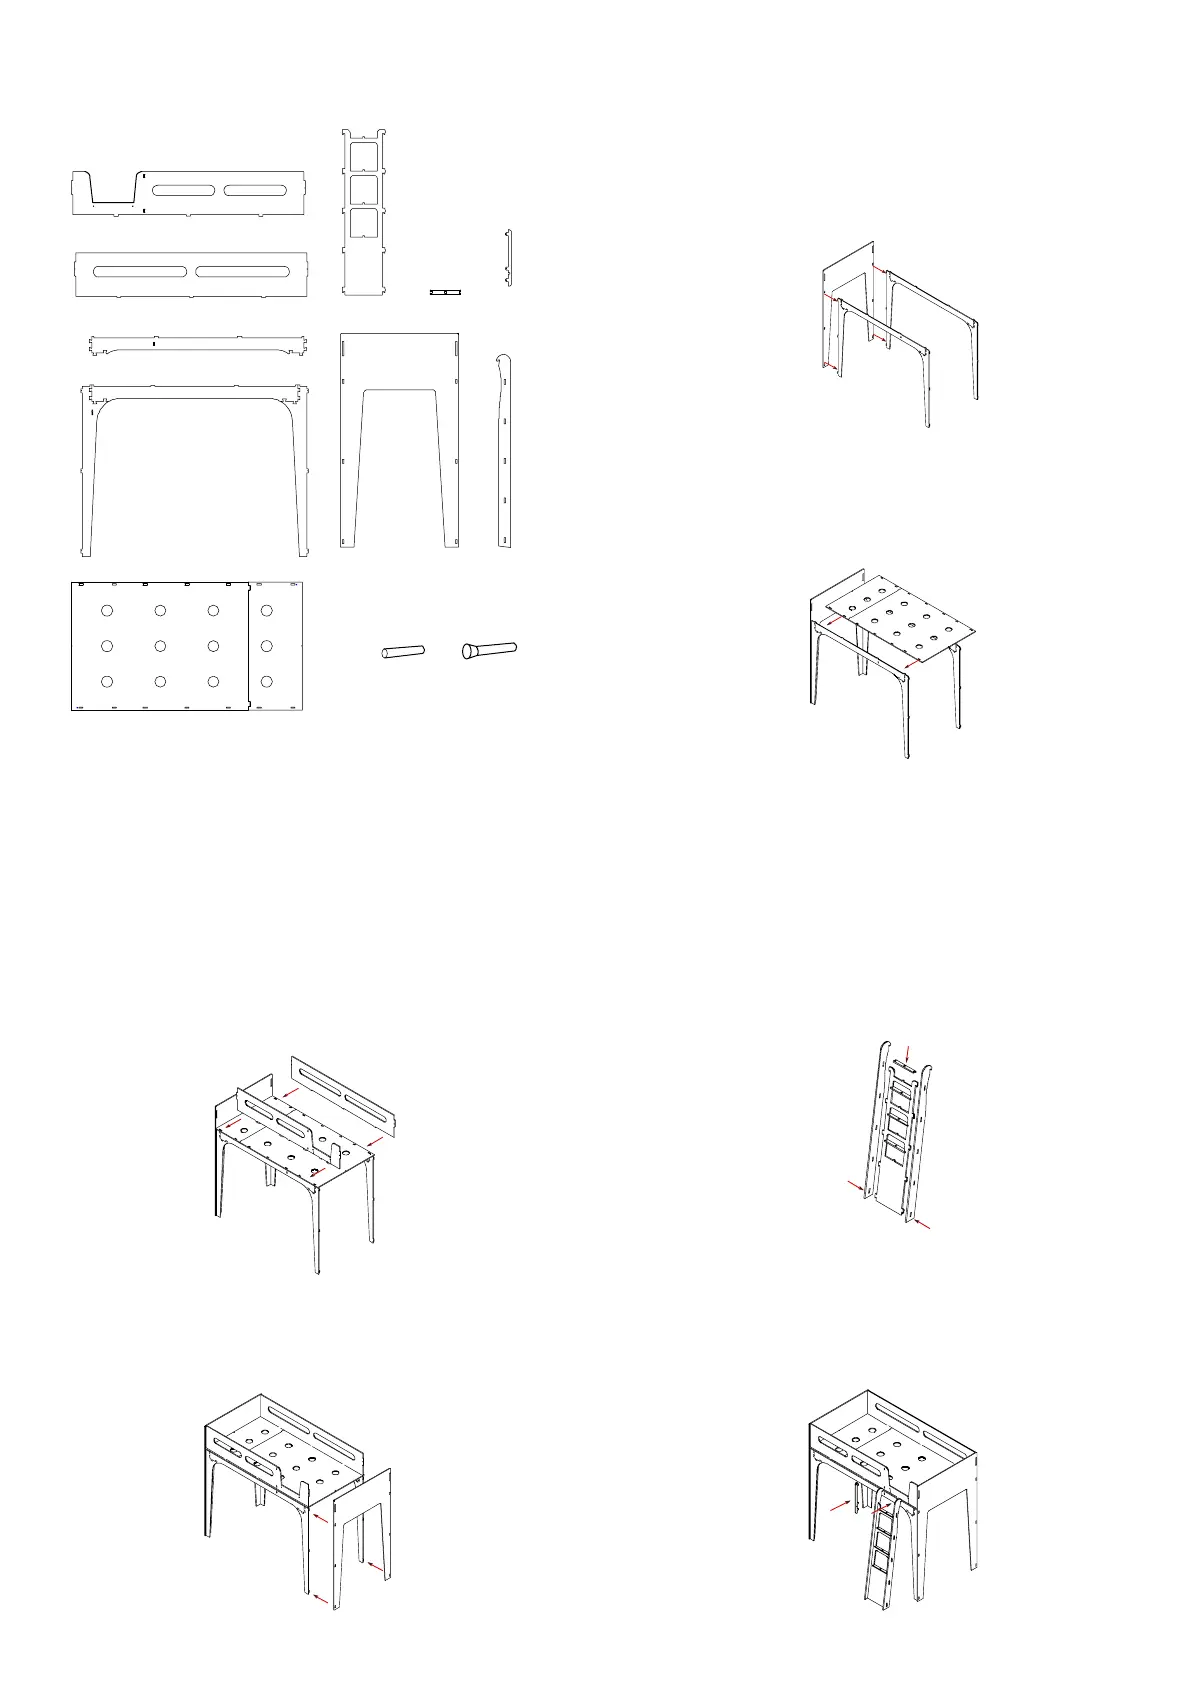
Lay 2 x B1 pieces on the floor and place B2 in between as shown
above. Attach as shown above - ensure the joins are exactly correct
before joining gently with a mallet. Repeat with 2 x B1 and B3. This
piece will be the front of your loft bed. Join your two supports with one
A frame as shown. Once all nodes are in the right position, a mallet can
ensure all parts are firmly in position.
Make the mattress base by uniting C1 and C2. Once it’s
connected lift it onto the frame, and resting on the support of the A
frame. Once all nodes are in the right position on the B and A pieces,
use a mallet to ensure they are firmly in position.
PARTS
Insert D1 and D2 onto the frame. Ensure D1 is on the same side
as the ladder. Insert the dowels on the side with the A frame to secure
the pieces. Add part F onto D1 and secure with the 3 wooden plugs.
Tap them in lightly with a hammer, you may want to put a soft cloth
over the hammer to protect the panel from getting scratched by the
hammer.
Assemble the remaining part A onto the open side. Once all
nodes are in the right position, use a mallet to ensure they are firmly in
position. Insert the dowels on the side with the A frame to secure the
pieces.
Insert E2 into the openings of the 2 x E1 pieces and lock in place
by pushing E2 downward. The ladder steps (E3) are inserted into the
square protrusions on the upper side of each rung. Use a mallet to tap
it firmly in place.
Place the ladder on the opening and fix at the back by tapping
in 2 wooden dowels. Add support part H onto D1 and secure inside
with the 3 wooden plugs. Tap them in lightly with a hammer, you may
want to put a soft cloth over the hammer to protect the panel from
getting scratched by the hammer.
There will be 2 spare dowels in your box to keep as spares.
A x 2
D1 x 1
B1 x 4
B2 x 2
E1 x 2
D2 x 1
B3 x 2
C1 x 1
C2 x 1
E2 x 1
E3 x 4
I x 3
wooden
plug
wooden
dowels
G x 20
H x 1
A
B1
B3
B2
C1
C2
B3
D1
D2
A
A
B1
E1
E3
E2
E1
H
E
 Loading...