9
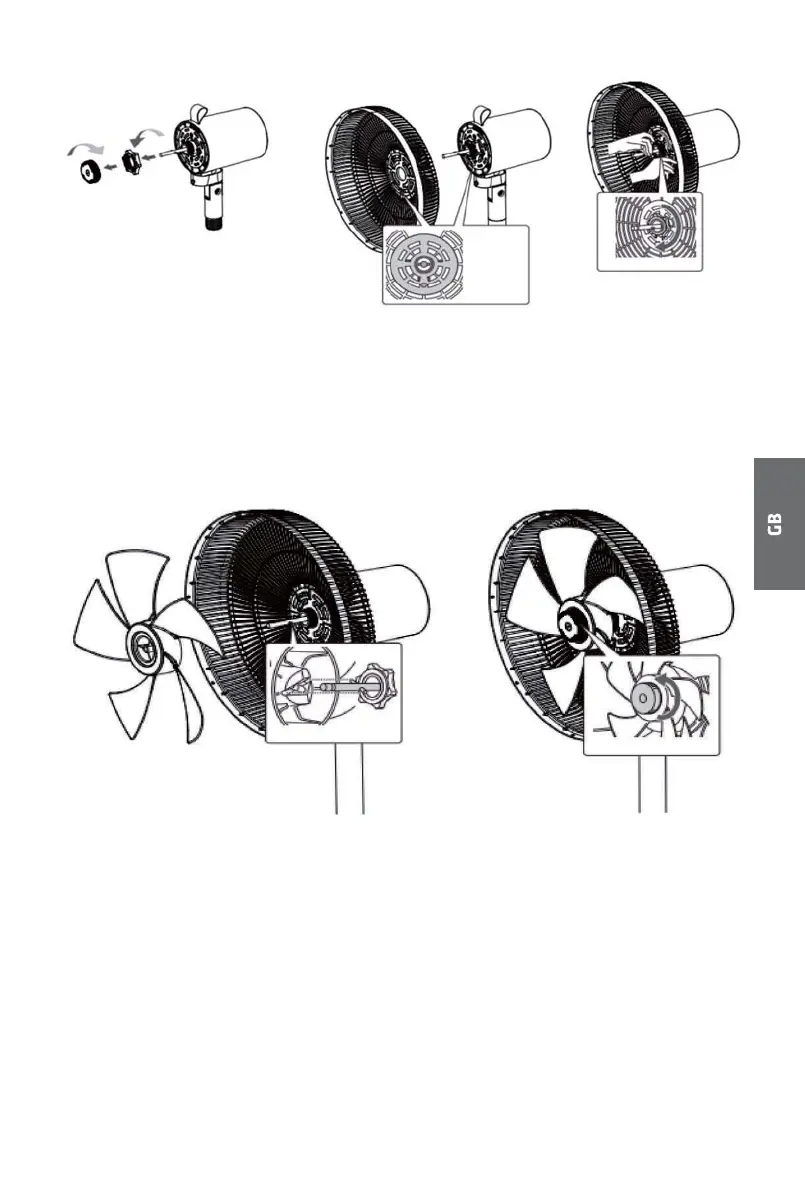
3.Fix the blade assembly (3)
Fully position the blade assembly (3) onto the motor
shaft (6).
Then tighten the blade assembly (3) by fastening the
blade assembly nut (2).
•
•
4.Fix the front guard (1)
Position the front guard (1) over the rear guard (5)
while ensuring the marks “I” and “II” on the front
guard (1) are up, and align the mark “I” on the front
guard (1) with the mark “I” on the rear guard (5).
Then turn the front guard (1) clockwise until the mark
“I” on the rear guard (5) is located in the center of the
mark “II” on the front guard (1).
Finally tighten the front guard (1) with the safety
•
•
•
 Loading...