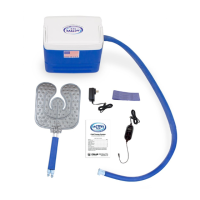
(g) Plug the Digital Timer #DT30 into the plate on the side of the cooling reservoir, then plug
the other end into the power supply. Finally, plug the power supply into a wall outlet.
Ensure all connections are securely seated.
(h) If the optional battery pack was purchased it should arrive fully charged and it may be
connected now. This replaces the power supply. The battery has two cords, one cord is
labeled “To Cooler” and the other cord is labeled “To Charger.” Use the “To Cooler” cord
to plug into the digital timer #DT30 and then plug the timer into the cooling reservoir. The
unit will now run off of the battery pack. To charge the battery pack, plug the other cord
labeled “To Charger” into the included charger and then plug the charger into a wall
outlet. While the battery pack is charging the light on the charger will be red. The light will
change to green when the battery pack is fully charged. Note: Do not attempt to charge
the battery while it is operating the unit.
(i) The Polar Active Ice® Cold Therapy System includes an electronic digital timer. The digital
timer may be turned on by pressing the on/off button. The timer will automatically set at
30 minutes and turn the unit on. The default 30-minute setting is a safety feature as
many doctors recommend 30-minute therapy sessions followed by skin inspection. If your
doctor directs you to use the unit for longer periods of time, an additional 30 minutes of
operation will be added to the session each time you press the “+” button. Always follow
your doctor’s recommendations in regards to treatment time and skin inspection. When
the unit times out or is turned off, the timer will always reset to 30 minutes as the
default time of operation.
(j) Lay the bladder on a flat surface and turn on the digital timer. Water will begin circulating
through the bladder and back into the cooling reservoir via the water return flow tube.
Allow the unit to run several minutes before securing the bladder to the target body part.
This will ensure good flow through the system. Always ensure that there is water flowing
out of the return tube into the cooling reservoir.
3
Digital Timer #DT30
To Cooling
Reservoir
To Power Supply
Timer set at 30 min.
(default setting)
 Loading...