PRODUCT DESCRIPTION
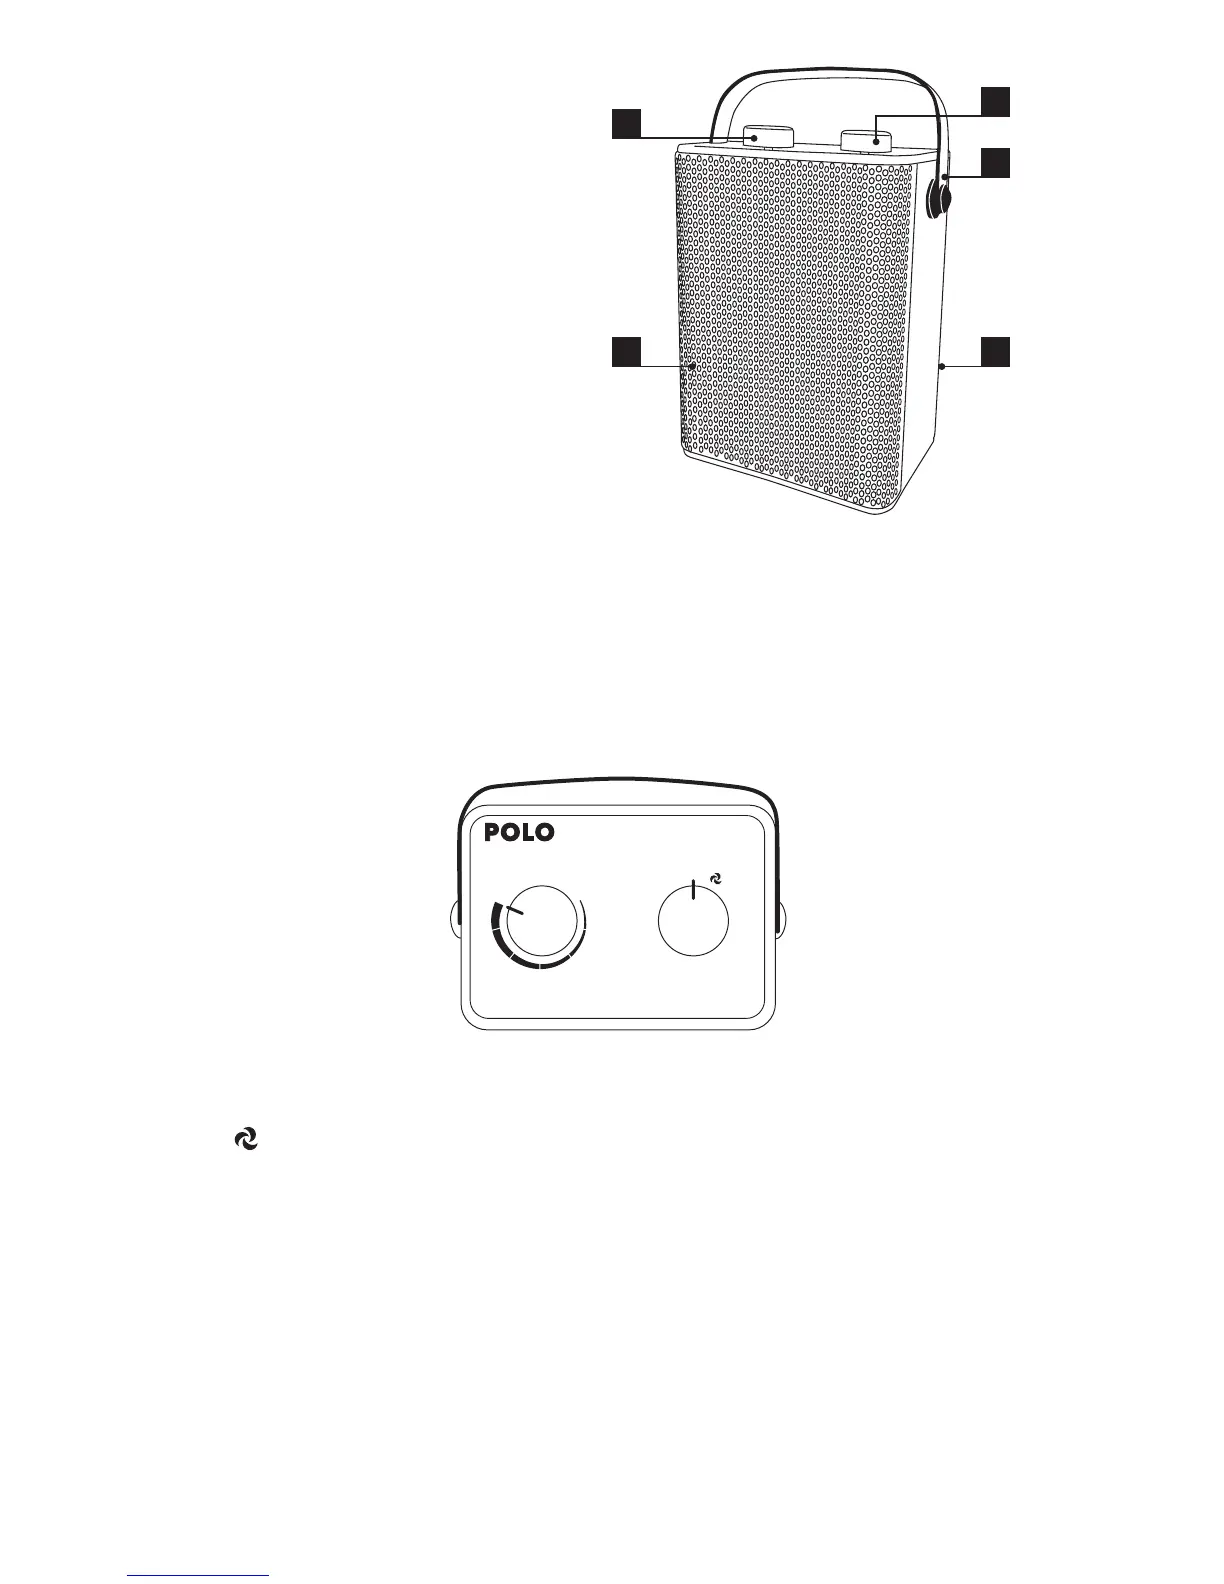
1 Control Dial
2 Thermostat Dial
3 Handle
4 Air Outlet Grill (front of heater)
5 Air Intake Grill (rear of heater)
LOCATION AND CONNECTION
(1) Choose a suitable location for the heater which is at least one metre away from any obstructions, walls
or inammable material (see also Important Safety Advice)
(2) Make sure a functioning heater is always placed on a solid, at and horizontal surface
(3) Check if the control dial is set to “OFF” (O)
(4) Fully extend the power cord and plug into a suitable power outlet and turn on.
SET UP AND OPERATION
(1) Turn the thermostat dial to maximum (clockwise as far as possible)
(2) Switch the heater on by turning the control dial to one of the following three positions:
fan only (no heat – use in summer for cooling)
I low heat (1200 watts)
II high heat (2000 watts)
It is most economical to heat the space on high heat, then switch to low heat to maintain the temperature.
(3) On all settings, the fan rotates at the same speed, the difference lies in the number of ceramic heating
elements in use
(4)
Once the desired temperature is reached, turn the thermostat dial back slowly until you hear a click. The
temperature is now set. The heater will automatically switch on and off to maintain the set temperature. To
set a higher or lower temperature, turn the thermostat dial either clockwise or anticlockwise.
(5) To switch off the heater, set the control dial to “O” (off). Switch off the power outlet and unplug the
power cord.
Page 2
DO NOT COVER
0
I
II
 Loading...