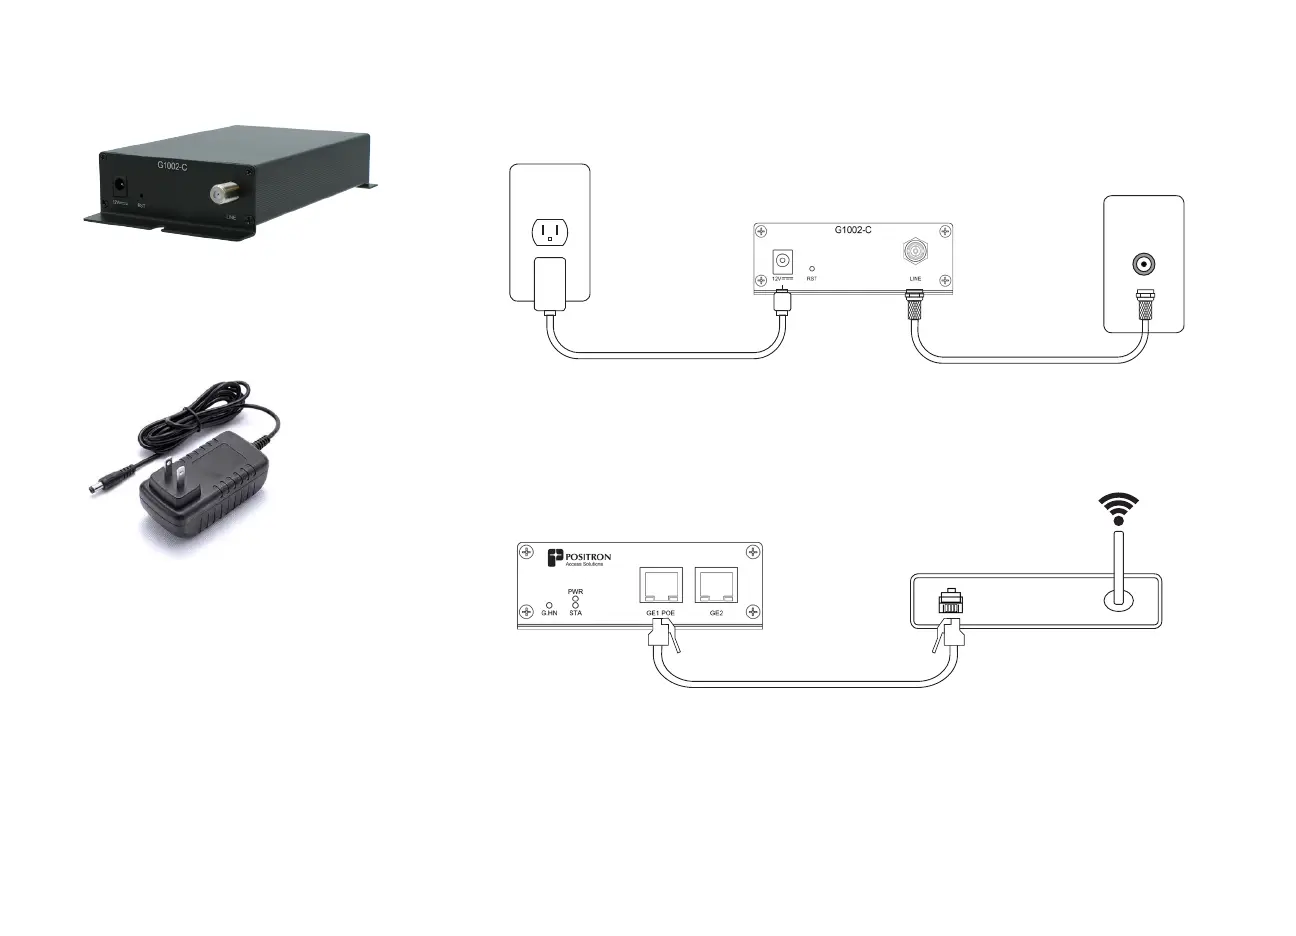
Step 4. Connect the port labeled as GE1 (on the opposite end of the G1002-C) to your
Residential Gateway using a standard Ethernet cable (usually provided with your
Residential Gateway). Port GE1 is capable of being congured in VLAN Trunk Mode
(over 4000 VLANs). Port GE2 is congurable in VLAN Access Mode (up to 12 VLANs).
Step 2. Connect the port labeled as LINE to your coaxial jack.
Step 3. Connect the 12V wall adapter to a nearby power plug and connect it to the 12V
connector of the G1002-C
Unpacking the G1002-C
Connecting the G1002-C to
your Residential Gateway
Step 1. Find a location close to where you will
install your Residential Gateway. This
location should also be close to the
coaxial jack where you will connect
the G1002-C and to a power outlet.
Power Up
The G1002-C takes less than one (1) minute to power up and establish the connection to the
Internet. The STA LED will turn solid green to indicate that the G1002-C boot sequence is
completed. The G.hn LED will turn green solid to indicate that the link is UP.
Your Residential Gateway will now be able to obtain its conguration and IP address and begin
providing access to the Internet for your in-home devices. Refer to the installation document for
your Residential Gateway if needed.
12V wall adapter
G1002-C
Step 3 Step 2
Coaxial jack
Power plug
12V wall adapter
Step 4
Ethernet Cable
Residential Gateway
G1002-C
 Loading...