7
Instructions for Use
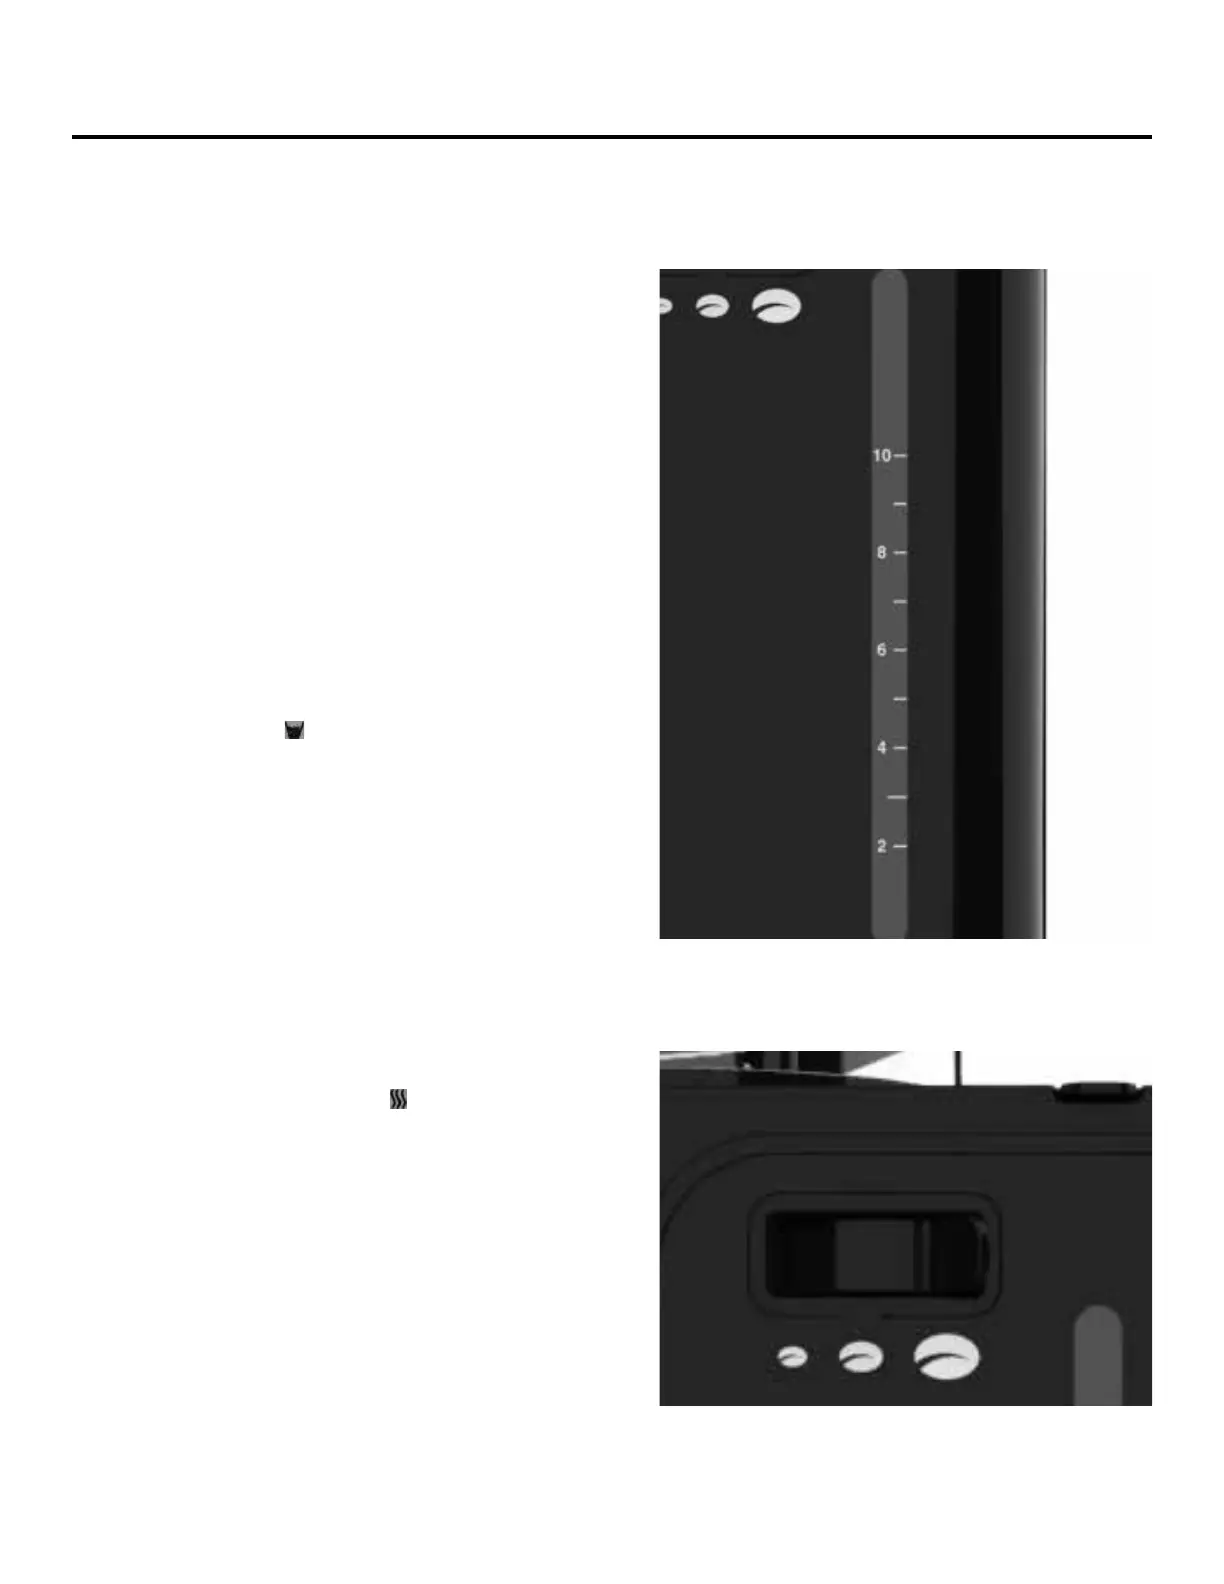
1. Open the Water Tank Lid. Measure water according to
the number of cups of coffee desired (see Fig.A). Do
not exceed the “10” line in the Water Tank. Note that
all the water in the Water Tank will be consumed when
brewing coffee, so do not add more water than needed
to make your desired cups of coffee.
2. Open the door on the appliance. Place the Filter in the
Filter Holder (a paper lter can be used instead). Add
a maximum of 3.2 oz (90 g) ground coffee to the Filter.
Close the door. Note that this door must be closed or
the appliance will not be able to brew coffee.
3. Ensure the Carafe is in position with the Carafe Lid on
the Carafe before brewing coffee.
4. Plug the power cord into an electrical outlet. Press the
ON/OFF Button to turn the appliance on.
5. Press the GRIND OFF Button to disable the
grind function. The icon should not appear on
the display.
6. Press the CUP Button to program the number of cups
of coffee you are brewing.
7. Press the STRENGTH Button to adjust the strength of
your coffee.
8. Press the BREW Button. With the grind function
disabled, the appliance will begin brewing the ground
coffee. You can press the ON/OFF Button or the BREW
Button to cancel the brewing process at any time. Note
that the coffee strength and number of cups cannot be
adjusted during the brewing process.
9. When the appliance is done brewing coffee, it will
beep ve times. The heat icon ( ) on the display panel
will illuminate, indicating that the appliance is keeping
your coffee warm for 30 minutes. After 30 minutes, the
appliance will beep three times and shut down
automatically. If you do not need the appliance to keep
your coffee warm, you can press the ON/OFF Button or
the BREW Button to stop the appliance from warming
your coffee.
10. Allow the appliance to cool. Then, check and clean
ground coffee residue out of the Filter after each use.
Brewing Pre-Ground Coffee
Fig. B. The Grind Adjustment Lever. The larger setting
gives you more coarsely ground coffee, while the
smaller setting gives you more nely ground coffee.
Fig. A. The Water Tank Window. Each number
represents a number of cups of coffee. Do not ll past
the “10” line.
 Loading...