page no. 52 of 68
LX Range Users, Installation & Servicing Instructions Doc Ref M110 issue 1.0 Dec 2020.
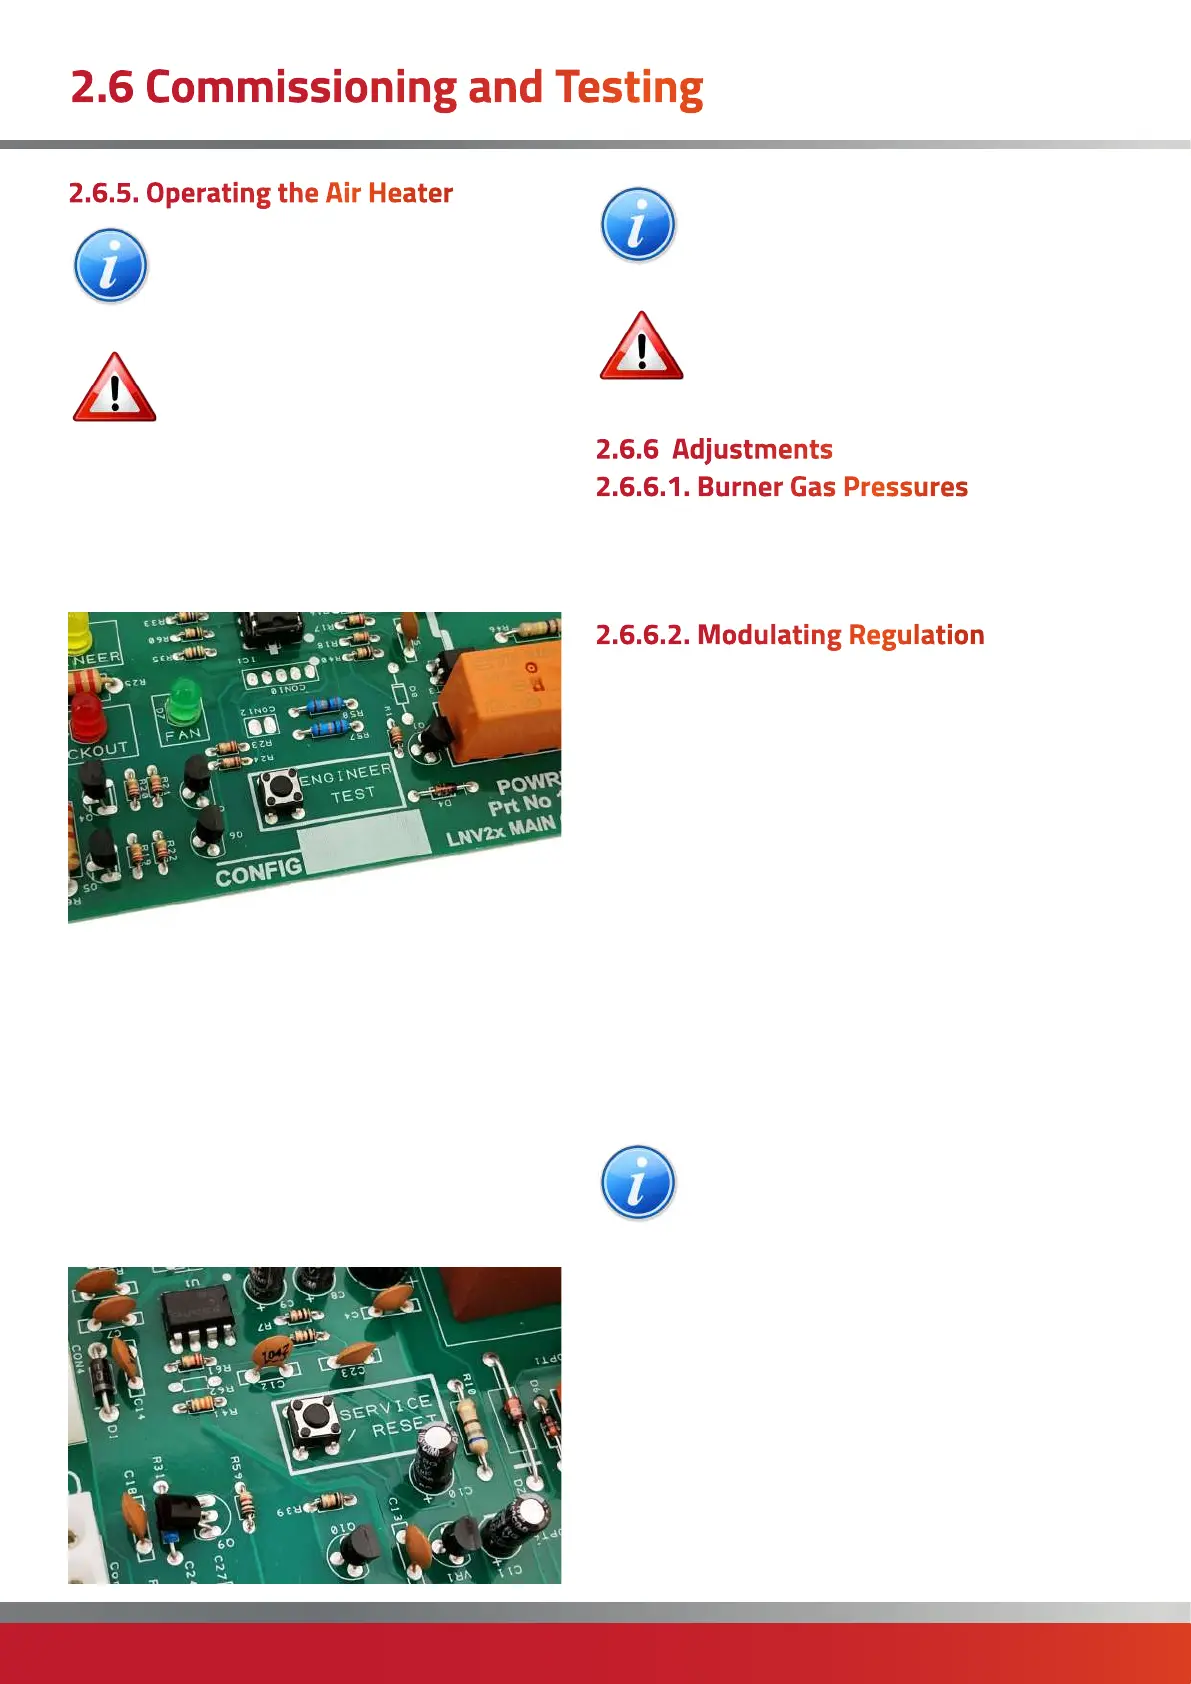
NOTE: A short press of the ENGINEER TEST
button will switch between high and low fire.
Press and holding the ENGINEER TEST button
for 2 seconds will shut the heater down.
IMPORTANT: Do not attempt to continually
hold the ENGINEER TEST button.
2.6.6 Adjustments
2.6.6.1. Burner Gas Pressures
This is set for the required heat input before dispatch.
High and low gas pressures should be checked in the
following manner:
2.6.6.2. Modulating Regulation
1. Set external controls to ensure that the main burner is
off. Open the burner access panel. Connect a manometer
to the burner pressure test point on the gas valve.
2. Press the ENGINEER TEST button on the R2R Main
Control board for 5 seconds and maintain high fire.
Compare the measured burner gas pressure to that
stated on the data plate.
4. If it is necessary to adjust either the high fire or low fire
pressures proceed as follows after removing the plastic
cover from the Modulating regulator. R2R board is fixed in
high fire for 5 minutes.
4. If it is necessary to adjust either the high fire or low fire
pressures proceed as follows after removing the plastic
cover from the Modulating regulator.
Note: Minimum fire setting must be adjusted
first after which the high fire setting can be
set. Any adjustment of the minimum fire
setting alters the maximum setting.
Minimum Setting.
Turn 9mm adjustment nut for low fire pressure clockwise
to increase and counter-clockwise to decrease until the
required pressure is obtained.
Maximum Setting.
Turn 7mm adjustment nut for high fire pressure,
clockwise to increase and counter-clockwise to decrease,
until the required pressure is obtained.
Repeat both settings if necessary and then replace cover
cap.
2.6.5. Operating the Air Heater
NOTE: On initial lighting of the heater(s), it may
take some time to purge the internal gas pipe
work of air.
IMPORTANT: The internal pipe work of the
appliance has been tested for tightness
before leaving the factory. After establishing
the main burners test round the gas inlet
connection using a leak detection fluid.
1. Switch on the electrical supply at the isolator.
2. Press the ENGINEER TEST button on the R2R Main
Control board for 5 seconds. Engineer LED will flash amber
a. Exhaust fan runs;
b. Ignition is established (approximately 20-30 seconds);
c. Main gas valve opens;
d. Main gas flame is established.
3. If the burners fail to light the control box will complete
a further five ignition attempts. If at the end of five
attempts the burners has still not lit, the control box will
go to lockout and the LED will be illuminated amber.
To restart the ignition sequence depress the SERVICE
RESET button on the R2R Main Control board.
2.6 Commissioning and Testing
 Loading...