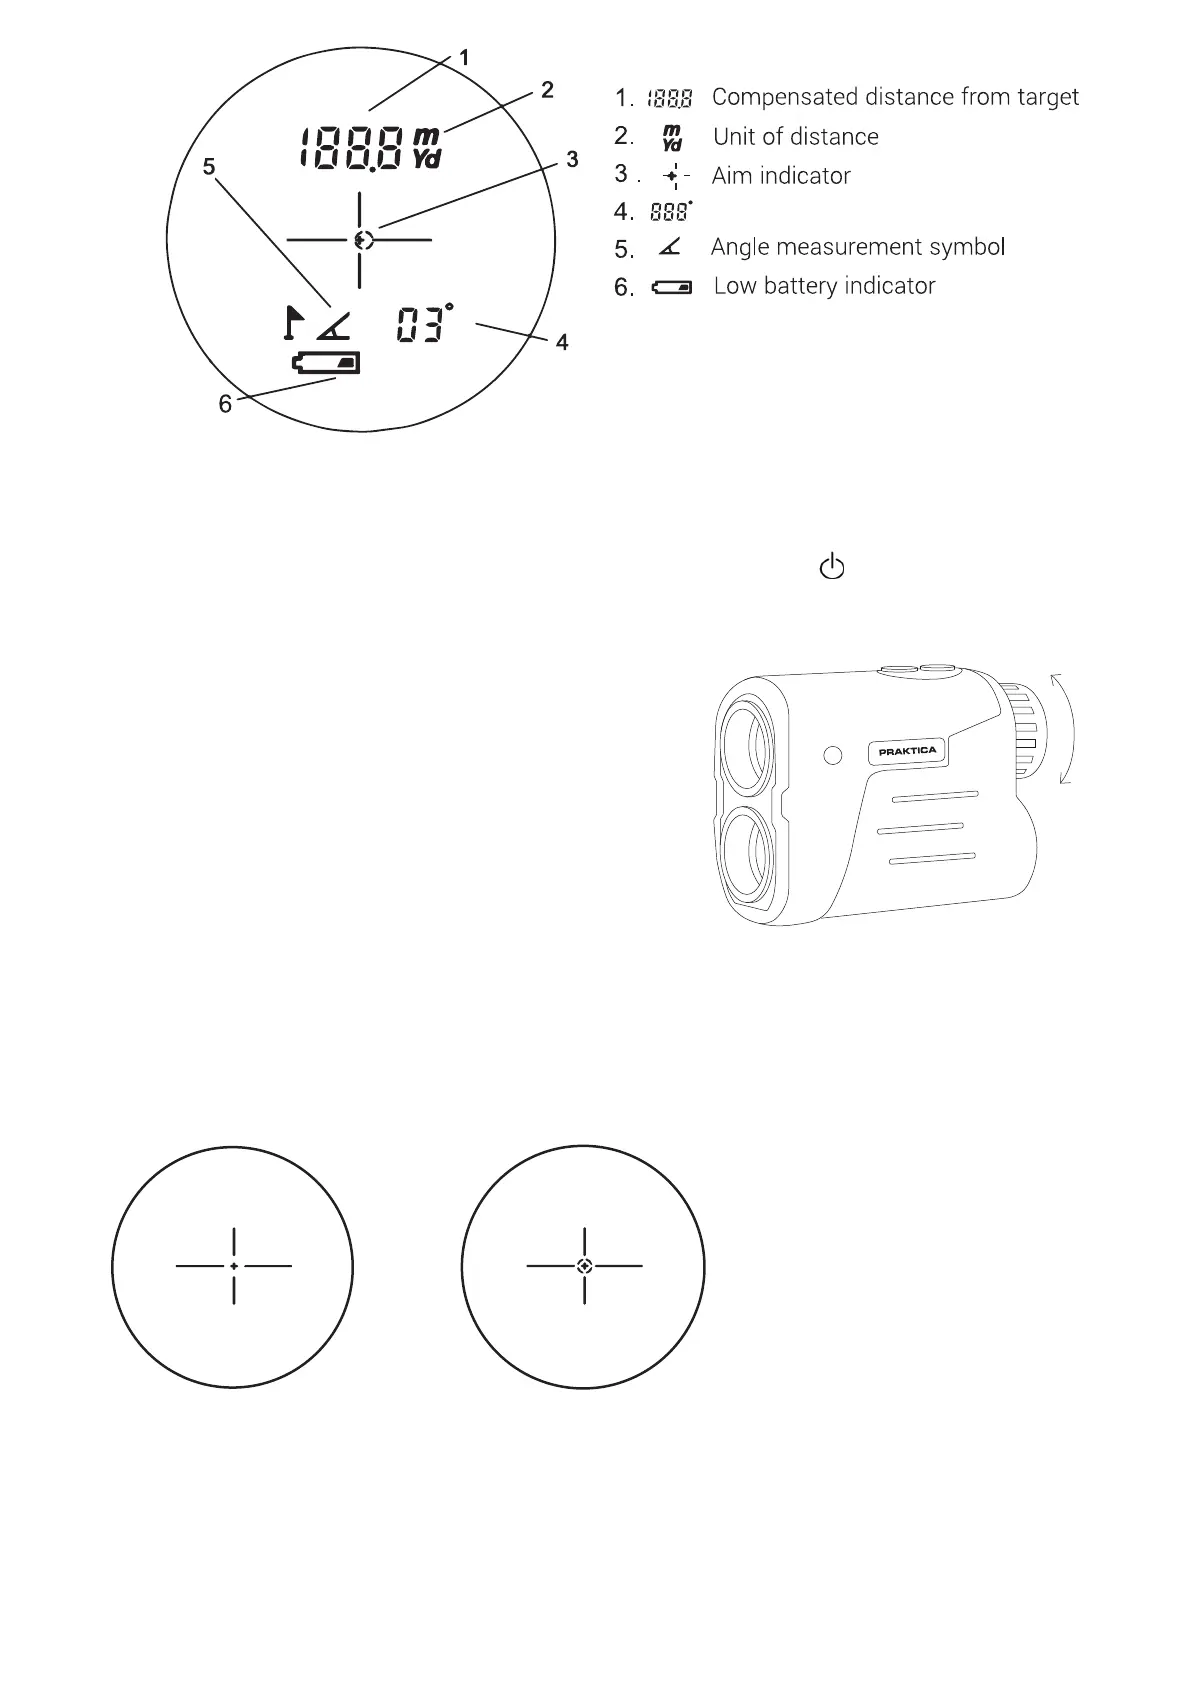
4. Target Seeking
Press the POWER button to turn the rangefinder on. Next align the aiming circle onto your target
and press and hold the POWER button. Once target seeking has been activated, an aiming circle
will appear over your chosen object and the distance will appear in metres or yards. This distance
will remain on your display until you press the POWER button again while focusing on another
object.
5. Compensated distance explained
The compensated distance technology built into this rangefinder automatically adjusts the
distance displayed in the viewfinder based on the target being level or at an incline/decline. The
measured angle (4) in the viewfinder indicates the angle of the target in relation to your position.
Measurement is accurate within -1/+1° of an angle.
Target Seeking not activated
Target Seeking activated
1. Start
The PRAKTICA LRF-7 Laser Rangefinder has two buttons; a POWER ( ) button and a MODE
button. Press the POWER button for roughly one second and your rangefinder will turn on.
2. Diopter Adjustment
To focus on a subject, turn the diopter ring left or
right while looking through your rangefinder.
LCD Display
3. Changing the measuring unit
To change the measuring unit from M(metres) to
Yd(yards), hold down the MODE button for two
seconds.
Operating Instructions
Measured Angle
 Loading...