This document is an installation manual for the Pratic Nomo Hi-Pergolas series. It provides comprehensive information for installers, covering general warnings, technical specifications, assembly steps, and specific installation details. The manual emphasizes safety, proper handling of components, and correct installation procedures to ensure the product's longevity and functionality.
Function Description
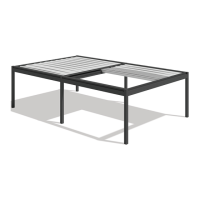
The Pratic Nomo Hi-Pergolas is an outdoor shading structure designed and manufactured by Pratic since 1960. It is built with high-quality materials and advanced technologies, combined with artisanal care in finishing details, to ensure functionality, design excellence, safety, comfort, and ease of use. The pergola is designed for long-term durability.
The manual details various configurations for the pergola, including self-supporting (01), wall-mounted on the width side (02), and wall-mounted on the depth side (03). It also covers optional accessories like telescopic brackets and reinforced corners, as well as integrated features such as water drainage systems, electrical connections, and motorization for the fabric cover. The product can be equipped with various peripheral closures like Slide Glass, Door Glass, and Fix Glass, which are covered in separate manuals.
Important Technical Specifications
General Product Information:
- Series: Hi-Pergolas
- Manufacturer: Pratic (designing and manufacturing awnings and pergolas since 1960)
- Safety Standards: UNI EN ISO 7010 (for safety symbols)
Component Weights (for handling):
- Assembled post profile: 27 Kg
- Preassembled cover: 6.0 Kg/m² (consider the area of the unfolded cover)
- Assembled guide: 3 Kg/m
- Safety Box: 8 Kg
- Assembled supporting profile: 15.5 Kg/m (RASO: 25.5 Kg/m)
Fasteners and Hardware:
The manual lists various fasteners with their dimensions (d x L, Md x L, etc.), including:
- Hex Nut (Dado esagonale)
- Hex Flanged Nut (Dado esagonale flangiato)
- Flat washer (Rosetta piana)
- Pop rivet (Rivetto)
- Screws (Vite): TE Md x L, TEF Md x L, TCEI Md x L, TBEI Md x L, TPSCE Md x L
- Socket set Screw (Grano): Md x L
- Self-tapping Screws (Vite autofilettante): TEF d x L, TPS+ d x L, TC+ d x L
- Self-drilling Screw (Vite autoforante): TC+ d x L
Dimensions and Clearances:
- Self-supporting (01): H max 300, L max 550, P max 700. Maximum projection of the cover in the center of the structure: 5 units (e.g., cm or mm, consistent with other dimensions). Minimum clearance for cover projection: ≥11 units.
- Wall Mounting (02 - Width side L): H max 300, L max 550, P max 700. Maximum projection of the cover in the center of the structure: 5 units. Minimum clearance for cover projection: ≥11 units.
- Wall Mounting (03 - Depth side P): H max 300, L max 550, P max 700. Maximum projection of the cover in the center of the structure: 5 units. Minimum clearance for cover projection: ≥11 units.
- Supporting Profile Technical Details:
- Intermediate - Width side: 11.6 units (L1, L2), 5 units (spacing), 1.6 units (height), 22 units (total width), 32 units (total height).
- Intermediate - Depth side: 14.5 units (P1, P2), 5 units (spacing), 1.6 units (height), 22 units (total width), 32 units (total height).
- Minimum clearance over the structure for assembly: ≥11cm.
- Packaging/Encumbrance (Is): The manual provides a table for the packed cover dimensions (I and Is) based on the number of ribs (N°) and folds (FALDE), ranging from 38 to 111 cm.
- Undercover Installation: After undercover installation, the rolled-up canvas size increases by 6mm per fold. The limit switch for the retractable canvas must be reprogrammed to IS + 20cm before installation and then to IS width after installation.
Electrical Specifications:
- Power Supply: Requires connection to a functional electrical system compliant with local regulations, equipped with a functional and certified earthing system. A dedicated automatic thermomagnetic earth leakage circuit breaker is required.
- Cable Protection: Cables passing through metal walls must be protected and insulated with a cable duct or pipe. Outdoor cables must be UV-resistant. A loop must be left on the external part of the supply cable to prevent water infiltration.
- Lightning Protection: Evaluation of lightning strike risk and installation of specific lightning arresters by a competent technician is recommended for electronic equipment.
- Cable Dimensions: Electrical cables must have a suitable cross-section for the structure's power and line length to maintain voltage drop within tolerances.
- Electrical Connections (Sensors): The manual includes a single-line electrical diagram for connections, including power supply (Red), Raso's motor (Blue for wired, Light Blue for IO/RTS), LED (Grey for white, Azur for RGB), and sensors (Green).
Water Drainage Capability:
- Configurations 02 and 03: The manual illustrates the water drainage paths.
- Warning: Do not pour water from vertical walls, other coverings, roofs, or gutters onto the Pratic covering, as this overloads the drainage system and can cause damage.
- Configuration 03 (Wall Mounting on Depth Side P): This configuration is subject to a reduction in the correct water drainage capacity due to the absence of a water discharge on the wall-mounted side.
- Testing: Check the covering resistance by simulating heavy rain. Do not use high-pressure water jets. Verify for leaks and infiltrations and perform necessary restoration actions.
Usage Features
- Installation: Exclusively by Pratic certified installers using personal protective equipment and appropriate tools, adhering to mounting instructions and local safety regulations.
- Manual Handling: Maximum limits are 25 Kg for men and 15 Kg for women. For voluminous or difficult parcels, use multiple people and/or an adequate lifter (e.g., Ercolino).
- Tools: The manual recommends using a manual lift (Ercolino) and laser measurement instruments for precise installation.
- Sealant Application: Proper sealant application depends on environmental conditions (humidity, temperature, thermal jumps, aggressive or polluting atmospheres). Verification by a professional is suggested for correct product selection and application.
- Thread Locker: For installations in areas with strong winds, applying thread locker on screws is recommended to prevent loosening over time.
- Motorized Fabric Cover: The pergola features a motorized fabric cover. Limit switches need to be programmed, especially when installing undercovers.
- LED Line: RGB LED connections require matching wire colors for correct functionality.
- Wind/Snow Sensor: After commissioning, ensure the threshold set enables the awnings to be raised/retracted.
Maintenance Features
- Manuals Storage: Installation and instruction manuals, including those for accessories, are integral parts of the product and must be stored for future reference until product disposal.
- Product Identification: Components are identified by labels and a structure scheme to facilitate assembly and maintenance.
- Warranty: Removing the metal plate with the logo, hologram label, declaration of conformity, or warnings will automatically void the warranty.
- Water Tightness: The installation must ensure the upper support structure is perfectly level and orthogonal to allow proper water discharge. Regular checks for water tightness are recommended, especially after heavy rain, and any necessary restoration actions should be taken.
- Wall Irregularities: Compensate for any unevenness or out-of-squareness of walls with spacers to prevent deformation of the structure and maintain water tightness.
- Technical Documentation: Technical documentation for automatic devices and electronic accessories can be downloaded from the B2B website. Users are advised to verify updates by contacting the call center or visiting the manufacturer's website.