EasyManua.ls Logo

Precision Pro Golf NX2 - User Manual

Precision Pro Golf NX2
7 pages
Print Icon
To Next Page IconTo Next Page
Loading...
PRODUCT MANUAL
NX2 GOLF RANGEFINDER
Question and Answer IconNeed help?

Do you have a question about the Precision Pro Golf NX2 and is the answer not in the manual?

Summary

Product Overview

Laser Lens

The front lens for emitting and receiving laser signals.

Optical Lens

The lens used for viewing the target and display screen.

Power & Activate Button

Button to power the device on/off and activate laser measurements.

Adjustable Eyepiece

Allows users to adjust focus for clear viewing of the display.

Battery Door

Compartment cover for accessing and securing the battery.

Viewfinder Display Indicators

Target Acquisition Indicator

Confirms successful lock-on to the target.

Distance Display

Shows the measured distance to the target in selected units.

Units Indicator

Displays the current unit of measurement: Yd (Yards) or M (Meters).

Battery Status Indicator

Visually represents the remaining battery charge.

Changing Measurement Units

Prepare for Unit Change

Wait for the display to turn off before initiating the unit change process.

Execute Unit Change

Press and hold the POWER button for three seconds to toggle between yards and meters.

Battery Replacement

Access Battery Compartment

Slide the panel away from the eyepiece to open the battery door.

Insert New Battery

Remove the old battery, insert the new one correctly, and secure the door tightly.

Confirm Battery Operation

Check the viewfinder to ensure the battery is charged and functioning.

Best Practices for Accurate Measurements

Target Scanning Technique

Pan the crosshair slowly over the target for optimal results.

Maintain Clear Lens

Ensure the front lens remains unobstructed by fingers or hands.

Button Operation

Press and release the power button; holding it down will not yield correct measurements.

Stabilization Method

Use both hands and brace against your chest for steady aim.

Overview

This document is a product manual for the NX2 Golf Rangefinder, providing an overview of its components, how to use its features, and best practices for accurate measurements.

Function Description

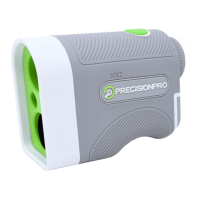
The NX2 Golf Rangefinder is a device designed to measure distances on a golf course, helping golfers determine the precise yardage to various targets such as the flag, hazards, or other points of interest. It utilizes a laser to acquire targets and displays the distance in the viewfinder. The rangefinder is equipped with a target acquisition indicator, a distance display, and a yards/meters indicator, allowing users to choose their preferred unit of measurement. A battery indicator is also present in the viewfinder to keep the user informed about the device's power status.

Usage Features

Product Overview:

The rangefinder has several key external components:

  • Laser Lens (1): This is where the laser beam is emitted and received to measure distances.
  • Optical Lens (2): This is the eyepiece through which the user looks to view the target and the display.
  • Power & Activate Laser Button (3): This green button is used to turn on the device and activate the laser for measurement.
  • Adjustable Eyepiece (4): This component can be adjusted to focus the view for different users.
  • Battery Door (5): This door provides access to the battery compartment for replacement.

Viewfinder Display:

When looking through the optical lens, the user will see the following indicators:

  • Target Acquisition Indicator (1): This symbol appears when the rangefinder has successfully acquired a target.
  • Distance (2): The measured distance to the target is displayed here.
  • Yards/Meters Indicator (3): This shows whether the distance is being displayed in yards (Yd) or meters (M).
  • Battery Indicator (4): This icon shows the current battery level.

Changing Yards/Meters:

To switch between yards and meters:

  1. Ensure the display is off. The screen should be blank, with no images visible. The device automatically shuts off after 10 seconds of inactivity.
  2. Press and hold the green POWER button for three seconds. The unit of measurement will toggle between yards and meters.

Best Practices for Measurement:

To ensure accurate and reliable measurements, follow these guidelines:

  • Pan Over Target: For the best results, slowly pan the crosshair (the aiming reticle in the viewfinder) over the target while pressing the power button to measure the distance. This technique helps the rangefinder lock onto the target more effectively.
  • Press and Release: When taking a measurement, press the green power button and then release it. Holding the button down continuously will not work correctly and may prevent the device from acquiring a stable measurement.
  • Use Both Hands: To stabilize the rangefinder and minimize shaky movements, hold the device with both hands. Brace your arms against your chest for added stability, especially when measuring longer distances or in windy conditions.
  • Don't Cover the Lens: Always ensure that the front of the rangefinder, particularly the laser lens, is unobstructed. A finger, part of your hand, or any other object interfering with the laser path will lead to inaccurate measurements.

Maintenance Features

Changing the Battery:

The rangefinder uses a replaceable battery. To change it:

  1. Open the Battery Door: Locate the battery door on the side of the rangefinder (component 5 in the product overview). Slide the panel away from the eyepiece to open it.
  2. Remove and Insert Battery: Carefully remove the old battery. Insert the new battery, ensuring it matches the orientation shown inside the battery compartment. Proper polarity is crucial for the device to function.
  3. Check Viewfinder: After inserting the new battery, look through the viewfinder and check the battery indicator. It should show a fully charged battery, confirming that the new battery is correctly installed and the device is powered.
  4. Secure Battery Door: Close the battery door by sliding the panel back into place. Double-check that the door is securely fastened to prevent it from opening during use and to protect the battery compartment from dust and moisture.

This rangefinder is designed for ease of use and provides essential distance information to enhance a golfer's game. By following the instructions for operation and maintenance, users can ensure consistent and accurate performance from their NX2 Golf Rangefinder.

Precision Pro Golf NX2 Specifications

General IconGeneral
Magnification6x
Eye Relief16mm
WaterproofYes
FogproofYes
Accuracy+/- 1 yard
FeaturesSlope
Dimensions4.1 x 2.8 x 1.6 inches
Included AccessoriesCarrying case, CR2 battery, microfiber cloth