3
BEFORE FIRST USE
As received, your pressure cooker will be fully assembled.
Following the instructions, disassemble the unit so you
can thoroughly clean it, remove any manufacturing
lubricants, and become familiar with the various parts
before initial use.
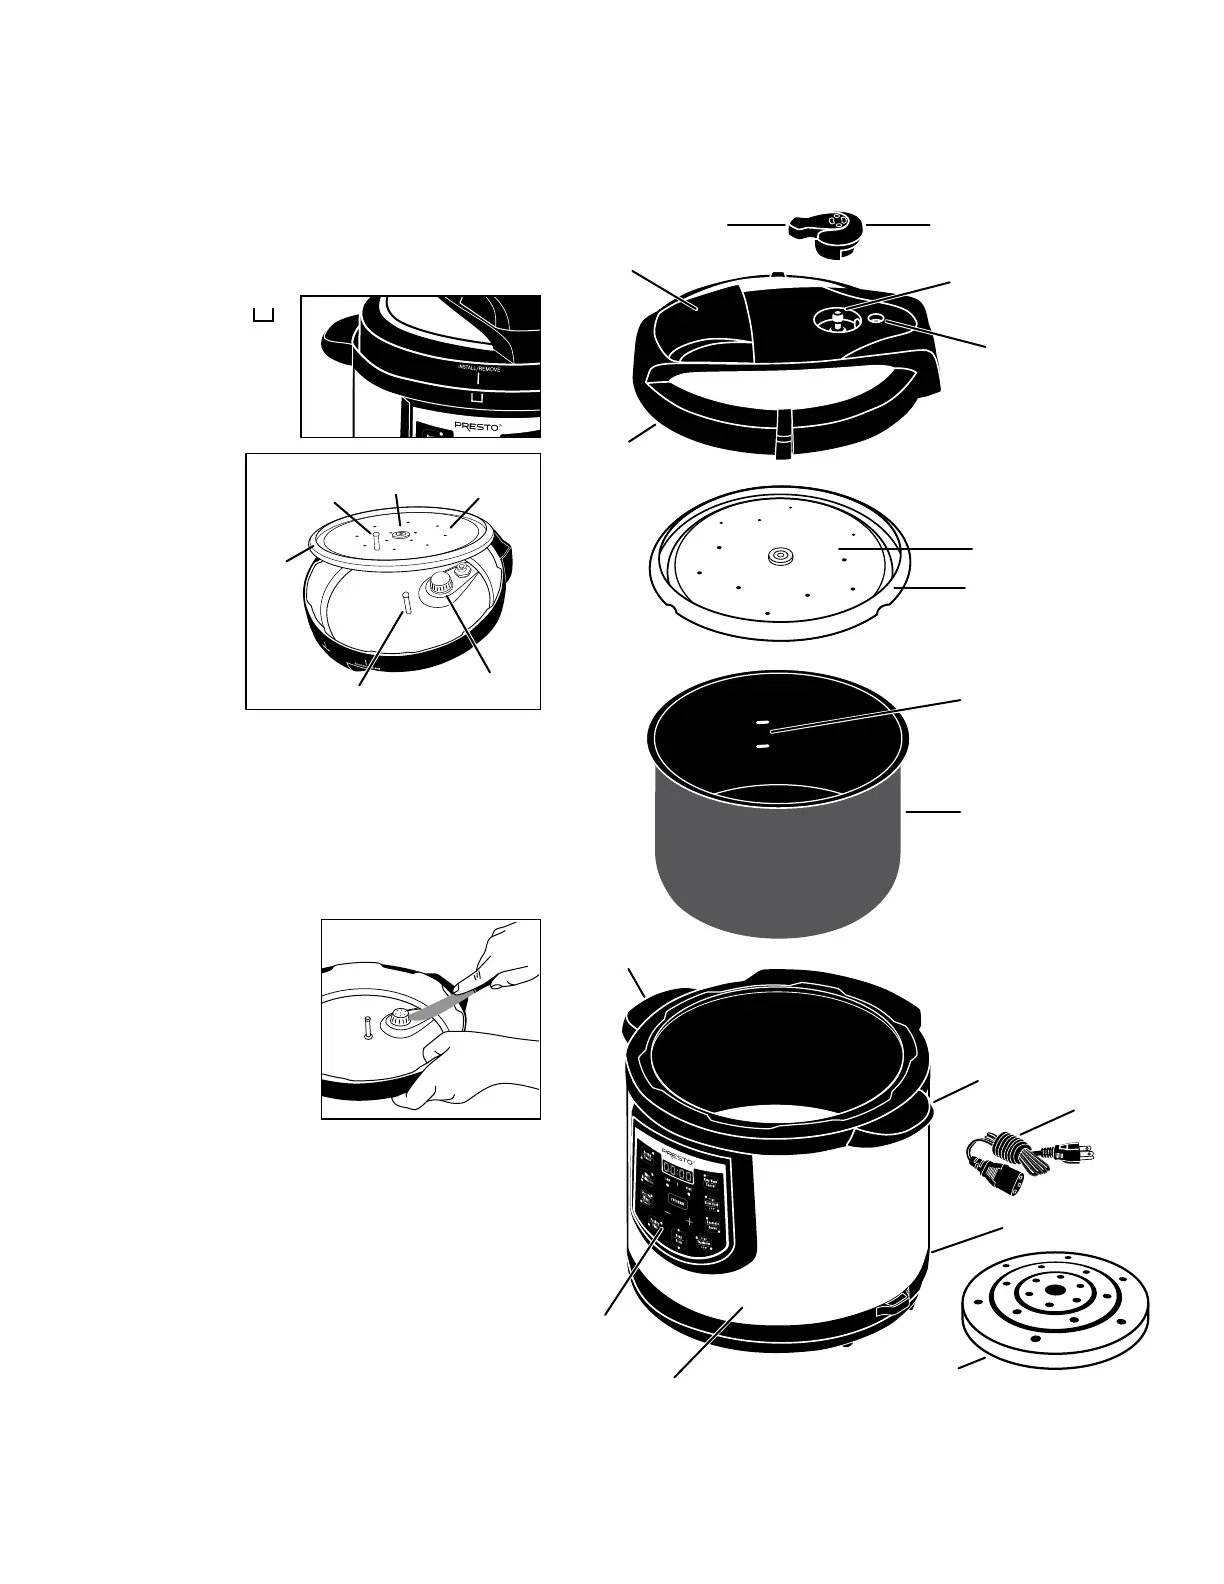
1. Remove the cover. Grasp the cover handle and rotate
the cover counterclockwise until the INSTALL/
REMOVE vertical
mark is within the
mark on the cooker
body (Fig. B). Then
lift the cover straight
up off the cooker
body.
Invert the cover
and place it on
the counter.
Using the grip
pin, pull the
sealing ring
plate out from
the cover
(Fig.C).
Remove the
sealing ring
from the sealing ring plate.
With the sealing ring plate detached from the cover,
youhaveaccesstotheventlterandventpipe.
Next,removetheventlterforcleaning.
NOTE: Although you will not need to remove the
lteraftereveryuse,youshouldperiodicallyremove
it for cleaning.
With the inverted cover
on the counter, rest a
table knife on the rim of
the cover and insert the
tipintooneofthelter
slots;liftthelterup
(Fig. D).
2. Lift the cooking rack
and removable cooking
pot out of the cooker body.
3. Remove all packaging materials. Then clean the
cooker cover with a damp, soapy cloth. Do NOT
immerse the cooker cover in water.
Washthesealingringplate,sealingring,ventlter,
cooking rack, and removable cooking pot in warm,
soapy water. Rinse and dry thoroughly. Do NOT wash
the cooking pot in the dishwasher.
CAUTION! To prevent electrical shock, never pour
water into the cooker body or immerse it or the power
cord in water. Always be sure the cooking pot is
COMPLETELYDRY before placing it back in the
cooker body.
Cookingrack
Carryinghandle
Quick pressure release valve
Ventpipe
Blue air vent/cover lock
Detachable
power cord
Removable
cooking pot
Digital
control
panel
Sealing ring plate
Coverhandle
Fill lines
Cookerbody
Carryinghandle
Locking cover
Valvelever
Sealing ring
COOKER PARTS
Fig. A
Cordreceptacle
Fig. B
Grip pin
Fig. C
Grommet
Coverpost
Ventlter
Sealing ring
plate
Sealing
ring
Fig. D
 Loading...