Rock the cooker from side to side to disperse air bubbles.
4
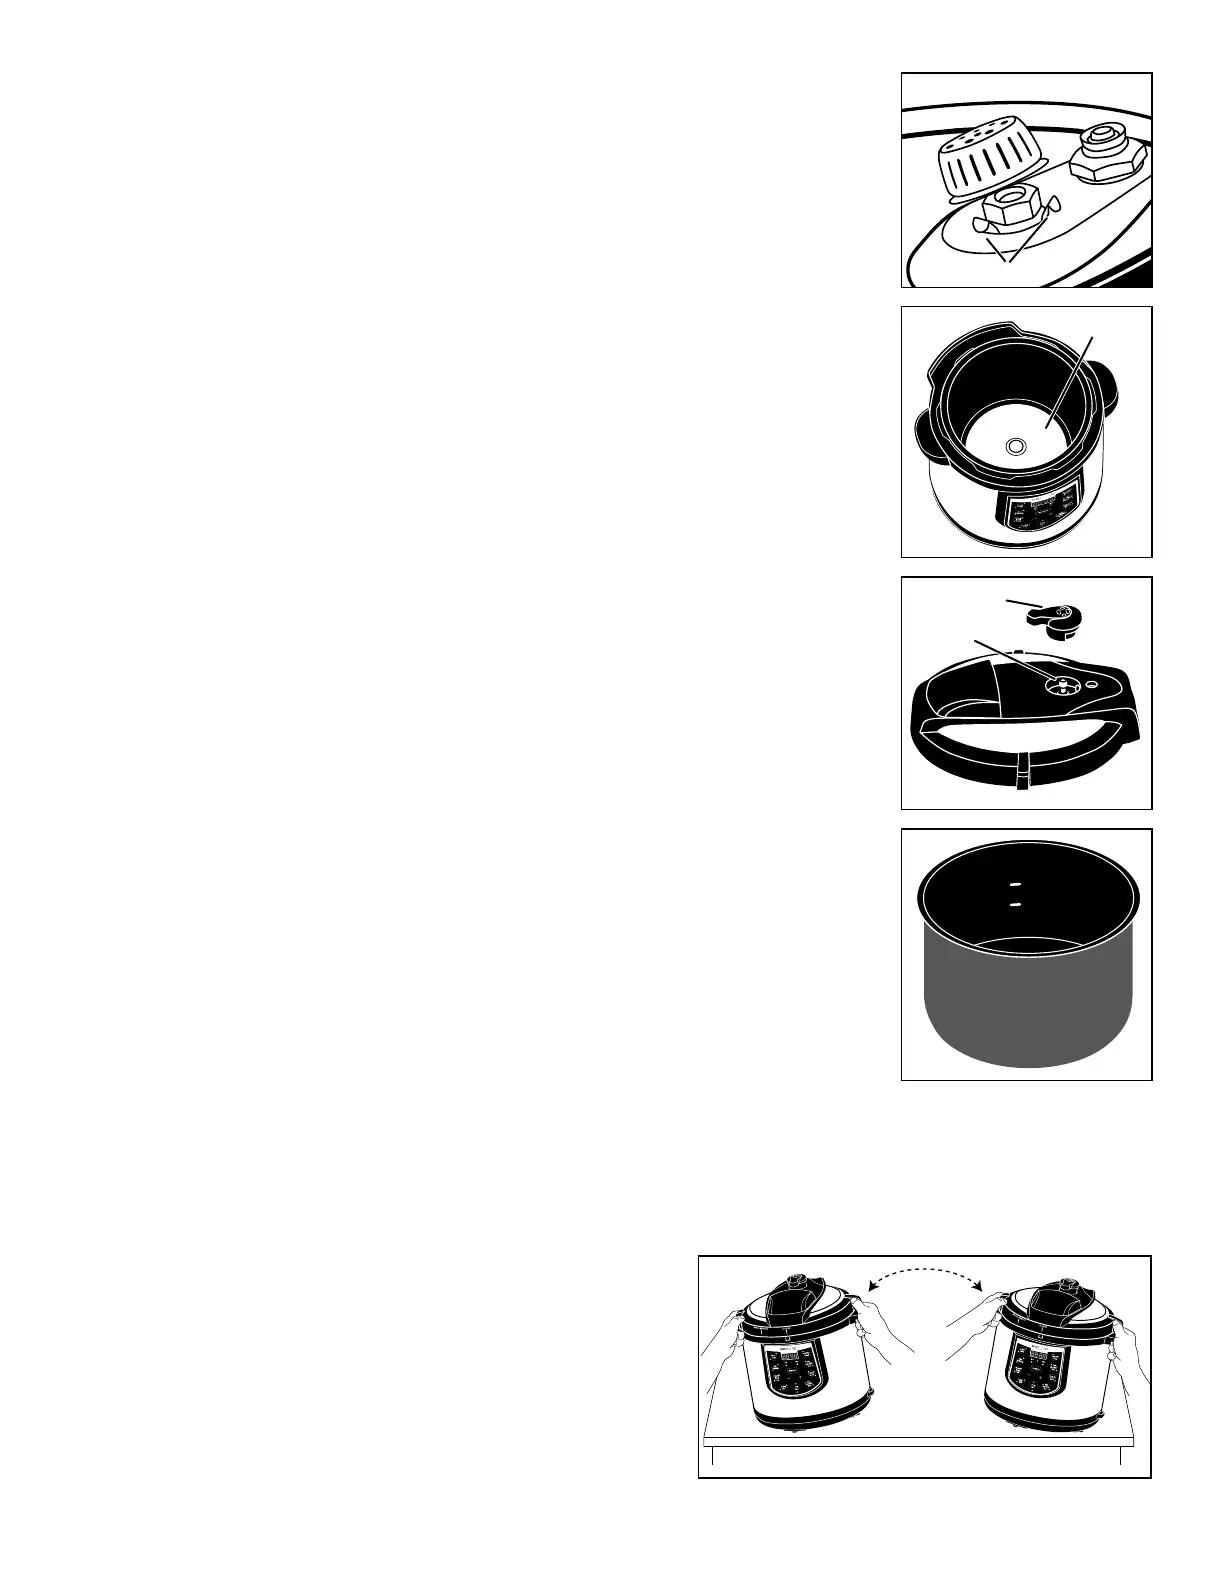
4.Aftercleaning,reassemblethecover.Whenreattachingtheventlter,besurethelterisplaced
over all 3 clips (Fig E). Then push it in place. You will hear a snap when it is in the proper
position.Itshouldttightly.Next,reattachthesealingringtotheplateandthenthesealingring
plate to the cover.
IMPORTANT:Whenproperlypositioned,thegrippinwillbefacingyou(FigC,page3).
Graspthegrippinanduseittopushtheplatebackinplace.Checkthatthegrommetissecurely
positioned over the cover post.
IMPORTANT INFORMATION
In order for the unit to function properly, always follow these instructions:
● Besurethebottomoftheremovablecookingpotandtheheatingplatewithinthecookerbody
(Fig. F) are free of debris before placing the cooking pot in the cooker body.
CAUTION! To prevent electrical shock, NEVERUSETHEUNITWITHOUTTHE
REMOVABLECOOKINGPOT.Also, be sure the outside of the cooking pot is COMPLETELY
DRY before placing it into the cooker body.
● Checkboththeventpipeandventltertobesuretheyareclear.Inordertodothis,youwill
needtoremovethequickpressurereleasevalve(Fig.G)andsealingringplate(FigC)fromthe
cover (see page 3). Then hold the cover up to the light and make sure you can see light coming
throughtheventpipe.Ifyoucannot,removetheventlter(seepage3)andcleantheventpipe
with a small brush or pipe cleaner to remove the blockage. Reattach the sealing ring plate to
the cover.
● Alwaysverifythatthesealingringplateisattachedtothepressurecookercoverbeforecooking.
● Makesureyouhavenotoverlledthecookingpot.Donotllabovethe⅔lllinewhencooking
most foods. When cooking foods that foam, froth, or expand, such as rice, grains, and dry beans,
peas,andlentils,orfoodsthataremostlyliquids,suchassoups,neverllthecookingpotabove
the½llline.
Foryourconvenience,boththe⅔and½lllinesaremarkedinsideofthecookingpot(Fig.H).
Inaddition,ineachsectionoftherecipesyouwillndinstructionsonthemaximumlllevelfor
each type of food.
● Alwaysmakesurecookingliquidhasbeenaddedtothecookingpot.Onecupofliquidisthe
minimum amount.
● Alwaysfollowspecialproceduresfoundintheinstructionbookwhenpressurecookingdry
beans, peas, and lentils (see page 18). During cooking, these foods tend to froth and foam which
could cause the vent pipe to become blocked.
● Neverpressurecookapplesauce,cranberries,rhubarb,cereals,pasta,splitpeas,andsoupmixes
containing split peas, pasta, or grains. These foods expand so much as a result of foaming and
frothing that they should never be cooked under pressure.
● Alwaysfollowthespecialproceduresfoundonpage20whenpressurecookingriceandgrains.
● DoNOTusethequickpressurereleasemethodaftercookingdrybeans,peas,lentils,andgrains,
or foods that are mostly liquid, such as soup, sauces, and stews (see page 7).
● Alwaysverifythattheblueairvent/coverlockisdownbeforeattemptingtoopenthecooker
(see Fig. M, page 6). If it is up, the cooker contains pressure which, if released, may result in burns and/or property damage. Then
check that no steam is emitted when the pressure release valve is rotated to the STEAM OUT position.
● WARNING! Air bubbles may form when pressure cooking foods with a higher fat content (such as meats with visible fat or poultry
with skin and visible fat) or thicker foods (such as stews, sauces, heavy soups, dried beans, lentils, and grains such as rice and
barley). Even after all pressure has been released, the air bubbles can rise to the surface when the cover is opened, unless they are
dispersed beforehand. If the air bubbles are not dispersed, hot food may
erupt out of the cooker, which could cause serious burn injuries. To
disperse the air bubbles, follow these steps: First, verify the pressure
has been released (the blue air vent/cover lock will be in the down
position). Next, prior to opening the cover, gently rock the cooker from
side to side. To rock, grasp the handles and tilt the cooker to the left,
so the right side of the cooker lifts 2 inches off the counter. Then rock
to the right so the left side of the cooker lifts 2 inches off the counter
(Fig.I).Repeatonce.Verifytheairvent/coverlockisstilldownbefore
attempting to open the cover.
Clips
Heatingplate
Ventpipe
Quick pressure
release valve
½ line
⅔ line
Fig. E
Fig. F
Fig. G
Fig. H
Fig. I
 Loading...