2
Important Cord Information
This appliance has a polarized plug (one blade is wider than the other). To reduce the risk of electric shock, this plug is intended to
fit into a polarized outlet only one way. If the plug does not fit fully into the outlet, reverse the plug. If it still does not fit, contact a
qualified electrician. Do not attempt to modify the plug in any way.
A short, detachable power supply cord is provided to reduce the risk of becoming entangled in or tripping over a longer cord. An
extension cord may be used if care is properly exercised in its use. If an extension cord is used, the marked electrical rating of the
extension cord should be at least as great as the electrical rating of the appliance. The extension cord should be arranged so that it will
not drape over the countertop or tabletop where it can be pulled on by children or tripped over unintentionally.
Connect the power supply cord to a 120VAC electrical outlet only.
How to Use
NOTICE: This griddle is not intended to be
used as a warming tray, hot plate, or for
heating any cookware. Using this griddle for
purposes different from those specified in
the instruction manual may cause damage
to the griddle and will void the product
warranty.
Before using for the first time, become
familiar with the griddle features. Wash
griddle in warm, soapy water, rinse, and
dry. Do not immerse Control Master
®
heat control in water or let the it come in
contact with any liquid.
1. Place the assembled griddle on a dry,
level, heat-resistant surface away from
walls, cabinets, and other objects.
NOTICE: To prevent possible heat
damage to your countertop, place a
heat-resistant counter protector, such
as aluminum foil, under the griddle.
However, to keep the griddle from
moving on the counter, do not place any
portion of the foil under the griddle’s legs.
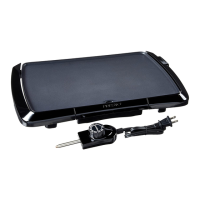
2. Insert the Control Master
®
heat control probe into the griddle so the two electrical pins on the griddle are fully inserted into the
heat control. Connect the cord to a 120VAC electrical wall outlet only.
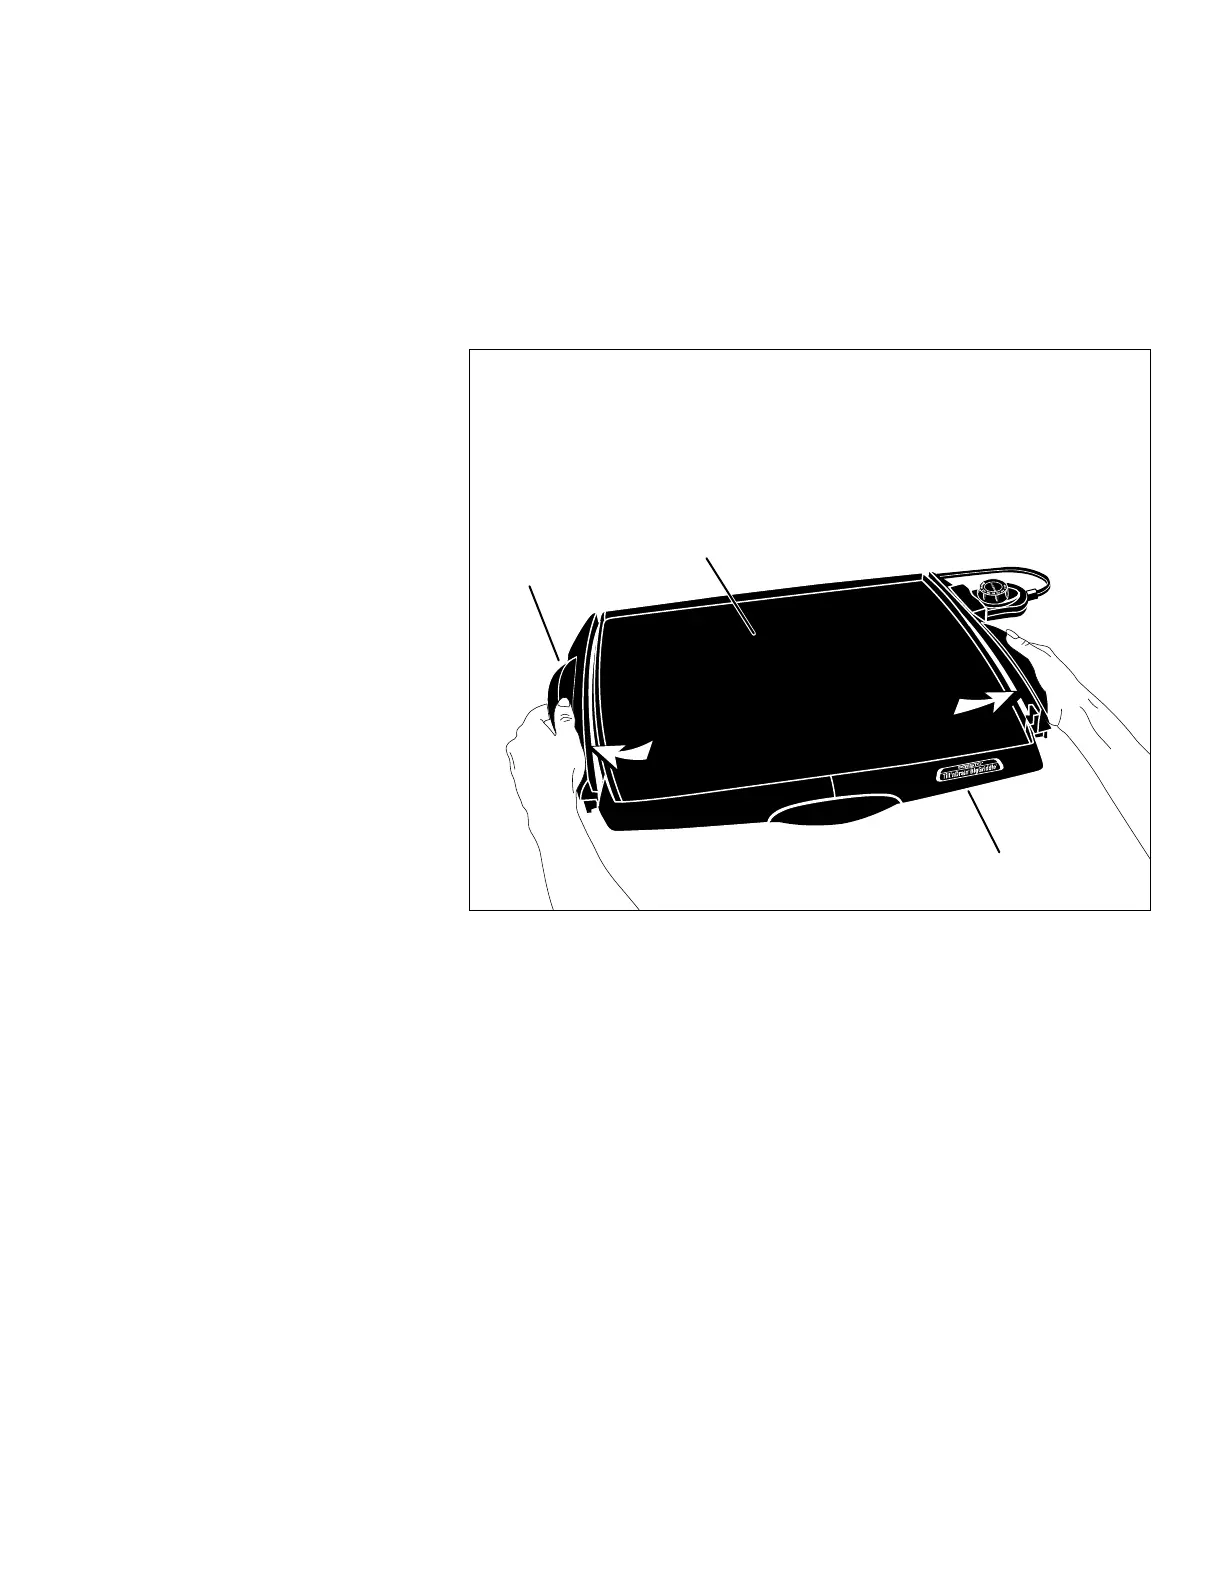
3. When cooking meats, pull out on the handles to tilt the grilling surface. This allows excess grease to drain into the drip tray. When
cooking other foods, such as eggs and pancakes, be sure the handles are pushed in so the griddle is level.
4. Turn the heat control to the temperature recommended in the temperature-timetable on page 3 and preheat the griddle. The
indicator light will turn off when the selected temperature is reached, in about 5 to 10 minutes.
NOTE: It is normal to hear a pop or clicking sound while the griddle heats up and cools down. This is due to the expansion and
contraction of the metal.
5. Prepare food for cooking. Because the griddle features a ceramic nonstick finish, food may be prepared with little or no oil.
NOTICE: Avoid using no-stick cooking sprays as they may cause the cooking surface to become tacky.
6. Place food on the griddle and cook according to the temperature-timetable on page 3. Adjust the heat according to personal
preference and the particular food being cooked. During cooking, the indicator light on the heat control will turn on and off to
indicate the selected temperature is being maintained.
Use heat-resistant nylon, plastic, rubber, or wooden utensils for best results. Do not use metal utensils as they may scratch the
nonstick surface. Do not cut foods on the cooking surface.
7. Turn the heat control to OFF when cooking is complete. Unplug the heat control from the wall outlet then from the griddle. Allow
the griddle to cool before removing the drip tray and before cleaning.
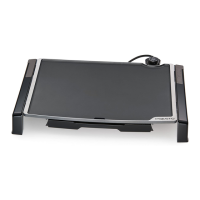
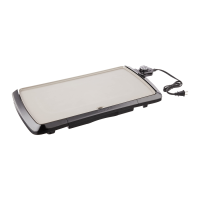
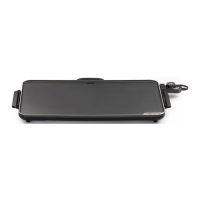
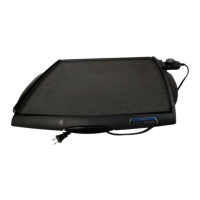
Tilt’nDrain
™
feature...
Easily adjusts from a level grilling surface for eggs and pancakes to a tilted
draining surface for meats.
Simply pull out on handles to tilt the grilling surface. Push handles back in
to return to a level surface.
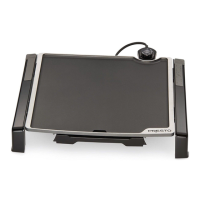
Nonstick finish
Cool-touch base
Handles
Control Master
®
heat control
Drip tray
 Loading...