Do you have a question about the Prime-Line E-2293 and is the answer not in the manual?
Set desired lock height, fold template, and mark all holes on the door edge.
Drill multiple holes in the door's center edge to create a pocket for the mortise lock.
Drill a large hole through the door for the spindle and smaller holes for mounting.
Place the mortise lock into the pocket, trace the faceplate, and chisel for depth.
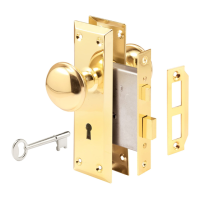
Insert the mortise lock into the pocket and secure it with the provided long screws.
Align and attach any trim plates to the door using the shorter screws.
Insert the spindle through the door and lockset, thread knobs, and tighten set screws.
Align the strike plate with the latch on the door jamb and secure it with screws.
Loosen set screw on one knob, unscrew knob, and remove second knob and spindle from door.
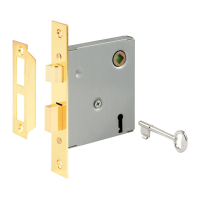
Remove screws from the old lock's faceplate and take the old mortise lock out of the door.
Place new mortise lock in existing pocket; enlarge pocket if necessary by chiselling.
Insert screws into the faceplate holes and tighten; attach trim plates if included.
Place spindle through lock, thread knobs onto spindle, and tighten set screws.
Remove machine screw on lock cover and carefully remove the lock cover.
Lift latch cam, depress spring to disengage rod, lift latch spring and tongue assembly.
Turn latch spring and tongue assembly over, reinsert, and secure spring rod.
Return cover to lock housing, secure with machine screw, and follow installation directions.
| Type | Mortise Lock |
|---|---|
| Material | Steel |
| Faceplate Width | 1 inch |
| Product Type | Mortise Lock |
| Model Number | E-2293 |
| Door Thickness | 1-3/8 to 1-3/4 inches |
| Handing | Reversible |