7
4
23
4
15
31
2
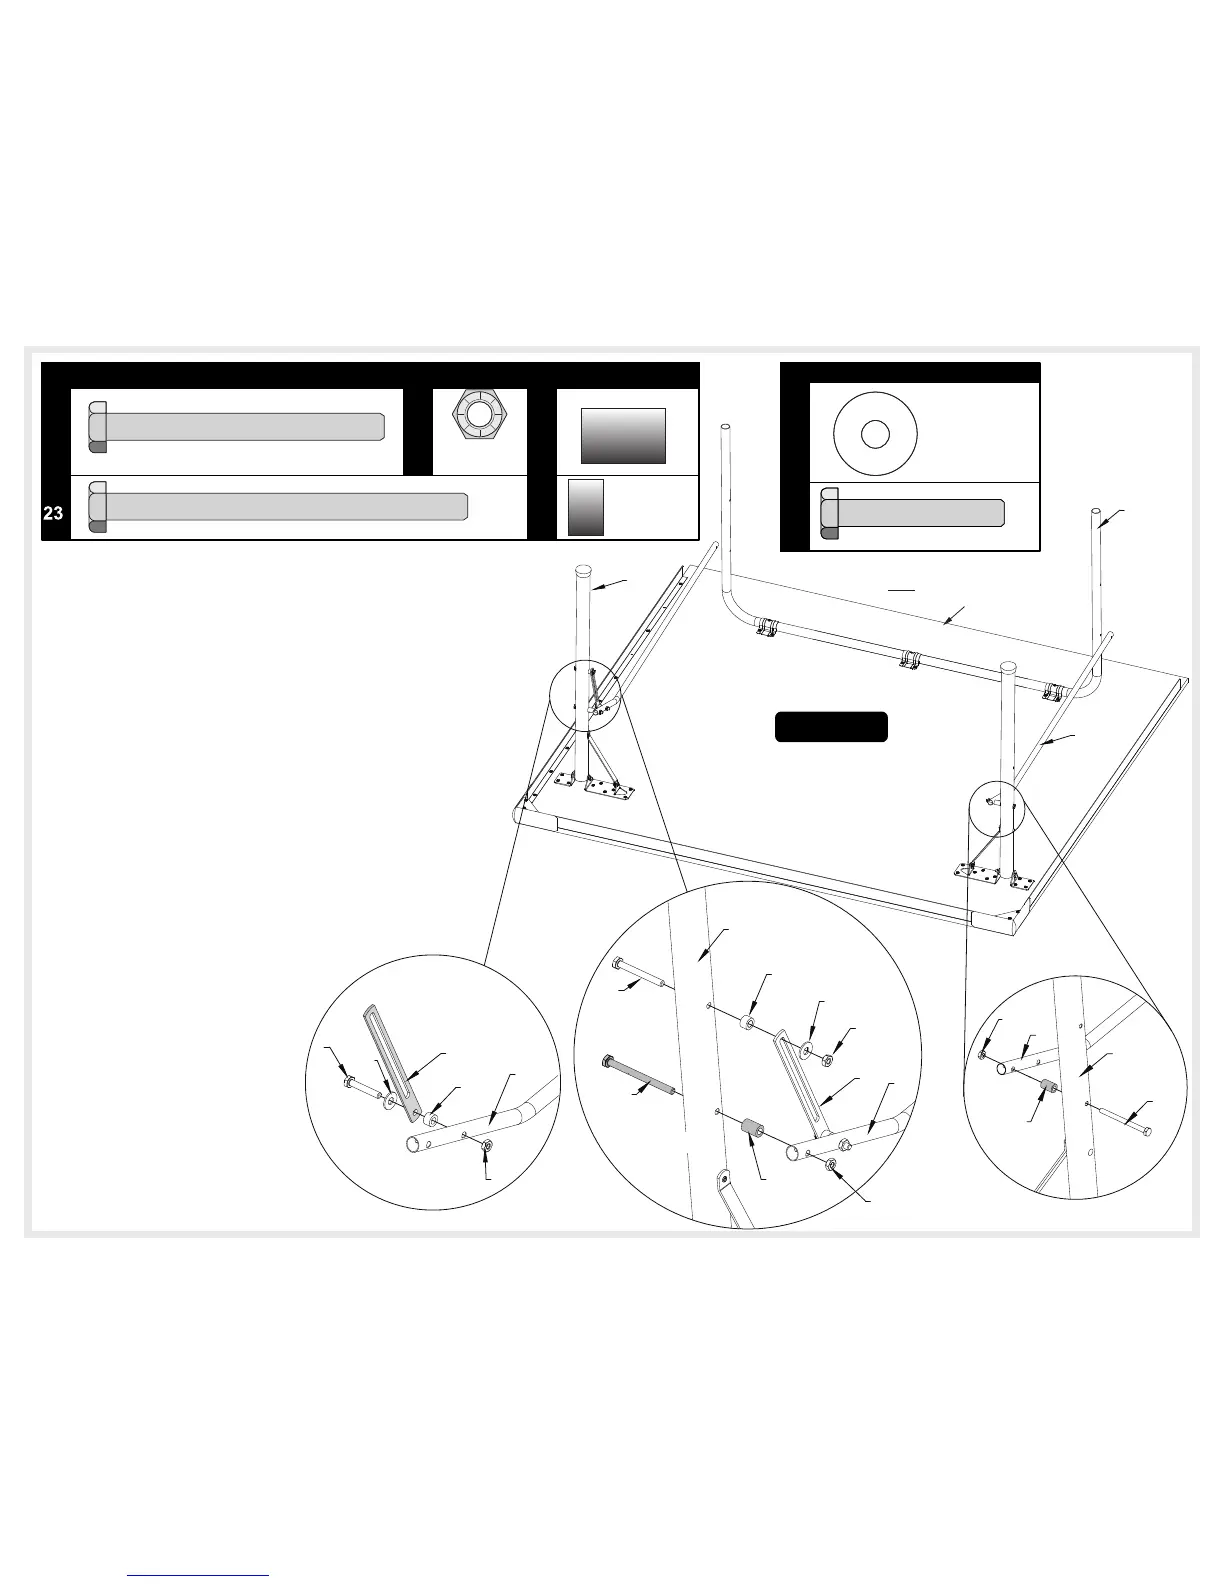
Detail H
First Table Top
Figure 7A
Important! DO NOT put other
safety strap #6 on this table
half. It will be installed on
second table half later.
15
1/4” Locknut
(Qty. 3)
39
1/4-20 x 2 1/2 Hex Head Bolt
(Qty. 1)
1/4-20 x3 1/4 Hex Head Bolt
(Qty. 2)
30
3/4” Spacer
(Qty. 2)
31
5/16” Spacer
(Qty. 2)
HARDWARE NEEDED
24
Plastic Washer
(Qty. 2)
1/4-20 x 1 1/2 Bolt
(Qty. 1)
9
HARDWARE NEEDED
30
6
4
24
15
9
Detail G1
31
2
4
15
39
6
30
15
24
Detail G2
(Longer)
23
(Longer)
Note: This is the end of the
table with no rails.
14. Attach slotted end of safety strap #6 to INSIDE of Leg #2
using one bolt #39, one spacer #30, one washer #24,
and one hex nut #15. Tighten hardware until snug but do
not overtighten. Tubes must pivot freely. See Detail G2.
12. Attach safety strap #6 to linkage #4. Be sure to attach on the end of
linkage with TWO holes. Use one bolt #9, one washer #24, one
Spacer #30, and one hex nut #15. See Detail G1.
13. Attach end of linkage #4 with the attached Safety Strap #6 INSIDE of
Leg #2 as shown in Detail G2. Secure through end hole with bolt
#23, Spacer #31 and locknut #15. Tighten hardware snug enough to
keep table stable but do not overtighten. Tubes must pivot freely.
15. Attach linkage #4 INSIDE other Leg #2 as shown in
Detail H. Secure through end hole with bolt #23,
plastic spacers #31 and locknuts #15. Tighten
hardware snug enough to keep table stable but do
not overtighten. Tubes must pivot freely.
9
2
 Loading...