THERMOSIPHONIC SOLAR WATER HEATERS / TECHNICAL DOCUMENTATION / JANUARY 2021 PAGE
12
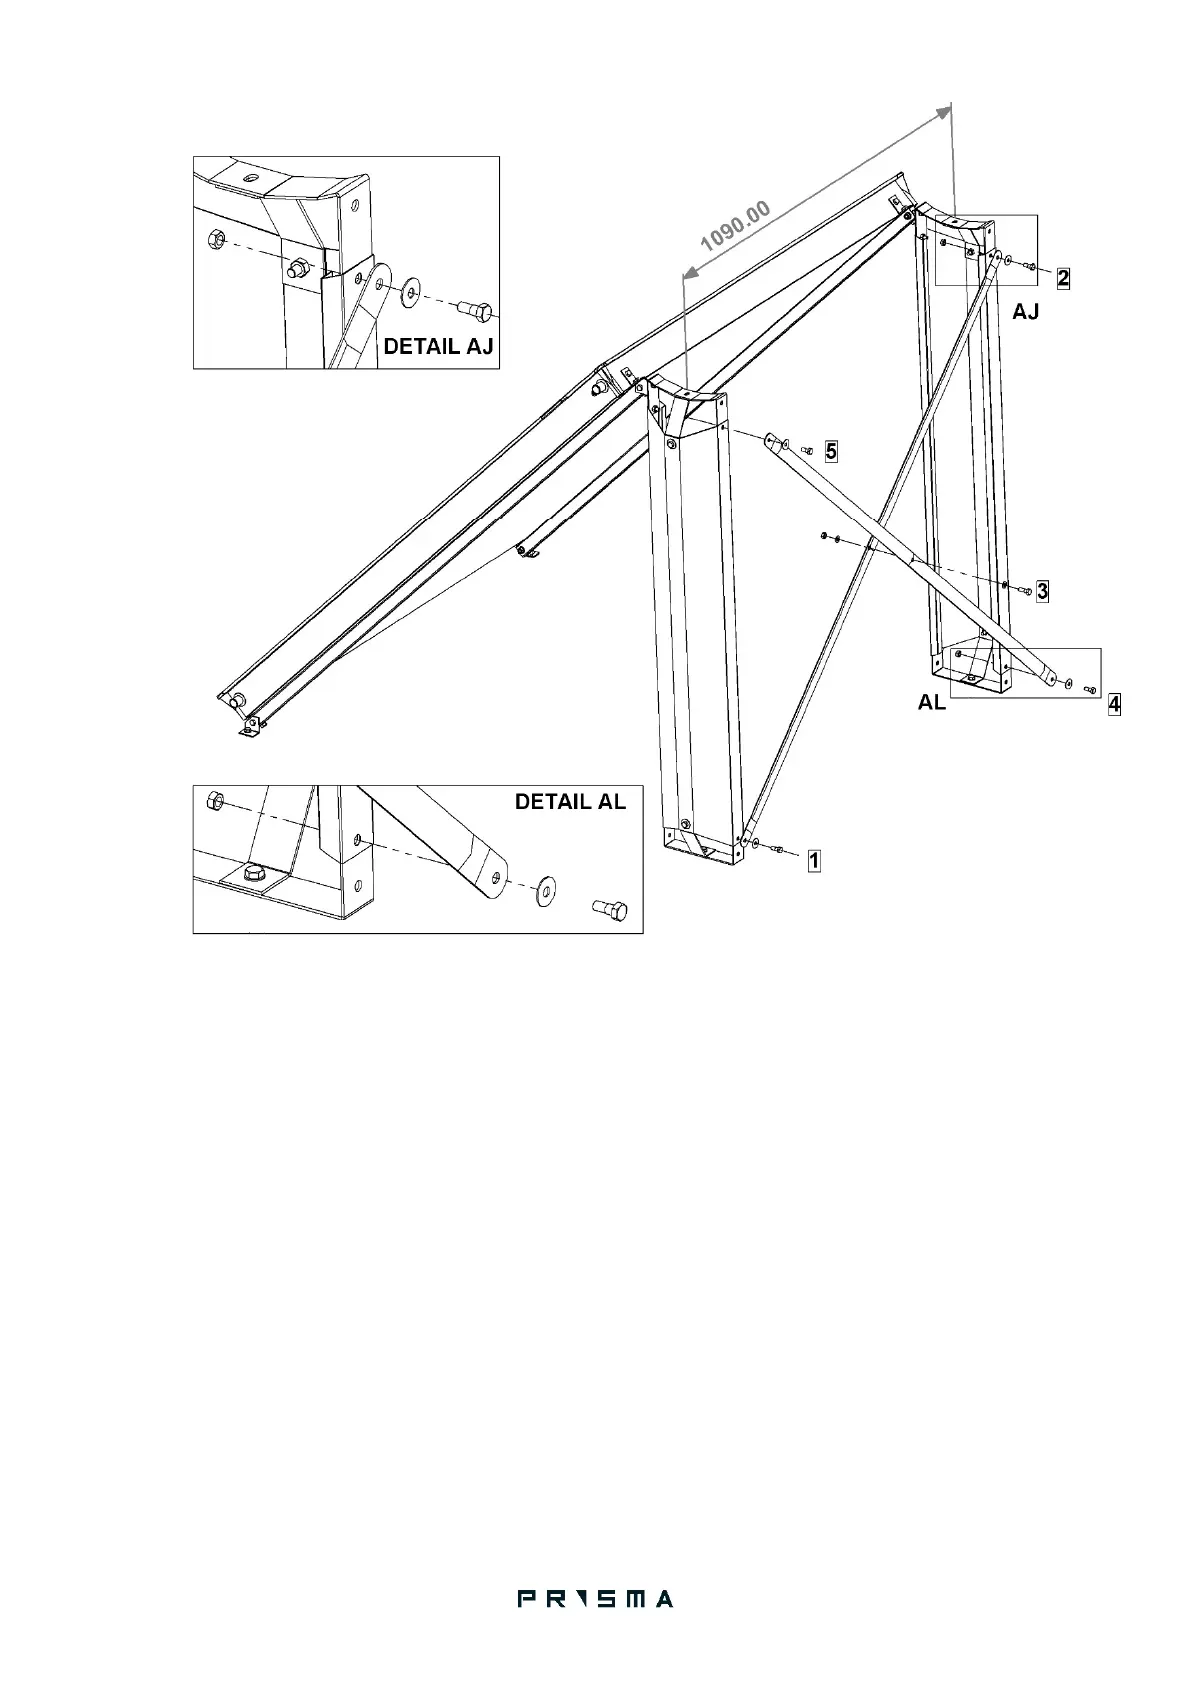
STEP 4
Install the X-system at the back of the pillars in the following sequence:
Remove bolt [1] and connect the lower end of the X brace beam as shown.
Make sure of the orientation of the beam: the convex side should face the front of the system.
Replace bolt [1] but do not fully tighten it.
Remove bolt [2] and connect the upper end of the X brace beam.
Replace bolt [2] but do not fully tighten it.
Connect the second X beam at the center with bolt [3]. Do not fully tighten the bolt. Make sure of the
orientation of the beam: The convex side should face the back of the system.
Remove bolt [4] and connect the lower end of the X brace beam.
Replace bolt [4] but do not fully tighten it.
Remove bolt [5] and connect the lower end of the X brace beam.
Replace bolt [5] but do not fully tighten it.
Check the distance between the tank support holes.
If it is not 1090mm make minor adjustments.
Ensure both pillars are vertical and tighten bolts 1-5 in the sequence 1-2-4-5-3.
 Loading...