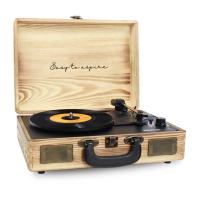
PREPARACIÓN: Coloque su giradiscos en una ubicación segura, protegida de los elementos y
de posibles caídas.
CONEXIÓN A LA CORRIENTE: Conecte la corriente utilizando el adaptador DC de 5V.
LEVANTE LA TAPA: Levante la tapa del tocadiscos y manténgala abierta durante su uso.
ENCENDIDO: Gire el mando de encendido. Tenga en cuenta que también controla el volumen.
SELECCIONE LA VELOCIDAD: Cambieelselectordevelocidada la más adecuada entre 33, 45 y
78 rpm.
COLOQUE EL DISCO: Saque cuidadosamente el disco de su funda y colóquelo en el plato
giradiscos.
COLOQUE LA AGUJA: Libere el gancho del brazo, muévalo despacio y con cuidado hacia el
disco, colocando la aguja sobre la parte exterior del mismo.
BAJE LA AGUJA: Una vez la aguja esté sobre el disco, utilice la pequeña palanca junto al brazo
y bájela para que éste descienda sobre el disco.
DISFRUTE SU MÚSICA: Una vez completados los pasos anteriores, pulse el botón de reproduc-
ción y el plato comenzará a girar automáticamente.
AL TERMINAR: Levante el brazo y colóquelo sobre su soporte. Apague el tocadiscos utilizando
el selector de encendido. Si el selector de autostop está conectado, el plato se detendrá
automáticamente. Si el selector está desconectado el plato continuará girando hasta que
coloque el brazo sobre su soporte.
CONEXIÓN DE UN SISTEMA DE SONIDO EXTERNO: Conecte un cable de audio RCA (no
incluido) al conector AUDIO LINE OUT en la parte posterior del tocadiscos. Conecte el otro
extremo del cable a una conexión AUDIO INPUT en el amplificador.
-Enchufe el cable rojo en el canal R.
-Enchufe el cable blanco en el canal L.
FUNCIONES USB/TF:
Levante el brazo y colóquelo sobre su soporte.
Inserte la memoria USB o tarjeta TF.
Espere unos segundos hasta que comience la reproducción del contenido de la memoria USB
o tarjeta TF. Al utilizar esta función, el resto se detendrán automáticamente.
GRABACIÓN USB/TF:
Introduzca la tarjeta TF o la memoria USB y mantenga pulsada la tecla "M" hasta que aparezca
en la pantalla "REC", a continuación pulse la tecla "PLAY/PAUSE" para comenzar la grabación.
FUNCIÓN BLUETOOTH:
Levante el brazo y colóquelo sobre su soporte.
-Pulse el botón «M» para seleccionar el modo Bluetooth.
-Asegúrese de que el dispositivo Bluetooth está en modo emparejamiento.
-Seleccione el nombre adecuado para conectar el Bluetooth.
FUNCIÓN FM:
Levante el brazo y colóquelo sobre su soporte. Pulse el botón «M» para seleccionar el modo FM.
BORRADO DE LA MÚSICA GRABADA:
Si desea eliminar la música grabada mantenga pulsado el botón «play/pause» hasta que la
pantalla muestre DEL, y pulse de nuevo el botón «play pause» para confirmar. La música que
REPLACING THE STYLUS NEEDLE:
Push back the arm lock to release the tone arm. Unclip and remove the stylus needle from the
cartridge then replace with a new one.
INSTALLING A NEW STYLUS CARTRIDGE
Note: Please exercise extreme care whilst performing this operation so as to avoid the tone
arm and audio line wires from any damage.
Gently unclip the cartridge from the tone arm. Gently pull out the audio wires attached to the
cartridge. Replace with a new cartridge, please ensure audio wires are fitted securely then clip
back on to the tone arm.
We advise you to clean your records with an anti-static cloth to gain maximum enjoyment
from them and to make them last.
We would also point out that for the same reason your stylus should be replaced periodically
(approximately every 250 hours) Dust the stylus from time to time using a very soft brush
dipped in alcohol. (Brushing from back to front of the cartridge)
WHEN TRANSPORTING YOUR RECORD PLAYER DO NOT FORGET TO
Replace the protective cap on the stylus. Put the rest clip into the pick-up arm.
WARRANTY POLICY
This product is guaranteed for 2 years from the date of purchase. When you have a problem
that you can not solve, you must access the web www.prixton.com and click on the contact
option to send us your assistance form.
We, La Trastienda Digital located in Avenida Cervantes 49, módulo 25, Basauri 48970, Bizkaia
hereby declare that the following goods, imported and selling at European market:
SIMPLIFIED EU DECLARATION OF CONFORMITY
Are in compliance with the EC Council Directive of 2014/53/EU (EM DIRECTIVE) and harmo-
nized standards and with the board of the 16th of April 2014.
The complete text of the UE Declaration of conformity is available anytime at this website
address:
www.prixton.com
LA TRASTIENDA DIGITAL
BRAND MODEL NAME DESCRIPTION
CATEGORY
Prixton VC400
Record Player
Audio
These technical and electrical specifications are those of typical units and may be changed
without prior notice in order to provide improved equipment.
 Loading...