Figure 5
XC-M shown in it Monopod State
Each of the 3 XC-M legs can be
detached
7
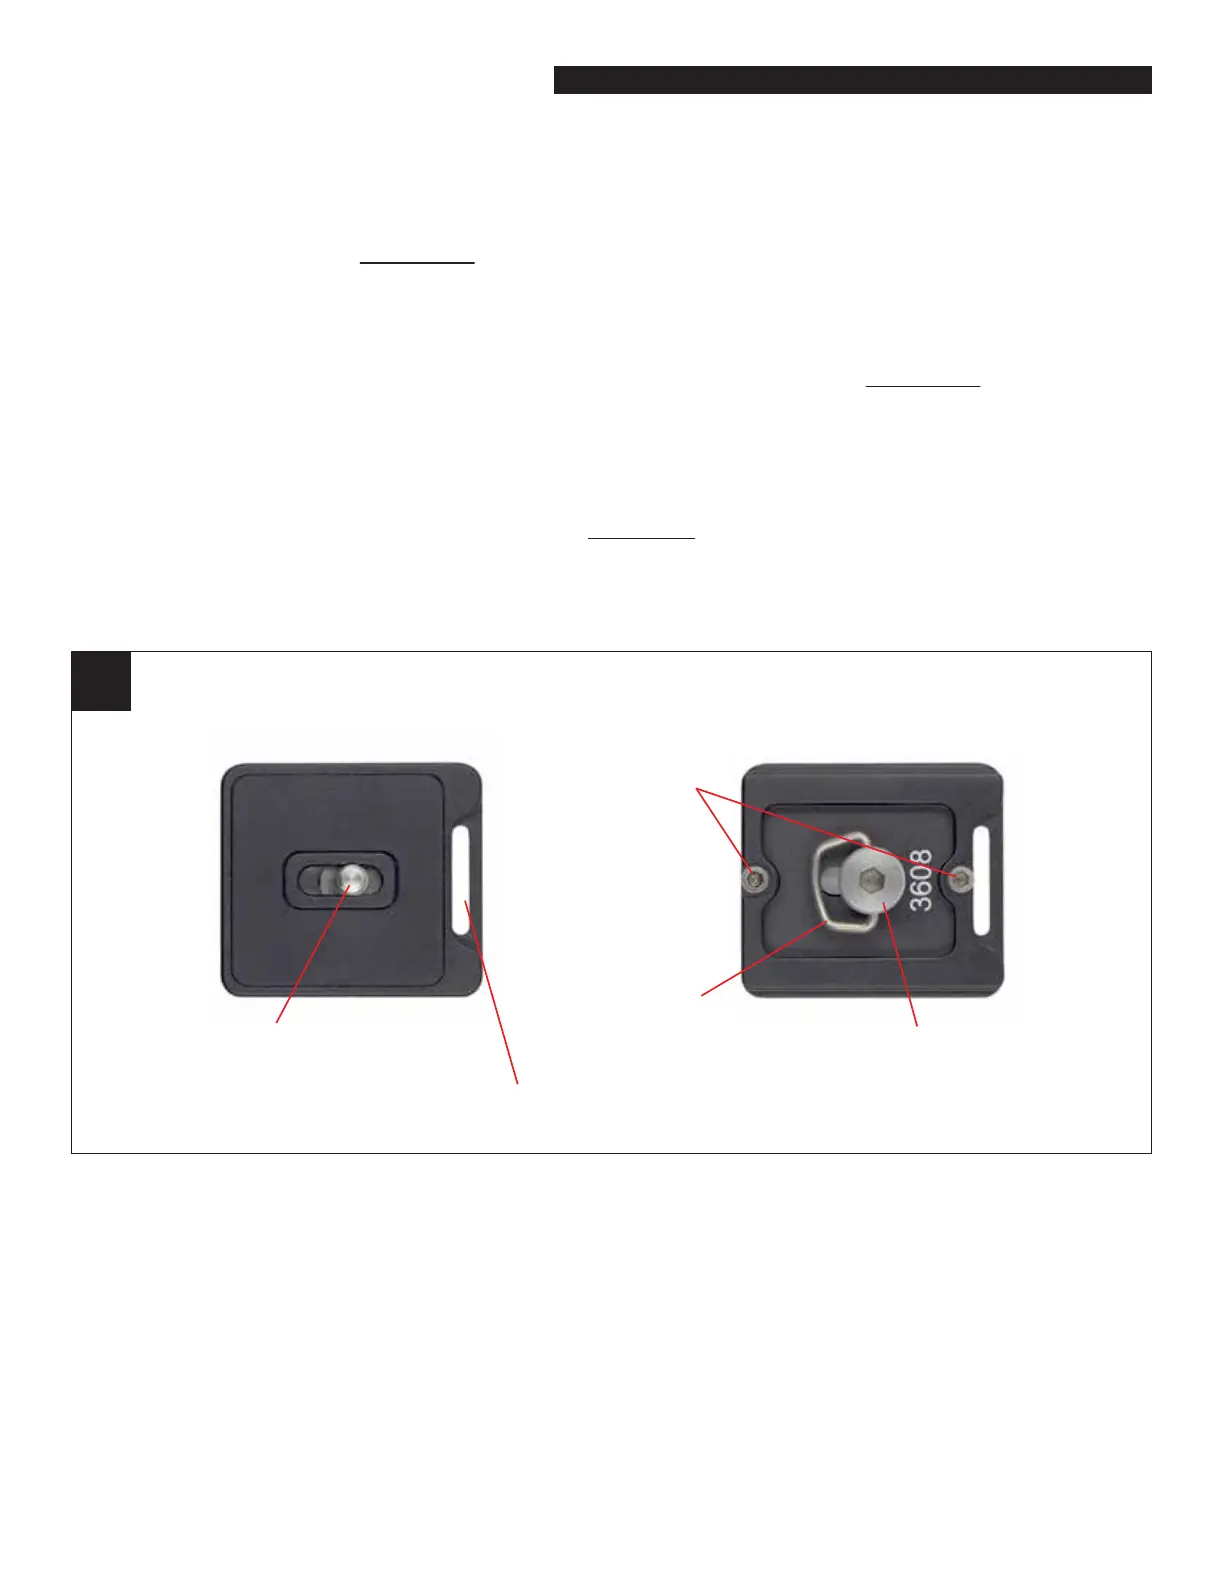
QR Plate
(top view)
QR Plate
(bottom view)
Mounting Bolt
(1/4” - 20 thread)
Mounting Bolt
(4mm hex)
Bail
Safety Bolts
(2.5mm)
Strap Slot
ATTACHING YOUR CAMERA
(USING THE QUICK RELEASE PLATE)
Loosen the QR Knob on the Ball Head and remove the QR Plate. Connect the QR Plate to your camera by
threading its Mounting Bolt (see gure 7) into the tripod connection port located in the bottom of your
camera (or lens). Use the Bail on the Mounting Bolt to tighten the QR Plate to your camera properly. You can
also use the Medium Hex Key (included with the Tool Kit) to tighten the Mounting Bolt. Now place the QR
Plate into the top of the Ball Head and tighten the QR Knob to hold it in place.
On the bottom side of the QR Plate you will notice two, protruding Safety Bolts (see gure 7). These prevent
the QR Plate and camera from accidentally sliding o the top of the ball head if the QR Knob is loosened. The
Safety Bolts can be removed using the Small Hex Key, if you choose. Removing the bolts will allow the QR
Plate to slide into the top of the ball head more easily but it will remove the safety feature. Proceed at your
own risk.
Note: Your XC-M QR Plate has an integrated strap slot (see gure 7). This slot is handy for connecting a grip strap
or cross-body style carrying strap.
 Loading...