13) Place the shelf on the lower extrusions in the front of the table allowing the T-nuts to drop in the
channels on the top of the extrusions. Tighten the M5 x 18mm screws.
14) Next, lift each leg individually and thread your feet or casters to the appropriate, level, height.
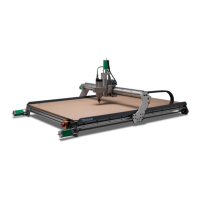
15) Now attach the machine mounting pads to the tops of the 6060 extrusion.
16) Use the eight remaining M5 x 20mm socket cap screws to secure your machine to the table
using the holes provided at the bottom of each of the machines feet.
17) Now place the protective black plastic end caps on the top of the square 60/60 extrusions and
the ends of the two longest cross bar extrusions.
18) If the machine does not fit on stand properly, and there is a gap between the mounting
pads and the back of the feet. You may need to loosen the bolts that hold the front and
back to the stand (1 side at a time) and either pulling the top front in our out depending on
where it has a gap or is too tight. One way to ensure your stand is square is by measuring
the top and bottom of the lengths of each side. They should all be the same so your
machine fits on top square so there are no issues with the machine performance.
Page 3 Last Modified 1/28/2019 Changes in BOLD
 Loading...