All appropriate safety equipment and gear must be used during the installation of this or any ProCycle product including any
time you work on a vehicle. ProCycle accepts no responsibility for injuries or damage incurred during the installation of any products.
When mounting racks, do not tighten any hardware until all mounting bolts are in place!
Just start the bolts a few turns.
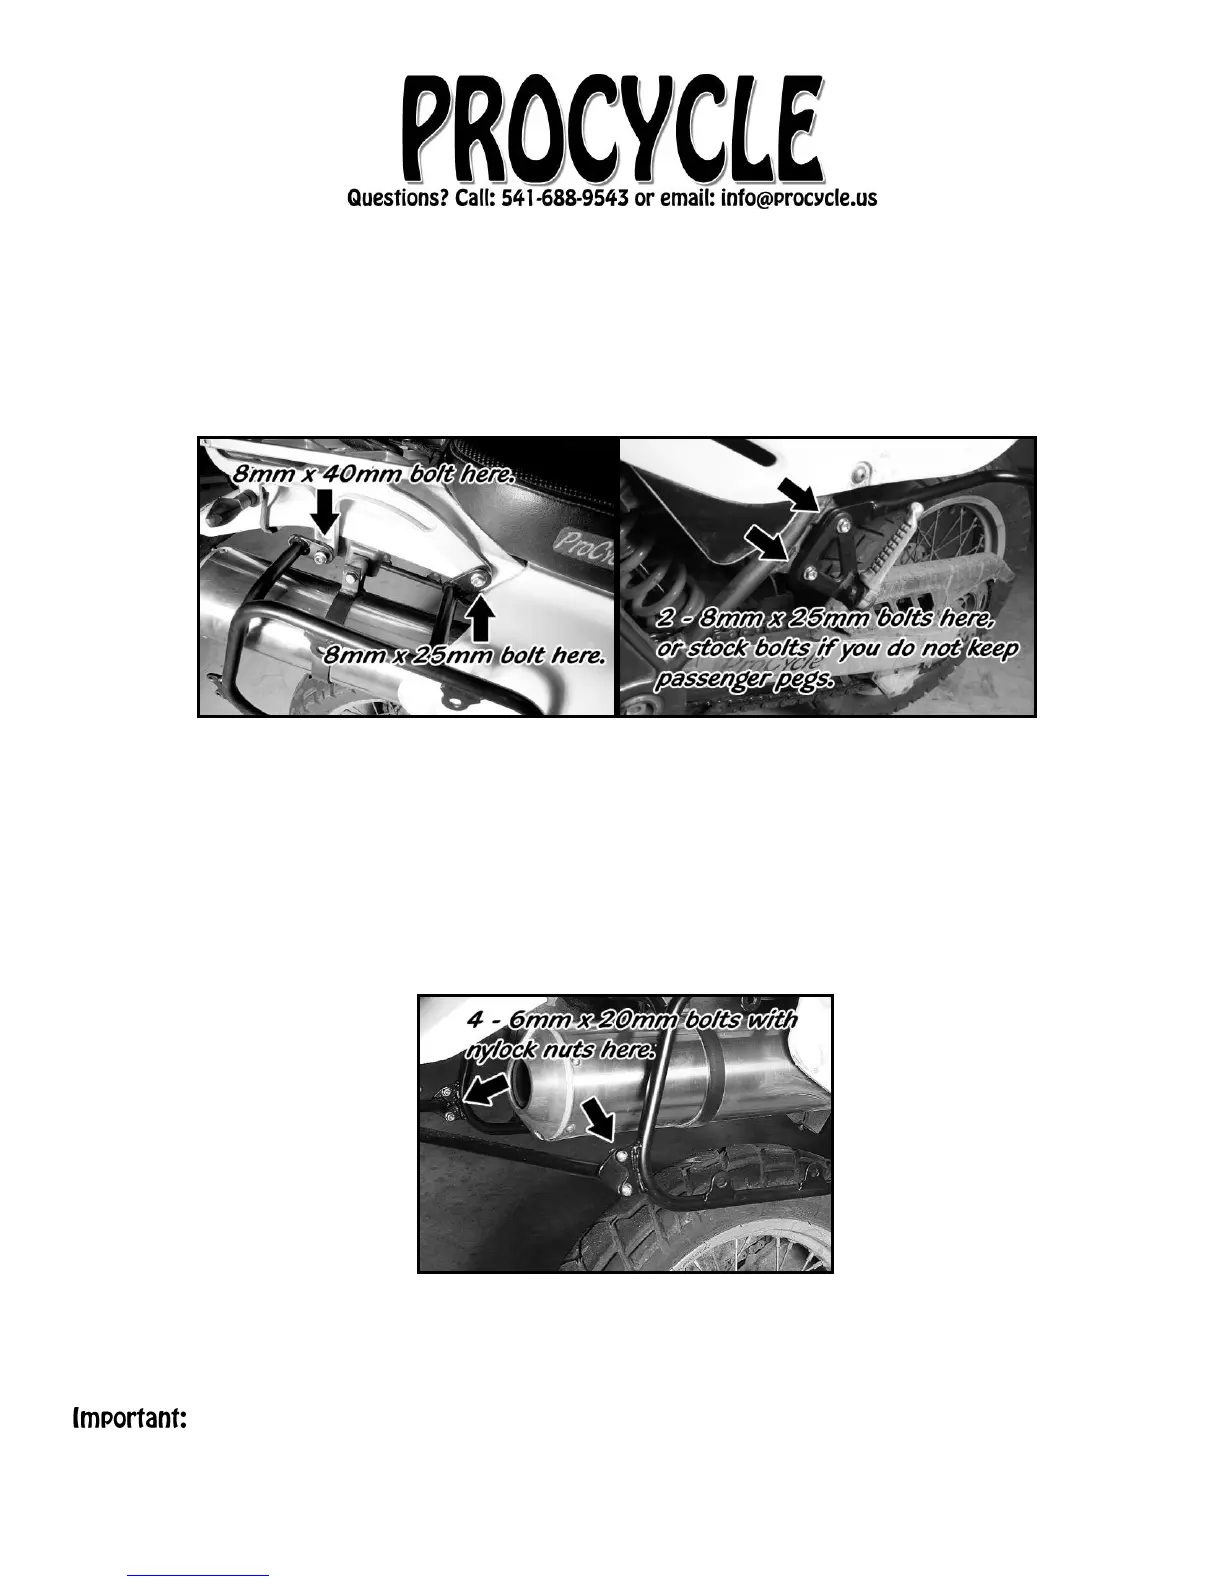
5. Mount the right-side rack first using a longer 8mm x 40mm bolt in the rear position. (See image
below.) If you have a TCI Borrego rack or no tail rack, you will use one of the two spacers
provided here. The other spacer will go in the same location on the other side.
6. Use one of the 8mm x 25mm bolts for the forward position. Be sure that the lower Side Rack
mounts are on the outside of the peg mounts. (See image above)
7. If you want to mount the passenger pegs, they will go over the rack mounts and use two of the
8mm x 25mm bolts provided in our kit. If you don’t want to mount the pegs, you can use the
stock bolts for the rack mounts.
8. Repeat steps 4 through 6 to mount the left rack. Again, do not tighten bolts yet, just start them.
9. The crossbar goes INSIDE the tabs on the racks (See image below) with the longer leg on the
right. Use four 6mm x 20mm button head Allen bolts with nylock nuts to mount rear crossbar to
racks.
10. Once all of the hardware is in place, please tighten the four bolts on the right rack first, then the
four bolts on the left rack and then the four bolts that hold the crossbar in place.
 Loading...