EasyManua.ls Logo

Profi-pumpe SOL-C12 User Manual

Profi-pumpe SOL-C12
5 pages
To Next Page IconTo Next Page
Page #1 background imageLoading...
Page #1 background image
Getting Started
The control unit requires 3 x AA rechargeable
batteries (NOT NORMALLY INCLUDED please
check the box). To insert batteries
remove the lid carefully by removing
5 screws (taking care not to detach
the wire connecting it to the case).
Insert the batteries into the case
ensuring the + is in the correct
position, then replace the lid and screws.
Attaching the control unit
The CONTROL UNIT
should be xed to a wall
or post facing in a sunny
direction. If your water
barrel is in a shady
position, the control
unit may be sited some
distance from the water barrel. It should be no more
than 2 metres higher than the bottom of the barrel
or more than 20m distant.
Connect to the water barrel
Drill a 5.5mm hole in the lid, or near
the top of the water barrel, above
the water line. Thread some tubing
through the hole and attach the lter
to it. Adjust the tubing so the filter
hangs about 10cm above the bottom
of the barrel. The other end of the
tube should be taken to the control
unit, cut cleanly to length and
attached to the pump inlet the left
hand connector marked I.
The connections to
the pump should be
straight (to avoid
leakage) and should
not pull the control
unit out of vertical.
5mm of tube needs
pushing into the connector port to ensure a good
connection and avoid potentially serious problems.
You can easily measure, then mark 5mm with a
piece of tape.
Check the PUMP
In a new control unit the batteries may be charged
or at. If they have charge in them, before
connecting to the irrigation system, using a piece of
tube connected to the outlet (marked O) discharging
back to the water barrel, allow the unit to run until
it stops.
Connect to the irrigation system
The control unit is designed to work with between
6 and 24 drippers. Using less than 6 may cause
damage. As you increase the number of drippers,
less water will be emitted by each one, additionally
there will be less back-pressure in the system so it
will become less tolerant of height differences. With
12 drippers in place height differences of 2m are
normally ok.
Switch on
Turn the knob to 3. Do
not worry if the pump
does not start it should
start itself after 3 hours
in good daylight. Please
note the unit will not run
in the dark. If after 24h
the pump has watered too much, turn in down, or if
too little turn it up. Repeat until you are happy.
If your pots/baskets drain a little after the afternoon
watering on a sunny day, this is about right for
most plants.
Monitoring
The timer on the control unit is zeroed by turning
the unit off and on again. In daylight the pump will
start automatically after a few seconds (if there
is sufcient battery charge) and thereafter at
roughly 3 hour intervals. The duration of pumping is
determined by how much light/sunshine has fallen
on the solar panel and the position of the control
knob since it last ran. Put a dripper in a jug to see
how much each dripper is delivering.
IMPORTANT the batteries will NOT charge if
the control unit is turned off.
5MM
T
h
e
w
e
a
t
h
e
r
r
e
s
p
o
n
s
i
v
e
S
M
A
R
T
i
r
r
i
g
a
t
i
o
n
c
o
n
t
r
o
l
l
e
r
Solar Automatic
Watering System
Irrigatia SOL-C12/24 installation and operation
SOLAR AUTOMATIC
WATERING SYSTEM
Version 17.11.
Technical changes, misprints and mistakes reserved! Newest information about our products can be found online
http://www.pro-pumpe.de
de
Question and Answer IconNeed help?

Do you have a question about the Profi-pumpe SOL-C12 and is the answer not in the manual?

Profi-pumpe SOL-C12 Specifications

General IconGeneral
BrandProfi-pumpe
ModelSOL-C12
CategoryLawn and Garden Equipment
LanguageEnglish

Summary

Getting Started with the Solar Watering System

Attaching the Control Unit

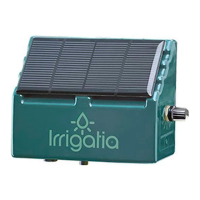
Instructions on how to fix the control unit to a wall or post, ensuring correct orientation.

Connecting to the Water Barrel

Steps for drilling a hole, attaching a filter, and connecting tubing to the water barrel inlet.

Checking and Connecting the Pump

Guidance on checking the pump and connecting it to the irrigation system, including dripper limits.

Switching On and Initial Operation

How to turn the unit on, its automatic start behavior, and adjusting watering duration.

Monitoring System Performance

How to reset the timer and factors affecting pump duration and water delivery.

Pump Priming and System Setup

Pump Priming Procedure

Ensuring the pump primes correctly, especially when a head of water is present.

Control Unit Status Indications

Understanding LED signals for pump running, charge rate, low water warning, and night mode.

Maintenance and Winter Storage

Advice on keeping the control unit frost-free and battery replacement for longevity.

Laying the Irrigation Tubes

Guidance on tube layout, cutting, joining, and dripper height relative to the water source.

Installing the Anti-Siphon Device

How to install an air release device to prevent unwanted siphoning of water.

Optional Seep-Hose and Micro-Porous Hose Kits

Details on installing optional kits for wider water distribution and different bed layouts.

Water Level Sensor Installation

How to install the sensor to detect low water levels and stop the pump.

Troubleshooting Pumping Issues

Using a syringe to resolve common pumping problems like stuck valves or lost prime.

Safety and Manufacturer Information

Essential Security Tips

Crucial precautions for safe operation, including electrical safety and pump usage limits.

Manufacturer's Responsibility Statement

The manufacturer's disclaimer regarding accidents or damages from misuse or disregard of instructions.

Imprint and Company Details

Company Contact Information

Provides the company name, address, email, and fax number for inquiries.