- 12 -
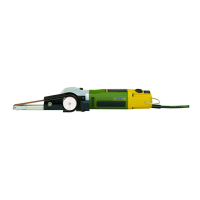
1. Insert drill 1 (Fig.3)into thebore ofclamp 2.
Letthedrill shank protrude for approx.10
mm attherearsothatitcan be fixed in the
clamping prism. Donot yettighten clamp
screw 3.
2. Lay drill 1 (Fig. 5)with clamp 2 into the
positioning prism, push forw
ardagainst the
stop andalign,asshowninFig.5(cutting
edgesvertical).
3. Slackenscrew3andadjust adjustment bar 4
accordingly.
4. Fastenthedrill in clamp 2 using Allenkey1
(Fig.7).
Drills with diameterofless than3mm:
Drills with adiameterofless than3mm must be
clamped in theadapter13(Fig.1)supplied for
this purpose.
Adapters for spiral drill diameters
1.5/1.6/2.0/2.4/2.5and3.0 mm areavailableas
accessories. Inthis case proceed as follows:
Insert drill 1 (Fig.
4)into theadapter 2 andfasten
with the Allenkey3. Theshank of theadapter
has adiameterof10 mm. Insert thedrill with the
adapterinto clamp 4. The machine must then be
adjusted aspreviously described for adrill with a
10 mm diameter.
Grinding thedrill:
Danger!
Always weargoggles whenperforming
grinding work!
Wear only suitable workingclothes (no wide
arms, ties, jewellery).
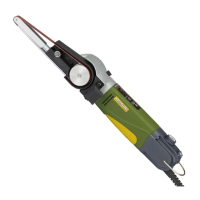
1. Turn knurled screw 1 (Fig. 8)indirection B to
openthepositioning prism.
2. Laythedrill into the positioning prism and
insert aguide pin 2 of theclamp into the slot
3 in the swivel arm.
3. Turn knurled screw
1 in direction A to close
the positioning prism.
4. Fixthedrill shank in clamping prism 5. For
this purpose press indexknob 4, move the
clamping prism forwardandslightly clamp
thedrill shank with screw 6.
Note!
In case of small or tooshort drillsclamping
withscrew 6(Fig.8)isnot necessary.Inany
case ensure exact axial stop andguidance in
the clamping prism 5(Fig. 8)!
5. Turn spindle 1 (Fig.9)until thedrill 2 slightly
contacts thegrinding wheel 3. Read the
scale value 4 and turn the spindle 1 exactly
one turn back. Theclearancebetween drill 2
andgrindi
ng wheelisnow 1mm.
6. Switchthemachine on bytheONOFF
switch 7 (Fig.1).
Note!
Remember the position on scale4(Fig.9)!
After grinding the firstcuttingedge the drill is
turnedaroundinthe positioningprismand at
this pointitmusthave thesamedistance to
the grinding wheel as before thefirst cutting
edge was ground.Otherwise thedrill willbe
asymmetric.
7. Move the swivel arm smoothly andevenlyto
the right against the stop whileadvancing the
feed spindle 1 (Fig.10) slowlyindirection B.
Repeatthis process, until thecuttingedge of
thedrill is sharp.
Note!
A drillisnormally correctly sharpenedafter 4-
5swivelling movements. Remember the
position on the scale!
8. Return feed spindle 1 (Fig.11) to the
previously remembered scale value 4.
9. Switchthemachine off bytheONOFF
switch 7 (Fig.1).
10. Turn knurled screw 3 (Fig.11) in direction A
and slacken cl
amp screw 2 so thatthedrill
can be removed from theclamp.
Attention!
Atthis pointdonot loosen the clamp!
11. Turn thedrill with theclamp for 180°, layit
into the positioning prism andfastenitinthe
clamping prism,asdescribed for grinding the
first cuttingedge.
12. Swit
chthemachine on bytheON-OFF
switch 7 (Fig 1) andgrind the secondcutting
edge.
Attention!
When grinding thesecond cutting edge stop
the feed at exactly thesamepositionatwhich
the first grinding process was finished.
Otherwisethe drill will be asymmetric.

 Loading...