Do you have a question about the Puky YOUKE and is the answer not in the manual?
Manufacturer's liability limits, child safety instructions, and supervision requirements.
Bicycle use limitations, safety precautions, and weight limits for safe operation.
Proper unpacking, removal of protective material, and checking all parts for completeness.
Adjusting saddle height and handlebar position for child's comfort and safety.
Essential checks before first ride to ensure bike is safe and functional.
Checking saddle and handlebar are firmly secured and cannot rotate.
Verifying brake levers, pads, back pedal brake, and pedals are functional and secure.
Inspecting chain tension, lubrication, tyre profile, air pressure, wheel alignment, and spoke tension.
Ensuring the bell is functional and performing a general visual check of all components.
Maintaining correct tyre pressure and replacing damaged parts with originals.
Guidelines for cleaning, oiling the chain, and protecting against rust.
Details on warranty coverage and exclusions for defects.
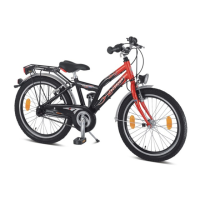
Visual guide showing pre-assembled bike, handlebar, and pedals for clarity.
Lists essential tools like Allen keys and spanners required for assembly.
Steps to insert and secure the handlebar into the steerer tube.
Tightening stem clamping screws to the specified torque for security.
Steps for attaching the brake cable to the brake handle.
Guidance on aligning the brake cable for proper braking function.
Steps to adjust handlebar height by rearranging spacers.
Tightening stem clamping screws to ensure stability and correct play.
Proper alignment of handlebars and adjustment of control bearing play.
Tightening steerer tube clamping screws to the specified torque.
Adjusting brake arms to ensure pads are equidistant from the rim.
Setting brake lever distance and cable tension for optimal braking.
Setting the distance between the brake lever and handlebar.
Adjusting cable tension via a knurled screw for proper brake pad clearance.
Steps to undo fastening nut, replace brake pads, and ensure correct position.
Adjusting brake pad position relative to the rim and setting tension.
Differentiating left and right pedals based on thread direction.
Instructions for screwing pedals into cranks using a spanner.
Setting saddle height for child's balance and reach.
Observing the minimum insertion depth marking on the saddle post.
Retightening the saddle clamp to the specified torque.
Steps to adjust chain tension by sliding the rear wheel for YOUKE/STEEL models.
Steps to adjust chain tension by sliding the rear wheel for LS-PRO models.
Installing the gear stick and gearbox onto the rear axle.
Tightening the gearbox with an Allen key to the specified torque.
Adjusting tension screw to align red line on push rod.
Checking correct gear changes by operating the REVOSHIFT lever.
Locking the tension adjusting screw with the tension adjusting nut.
Details of the 5-year guarantee on frames, forks, and handlebars.
Requirement for online registration within 4 weeks of purchase.
Instructions for filling out the vehicle's identification plate for dealer reference.
Showcases helmets, a combination lock, and a cable lock.
Displays various bags and decorative flags for the bicycle.
Features pumps, cycling gloves, and helmets.
Shows chain locks and protective bags for the bicycle.
Section for recording owner and vehicle information.