Applicable Filter Models: H2O-F12, H2O-F13,
H2O-F14, H2O-F15, H2O-F16, H2O-F17
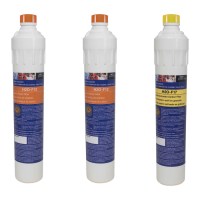
Parts Included: One Replacement Filter
Operating Specications: Please refer to the information
on the relevant lter box / lter label
Where Used:
Model number
/ Watts Part
Number Description Used in System
Filter
Change
Time Frame
H2O-F12 /
88005217
Carbon Block Filter H2O-DWCB200
H2O-DWUF300
H2O-DWRO300
6 months
H2O-F13 /
88005235
Lead/Volatile organic
Compound Filter
H2O-DWGC100
H2O-DWGC101
H2O-DWCB200
H2O-DWUF300
6 months
H2O-F14 /
88005215
Sediment Filter H2O-DWCB200
H2O-DWUF300
H2O-DWRO300
6 months
H2O-F15 /
88005447
Ultra-Filtration H2O-DWUF300 12 months
H2O-F16 /
88005218
Reverse Osmosis
Membrane Filter
H2O-DWRO300 2-5 Years
H2O-F17 /
88005219
Granular Activated
Carbon Filter
H2O-DWGC100
H2O-DWGC101
12 Months
Component tested & certified by WQA for NSF/
ANSI 372 standard for ‘Lead Free’ compliance.
Replacement Filter for Watts Pure
H20 Series Under Counter Push
Button Drinking Water Systems.
WARNING
!
Do not use with water that is microbiologically unsafe or of
unknown quality without adequate disinfection before or after
the system.
IMPORTANT
CAUTION
!
If you are unsure about installing your WATTS water filter, contact a
WATTS representative or consult a professional plumber.
Other filters may look the same, but only use certified PureH2O
manufactured replacement cartridges in systems in order to ensure
proper reduction of water contaminants
Filter Replacement Instructions
Replacement instructions:
Step 1: Place a towel under the lter
module to catch any excess water
that may drip out from the lters
during the changeover.
Step 2: To remove a lter cartridge:
Push and hold the button on the
valve head above the lter. Twist
lter counter-clockwise for about
45 degree while pulling downward
(from the head) Release button and
discard old lter.
Step 3: To install a lter cartridge:
Remove the seal cap and insert the
cartridge into the lter head, push
upward and twist the lter clock-
wise for about 45 degree until you
hear an audible “click” (the button
does not need to be pressed to
install new lters).
Step 4: Turn faucet handle to the
open position to start the ow
of water through the unit. Run 3
gallons of water through the unit in
order to ush out the normal black
carbon nes (it will “sputter” until
the air is purged out) from the unit.
A container with a known volume
can be lled to determine how
much water has ushed through
the system. Initially, the water
may appear cloudy which is due
to tiny air bubbles and it will clear
up shortly. Close the faucet when
nished.
Step 5: Check for leaks. If you have
any leaks, shut off the water supply
to your system, tighten any ttings /
housings then turn the water supply
back on. Check frequently over the
next 24 hours to ensure no leaks are
present. If you have any questions,
please call our retail customer
service at (888)321-0500.
Tubing not shown in above pictures. Do not remove the tubing
while changing the filter
NOTICE
Step 2
Step 3-1
Step 3-2
Step 3-3
COMPONENT