62 63
ES
Manejo del QLOCKTWO
Con un poco de perspicacia y cuidado se puede
acceder a las 4 teclas de ajuste de la parte posterior,
incluso con la cubierta frontal montada. Para ello,
no es necesario descolgar el QLOCKTWO.
Posición de las teclas en la parte posterior, vista desde
delante, con la cubierta montada
Funciones y manejo
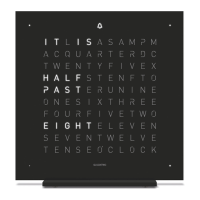
Principio de representación/Leer la hora
Ejemplo: 7 horas 18
[Es] sPANIsch - düNN wEIssfIlm - sEItE 6 - 15. mAErz 2013
A
D Ro ES SI oT A
D oI NE CZ ESA
S SE II ES TA E
o TV EE DI IN E
C oU CA IT NR C
D Yo MC EE NL o
o C H o PN U E V E
V IE CI IN NT C
E LS o SN UE N A
M
L
N
Z
o
S
M
o
[Es] sPANIsch - düNN wEIssfIlm - sEItE 6 - 15. mAErz 2013
A
D Ro ES SI oT A
D oI NE CZ ESA
S SE II ES TA E
o TV EE DI IN E
C oU CA IT NR C
D Yo MC EE NL o
o C H o PN U E V E
V IE CI IN NT C
E LS o SN UE N A
M
L
N
Z
o
S
M
o
5
1
60
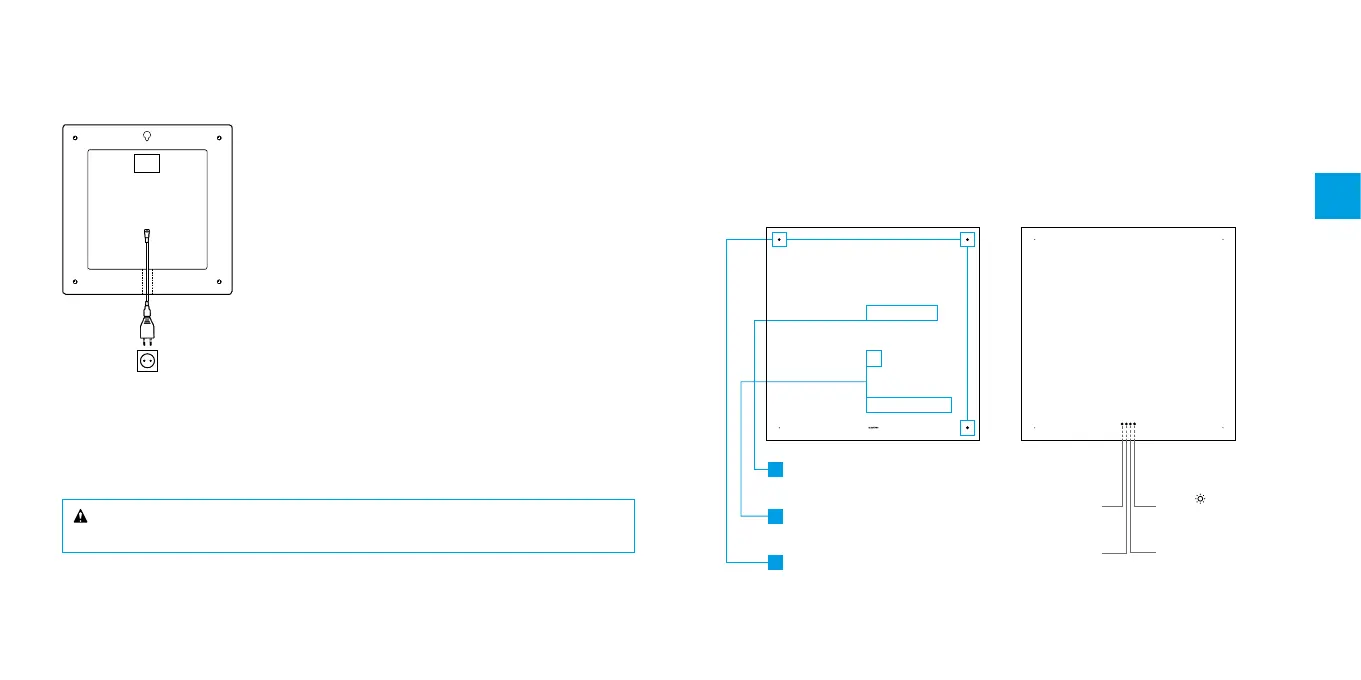
Tecla ( 60 )
Intervalos por horas
Tecla ( 5 )
Intervalos de 5
minutos
Tecla ( )
Luminosidad
Tecla ( 1 )
Intervalos de
1 minuto
Visualización de la hora
Ajuste con la tecla ( 60 )
Texto en intervalos de 5 minutos
Ajuste con la tecla ( 5 )
Cada punto luminoso en las
esquinas = 1 minuto más tarde
Ajuste con la tecla ( 1 )
Entrada de corriente mediante una toma de corriente de red
En el montaje mural, la entrada de corriente puede efectuarse también mediante una toma de corriente de
red, véase página 60 (entrada de corriente mediante una toma de corriente). El cable pasa por el canal del
cable del soporte mural.
Ilustr. 5
J
F
K
Montar el QLOCKTWO
Inserte y gire el tornillo de fi jación manualmente en el orifi cio roscado del QLOCKTWO. A continuación,
puede colgar su QLOCKTWO con el tornillo de fi jación en la corcheta del soporte mural. Consejo: En el caso
de que se formara un lazo de cable entre el soporte mural y el cuerpo del reloj, éste se puede empujar hacia
atrás con una regla.
¡ADVERTENCIA! Enrosque el tornillo de fi jación en el QLOCKTWO solo manualmente. El uso de una
herramienta puede dañar su QLOCKTWO.