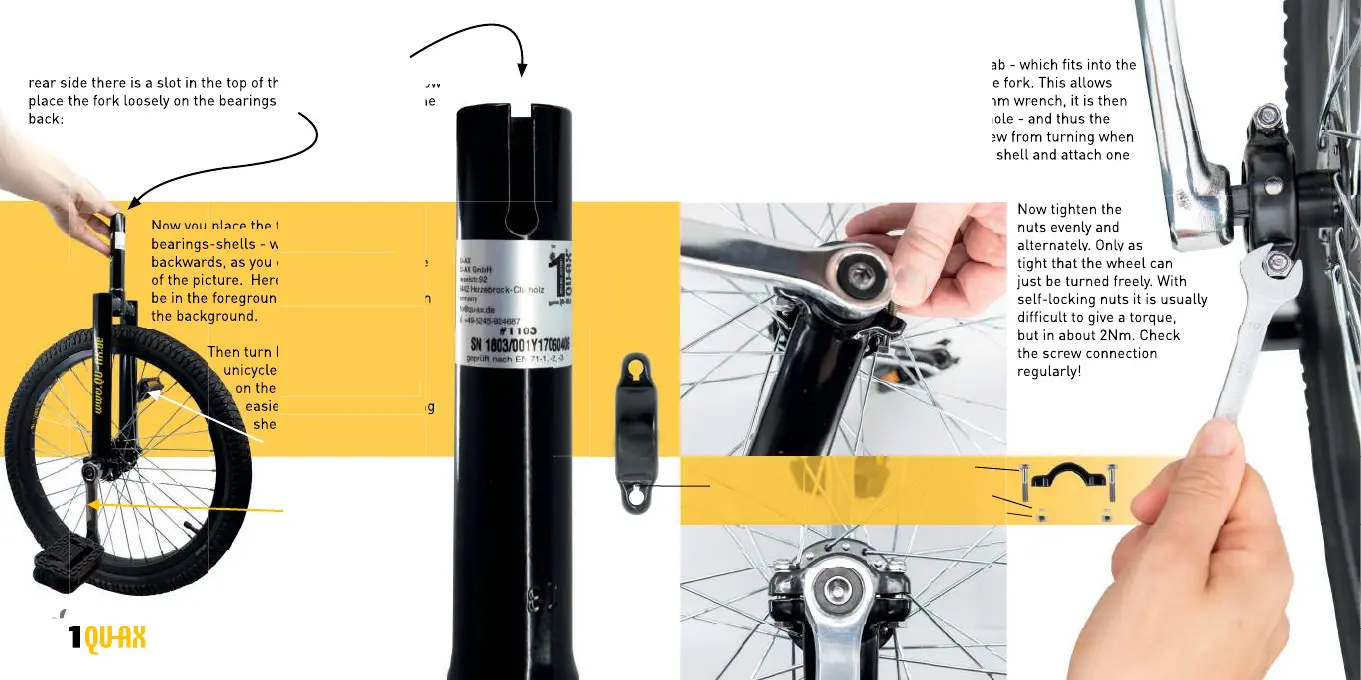
Assembly:
b) Now you take the fork - this one also directional - at the
rear side there is a slot in the top of the fork (picture left). Now
place the fork loosely on the bearings so that the slot is at the
back:
Now you place the fork loosely on the
bearings-shells - with the slot facing
backwards, as you can see on the left side
of the picture. Here, the left crank would
be in the foreground and the right crank in
the background.
Then turn both 180° and put the
unicycle with the seat tube
on the ground. This way it is
easiest to mount the bearing
shells properly.
L for left
R for right
Assembly:
c) The bearing fixing screws have a small tab - which fits into the
groove in the hole in the bearing shell of the fork. This allows
the screw to be tightened with just one 10mm wrench, it is then
sufficient to push the screw head into the hole - and thus the
nose into the groove. This prevents the screw from turning when
tightening the nut. Then put on the bearing shell and attach one
washer and one nut each.
Now tighten the
nuts evenly and
alternately. Only as
tight that the wheel can
just be turned freely. With
self-locking nuts it is usually
difficult to give a torque,
but in about 2Nm. Check
the screw connection
regularly!
tab
washer
groove
nut
 Loading...
