4. Press “ / ” button to select “Time Format” and press the “
/ ” button to select “12-hour”
or “24-hour”.
5. Press “
/ ” button to select “Auto Clock” and press the “ / ” button to select “On” or
“Off”.
6. Press “
/ ” button to select “Clock” and press the “ENTER/ ” button to adjust.
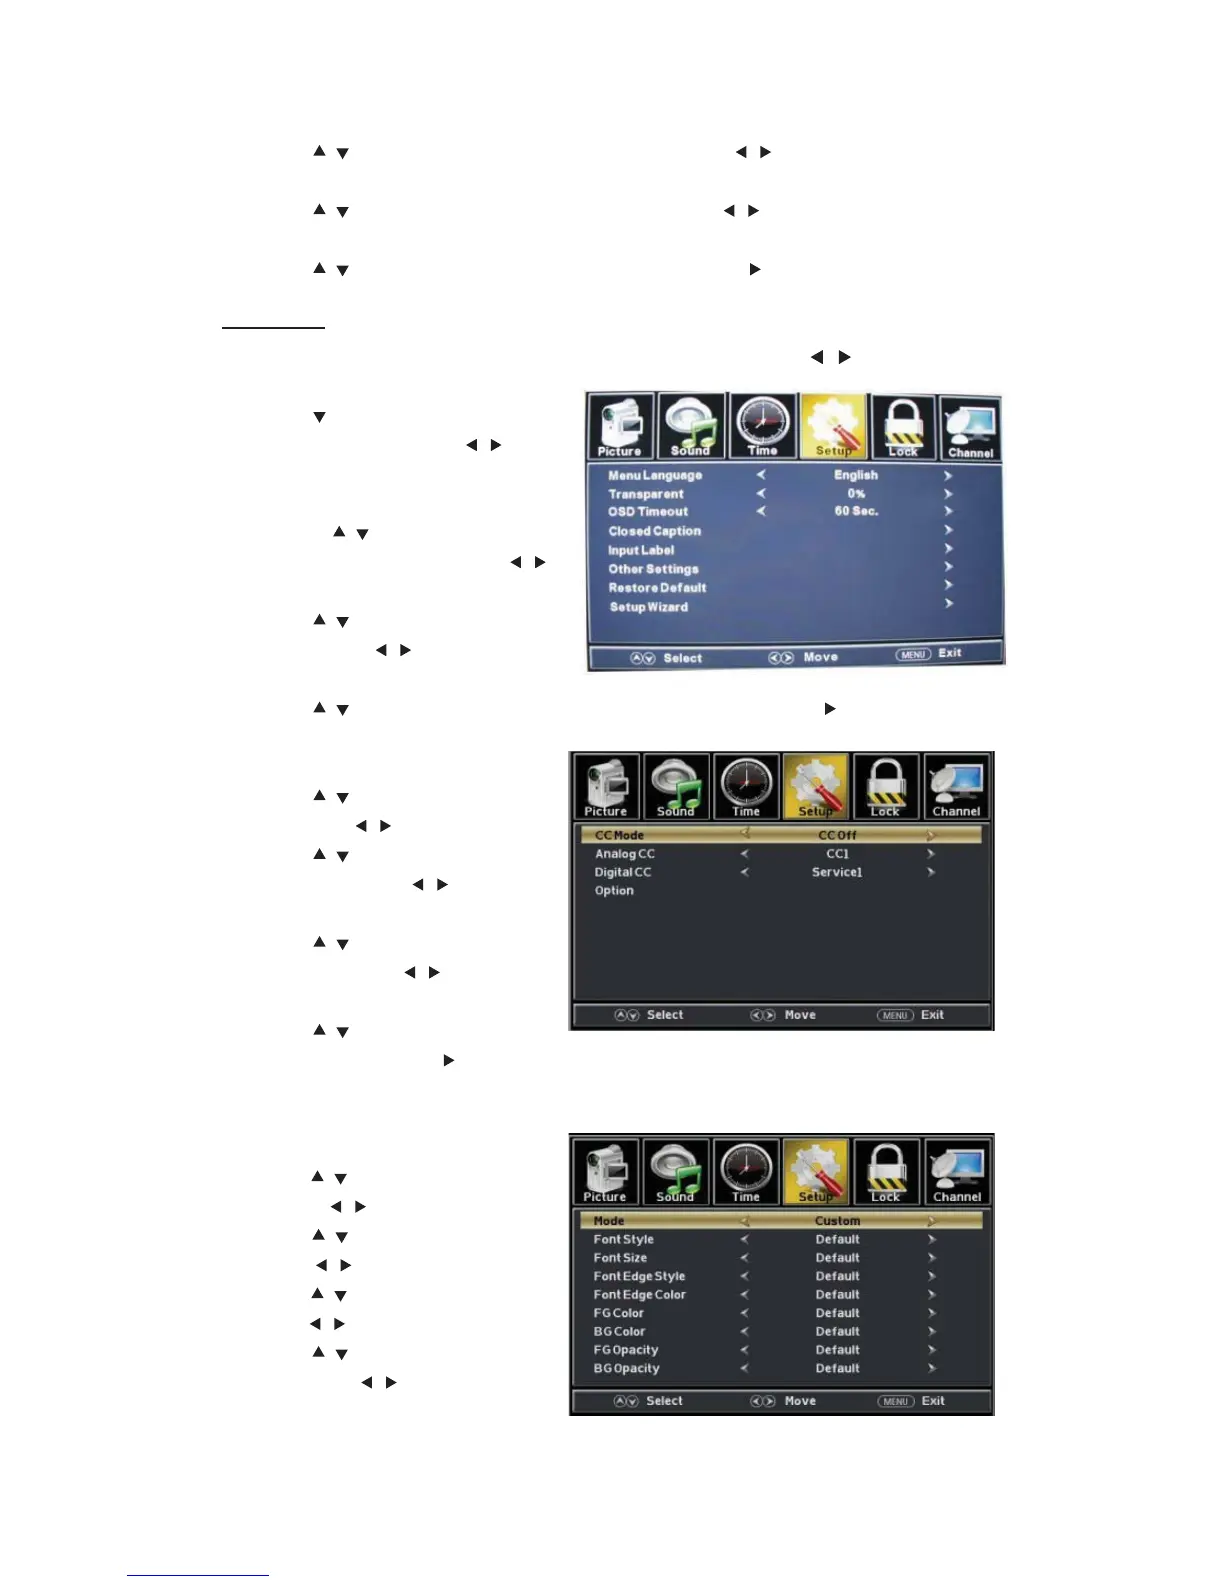
SETUP
Press the “MENU” button to enter the OSD menu .Then press “
/ ” button to select
the “Setup” menu.
1. Press “ ” button to select “Menu
Language” and press the “
/ ”
button to select the OSD language
which you desire.
2. Press “
/ ” button to elect
“Transparent” and press the “
/ ”
button to select.
3. Press “
/ ” button to select “OSD
Timeout” the “
/ ” button to adjust
OSD timeout.
4. Press “
/ ” button to select “Closed Caption” and press the “ENTER/ ” button to enter
sub-menu.
a. Press “
/ ” button to select “CC
Mode” the “
/ ” button to adjust.
b. Press “
/ ” button to select
“Analog CC ” the “
/ ” button to
adjust.
c. Press “
/ ” button to select
“Digital CC” the “
/ ” button to
adjust.
d. Press “
/ ” button to select
“Option” the “ENTER/
” button to enter sub-menu.
Note:The above settings c and d are only for DTV.
Note:The option is for setting the digital closed captioning.
(a). Press “
/ ” b
utton to select
“Mode” the “
/ ” button to adjust.
(b). Press “
/ ” button to select “Font
Style” the “
/ ” button to adjust.
(c). Press “
/ ” button to select “Font
Size” the “
/ ” button to adjust.
(d). Press “
/ ” button to select “Font
Edge Style” the “
/ ” button to
adjust.
01
 Loading...