4
5
Before the assembly, please check to make sure that you have all parts listed
on the Parts List.
For more details about the assembly, please refer to the video on the prod-
uct listing page. Please contact our support team whenever you need help.
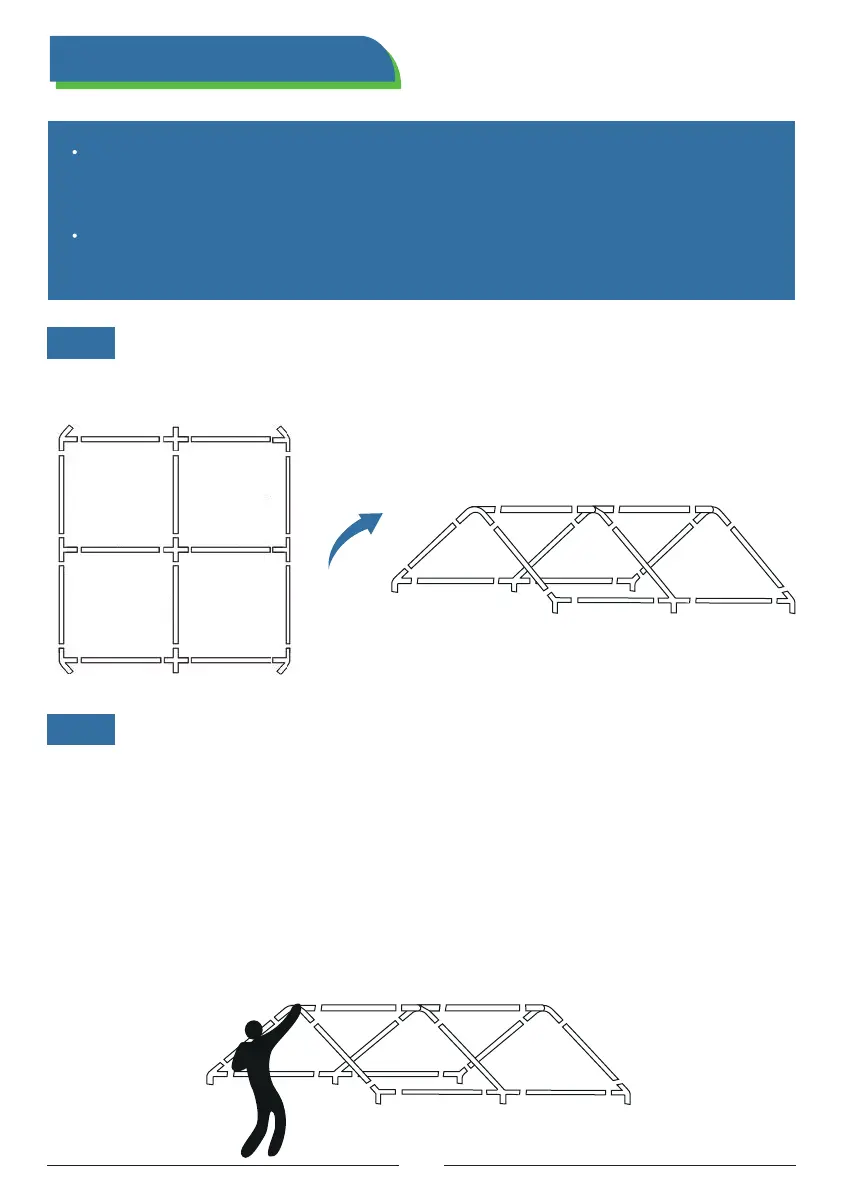
Step 1 Layout and form the top frame with the poles (6 x #1 & 6 x #2) and the
connectors (6 x #A & 3 x #B).
Step 2 Start assembling the mainframe.
A
A
A
A
A
A
B
B
B
2
2
2
2
2
2
1
1 1
1 1
1
A
A
A
A
A
AB
B
1 1
1
1
1
2
2
2
2
2
2
1
B
On one side, attach the poles (1 x #3, 1 x #3A, and 1 x #4) to the
connectors (#A & #B) on the top frame and lift the structure.
a)
On the other side, attach the poles (1 x #3, 1 x #3A, and 1 x #4) to
the connectors (#A & #B) on the top frame.
b)
Secure the mainframe by connecting 4 x poles (#1) with the poles
(#3, #3A, and #4) at the bottom.
c)
Assembly

 Loading...