16 17
QUIETKAT APEX OWNER'S MANUAL QUIETKAT OWNER'S MANUAL
TO REMOVE THE REAR WHEEL
TO INSTALL THE REAR WHEEL
Loosen the 4x M8 dropout pinch bolts with a 6mm hex
tool until you can turn them by hand.
Insert the wheel into the dropouts ensuring that the
brake rotor is between the brake pads.
Use a 4mm hex tool to loosen (counter-clockwise) the
dropout tensioning bolt.
Once the axle is in the dropout, push down firmly on the
rear of the bike or pull the wheel securely up into the
dropouts (if in bike stand) to ensure that the axle is fully
seated inside the dropout. Then…
Alternate left and right side every 4 - 6 full rotations to
ensure the hub doesn’t get cammed in the dropout.
Using the 19mm box wrench, loosen the axle nuts. The
wheel should easily remove from the dropouts.
Once the chain is slack, stop loosening the dropout
tensioning bolt.
Note: on hub drive models, it’s easier to unplug the motor cable
before install/removal of the wheel. Always remove the battery
before unplugging!
Note: on mid drive models, you will need to remove the torque
arm bolt with a 3mm hex tool before the axle will come free of
the dropout.
Note: on hub drive models the motor power cable should be
exiting the axle towards the bottom rear of the bike.
For Mid Drives: Align the torque arm washer so the M5 torque
arm bolt and corresponding dropout threads are concentric.
Tighten the torque arm bolt with a 3mm hex tool to 7Nm both
sides.
For Hub Drives: Ensure you have the proper washer orientation.
Drive side: Tabbed washer between frame and hub on inside
of frame.
Non drive side: Tabbed washer between frame and axle nut
on outside of frame.
a.
b.
a.
a.
b.
i.
ii.
1.
1.
2.
2.
3.
5.
4.
Tighten the axle nuts with a 19mm box wrench. Torque
to 30Nm.
INSTALL REAR WHEEL CONTINUED
Using a 4mm hex tool, loosen (counter-clockwise) the
dropout tensioning bolt until you can place the chain on the
rear cog.
Once you have the chain on, tighten (clockwise) the
dropout tensioning bolt with the 4mm hex tool. Again
alternating sides every 1 or 2 full rotations. The chain
should feel slightly more slack than a traditional single
speed bike chain.
Ensure the dropout is equally adjusted by matching the
measurement on the right side of the dropout to the left.
Using a 6mm hex tool, tighten down the 4x pinch bolts
alternating until all 4 are torqued to 20Nm.
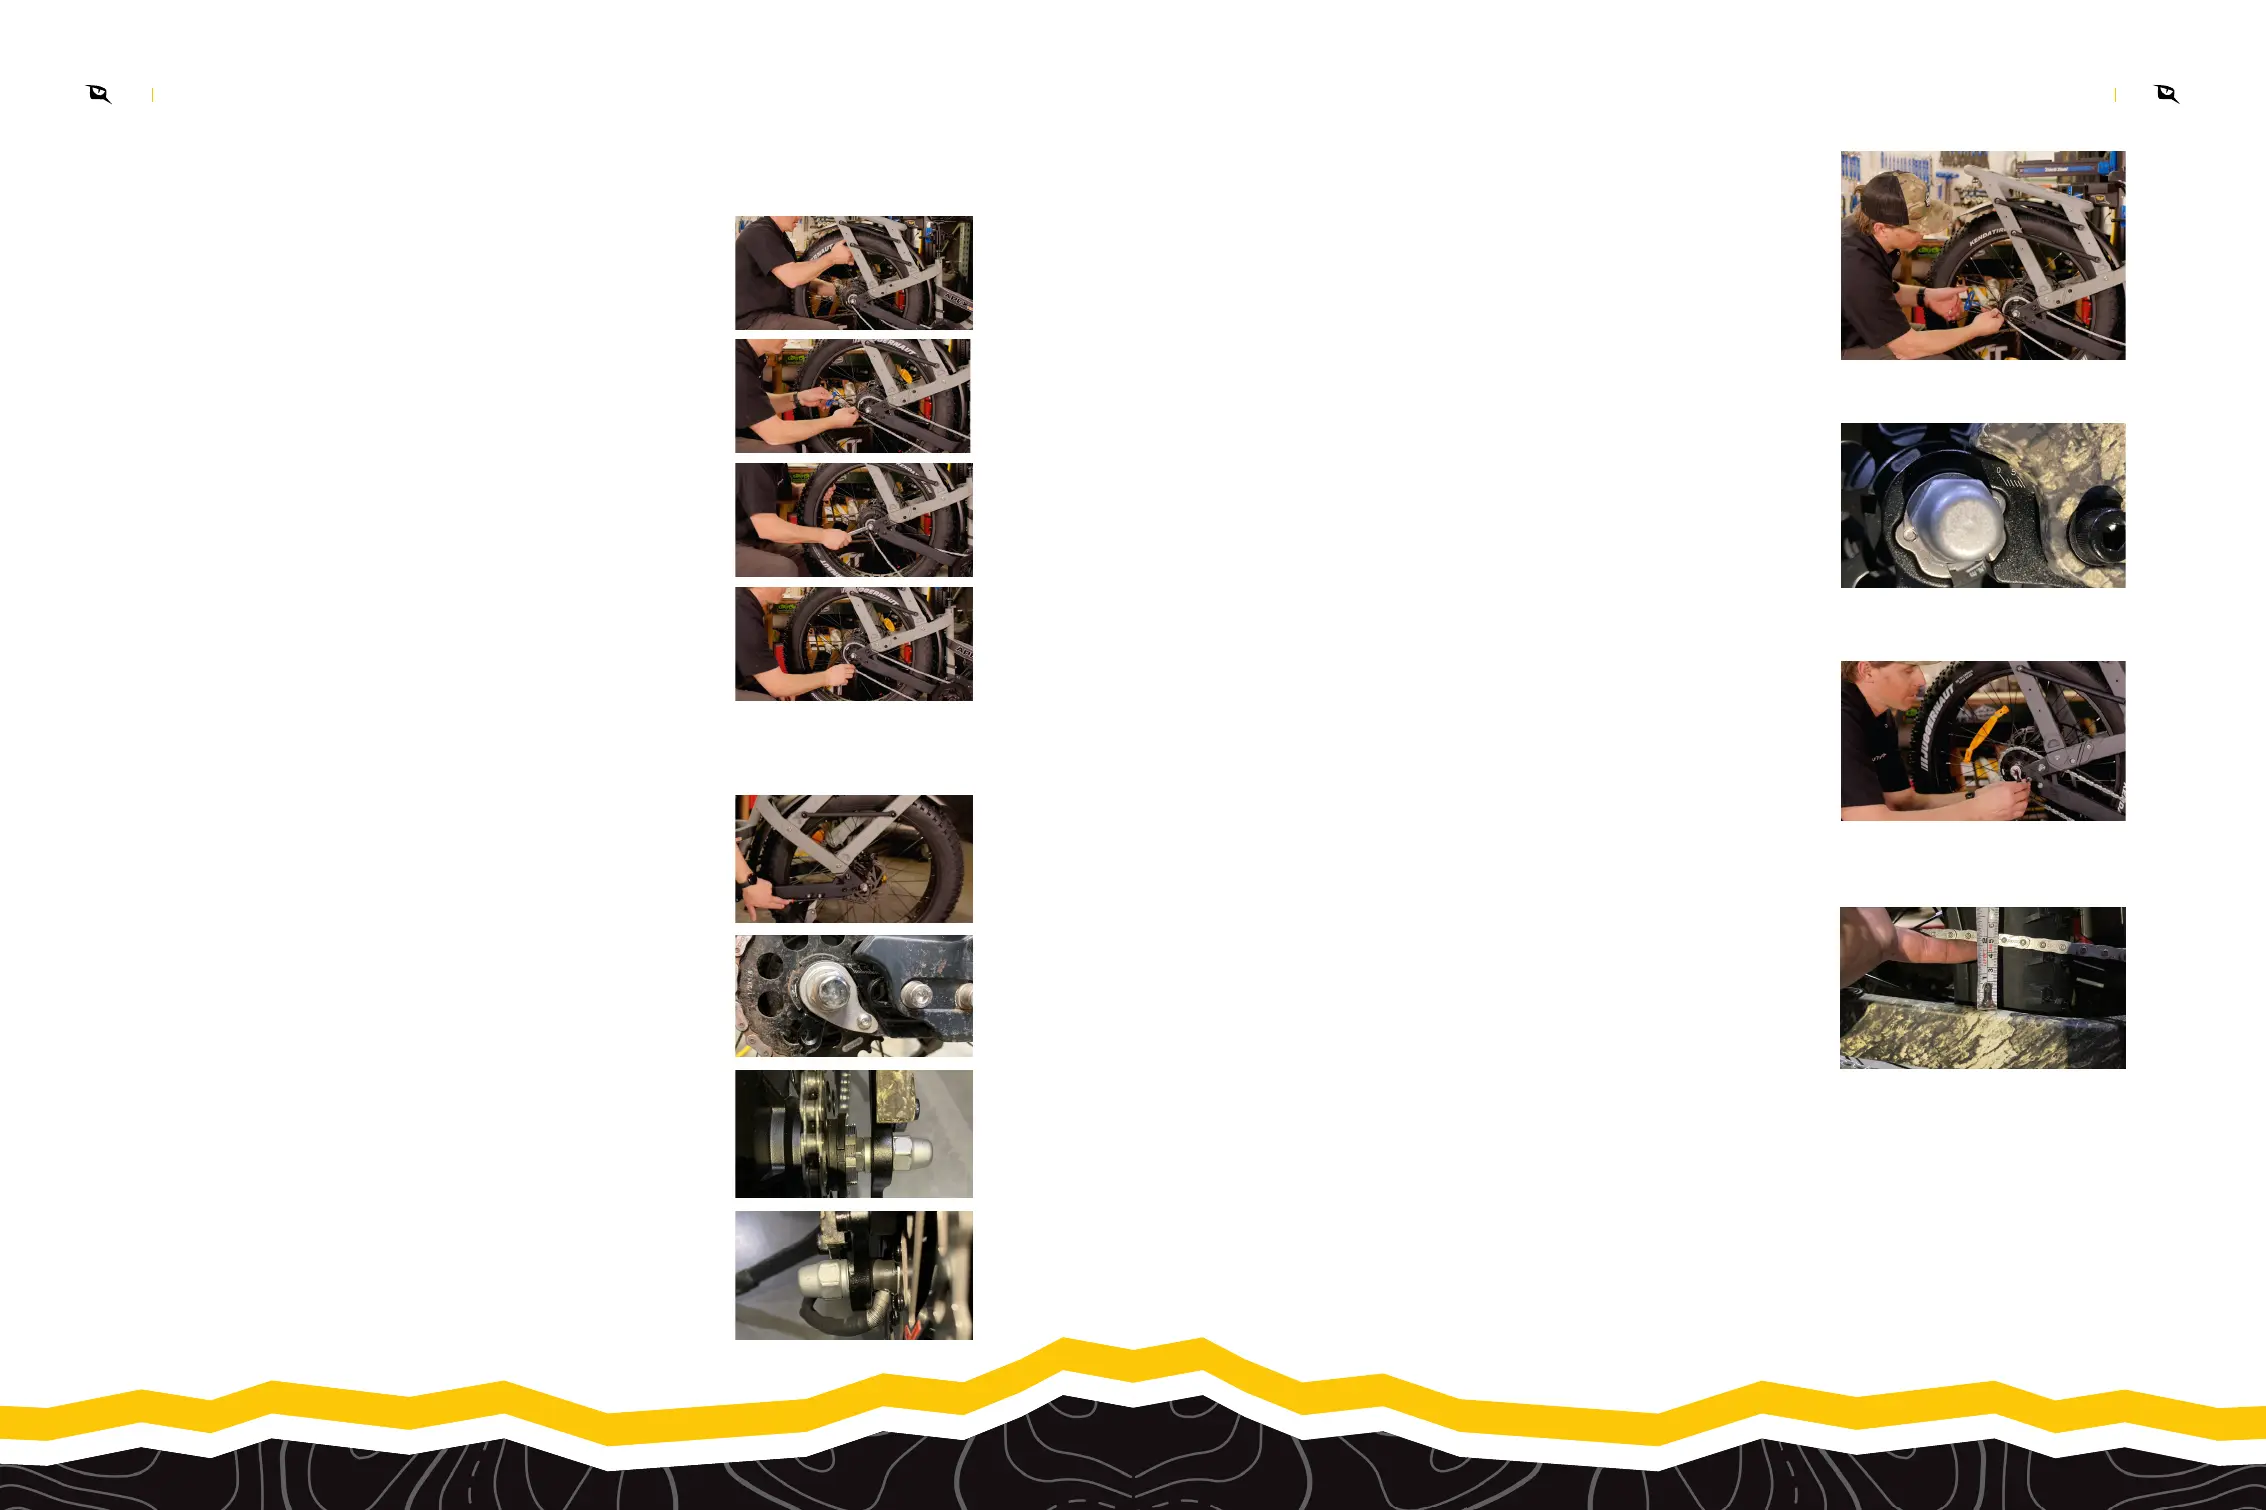
Using a tape measure or ruler, apply a 1kg force to the
midpoint between the cogs and measure the total travel
up + down from the same spot on the chain. Once this
distance measures 12-22mm, the chain is properly
tensioned. If you fall outside of this range, repeat steps
5-8 until you fall within this range.
Note: do not overtighten or you can damage the axle threads.
Be careful when tightening to ensure the axle stays parallel to
the ground. Place some weight over the handlebars and press
down while tightening the nuts to ensure the axle stays level and
straight.
Note: there are numbered tic marks on the dropout to aid this
process.
Note: as you tighten down the pinch bolts, the chain will get
tighter. This is expected.
WARNING: an overtight or too loose of a chain can cause
damage and premature wear. And will void your warranty.
a.
a.
a.
a.
a.
3.
4.
5.
6.
7.
8.
 Loading...