20
To further increase the eciency of recording “Incidents”, we have designed extra
funconality to the interface, which automacally sets up the details of the incident for you.
Before the system automacally sets up and stores details of the incident, the cameras
the incident was caught upon need to be added to the les in the video playback
secon.
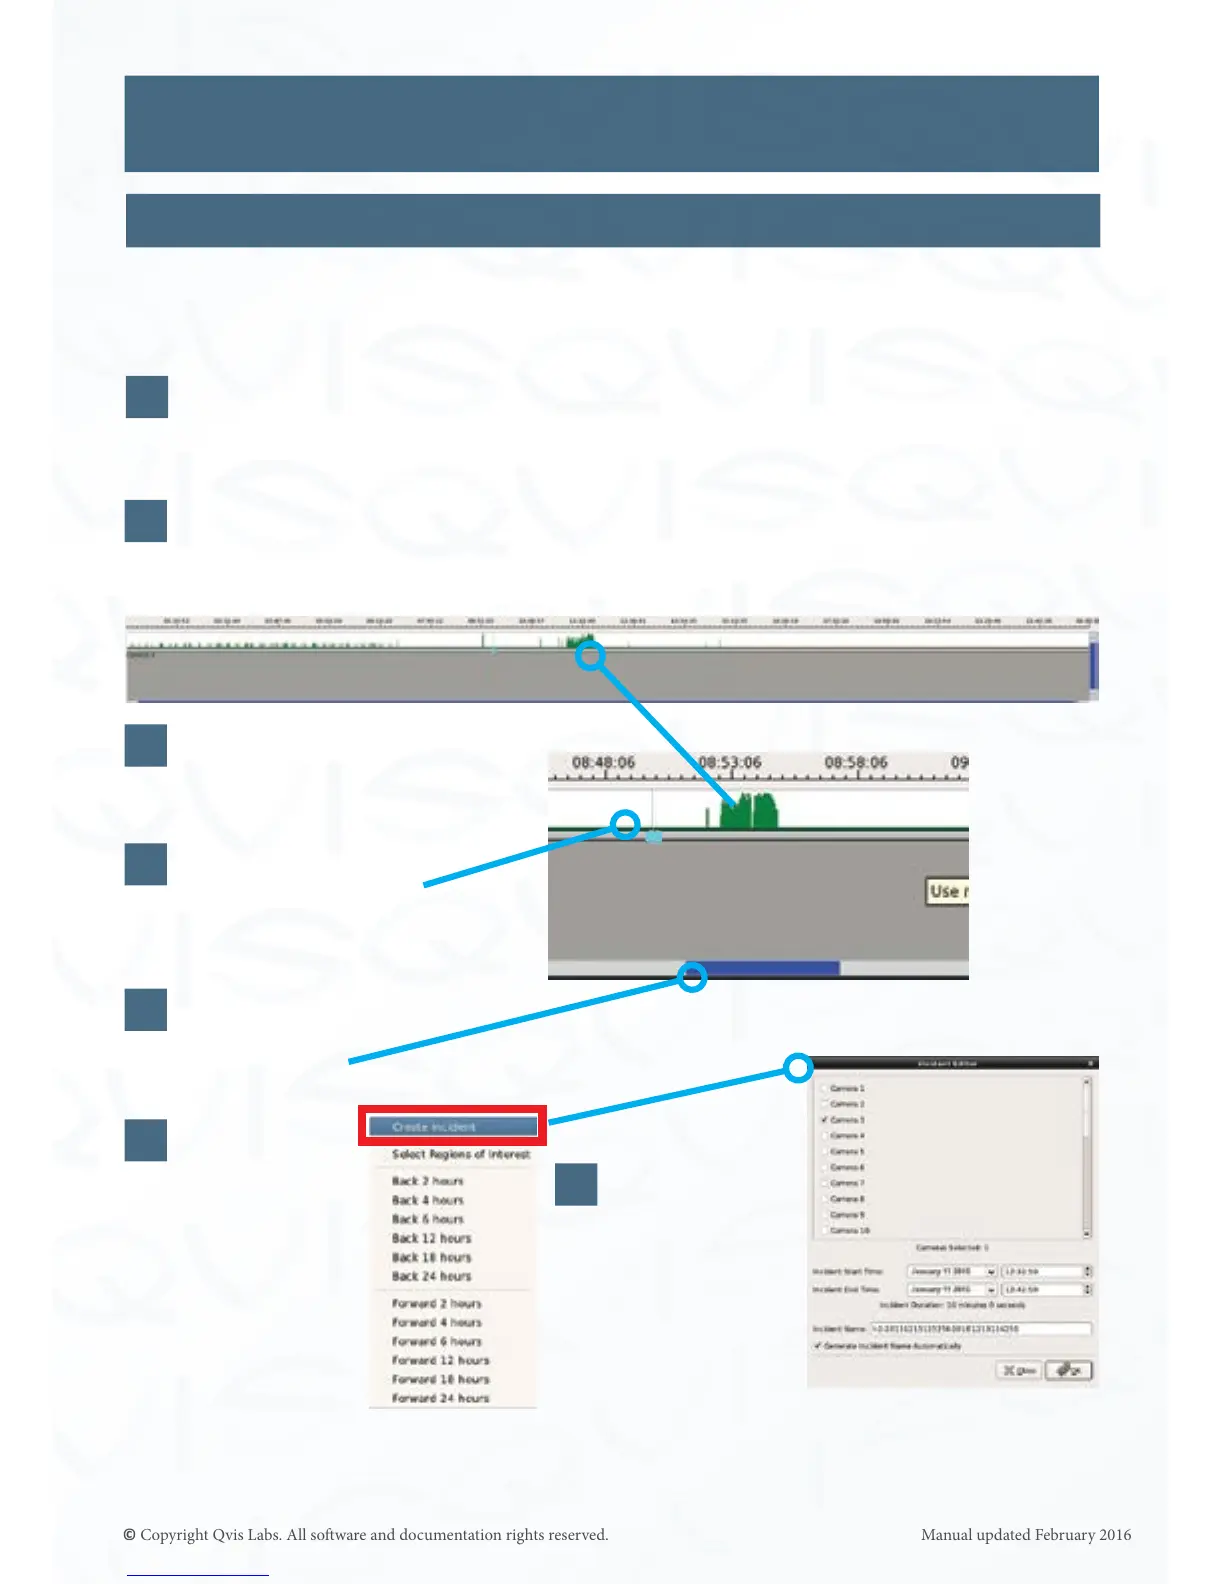
Then on the me line nd the incident by using the mouse wheel to zoom into the
me line and centre the le and right scroll bar on the incident.
Use the mouse wheel to
zoom into the incident.
Centre the le and
right scroll bar on
to the incident.
Next right click
either on the
me line secon
or the camera’s
le in the
video playback
secon. An
opons list will
appear, select
‘Create Incident’
(highlighted by
the red box).
Move the me line’s
blue marker to a point
before the incident.
The incident
editor will
appear with
all the incident
details already
setup.
Video Playback Interface
Incident Records: Auto Setup
1
2
3
4
5
6
7
It will automacally set the incident start and
end mes for a 10 minute period (you can
adjust this me frame by the second).
 Loading...