3
2. Plug the supplied adapter’s 3-pin power
plug into the jack on the back of the
charger. Plug the other end of the adapter
into a standard AC outlet.
Caution:
The supplied AC adapter
supplies 11 volts AC at 0.1 A and 5
volts AC at 2A, and its plug fits the
charger’s
AC 11V 0.1A
and
5V 2A
jack. Using
an adapter that does not meet these specifi-
cations could damage the charger or the
adapter.
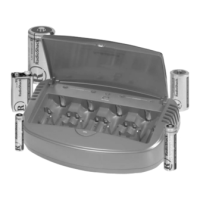
3. To discharge AAA, AA, C, or D batteries,
set
CHARGE/DISCHARGE
to
DISCHARGE
.
The green indicator(s) light. When the
batteries are fully discharged, the green
indicator(s) turn off.
Notes:
• You can discharge/charge a pair of
AAA, AA, C or D batteries while the 9-
volt battery chambers are empty. You
can discharge/charge different types of
batteries (AA and D, for example) in
the left and right chambers, as long as
both batteries in each chamber are the
same type.
• You cannot discharge 9V batteries.
4. To charge the inserted batteries, set
CHARGE/DISCHARGE
to
CHARGE
. The
red indicator(s) light. When AAA, AA, C,
or D batteries are fully charged, the red
indicator(s) turn off.
The 9-volt charging channel has no auto-
matic turn off feature. Be sure you do not
exceed the times listed in “Charging
Time” on Page 4, or the batteries’ capaci-
ties could be reduced.
5. When you finish, unplug the AC adapter
from the AC outlet, then remove the bat-
teries from the charger.
Warning:
To prevent damage to your charger
and the risk of shock, always unplug the AC
adapter from the AC outlet before unplugging
it from the charger.
Discharging Time
!
Type
Discharging
Current (mA)
Capacity
(mAh)
Estimated
Discharging
Time (Hrs)
Ni-Cd
C/D 400 4500 12.4
3000 8.2
2500 7
1800 4.5
1600 4
1400 3.5
AA 1000 2.5
800 2
600 1.5
AAA 300 0.8
250 0.7
180 0.5
9V Not Applicable
Ni-MH
C/D 400 7000 19.2
4500 12.4
3000 8.2
2200 6
AA 1600 4
1500 3.8
1300 3.3
1100 2.8
AAA 650 1.7
550 1.4
450 1.2
9V Not Applicable
23-425.fm Page 3 Monday, July 10, 2000 8:04 AM
 Loading...