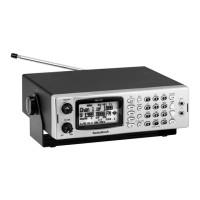
58
Trunk Scanning
Advanced Programming
EDACS Talk Group ID Range Search
When your scanner searches EDACS talk group IDs, the scanner can search
within a range you set for agency or fleet listings. For example, if you want
to search within the 01 agency, while in Trucking Pause Mode press 0, 1,
•/DELAY then SCAN. “01----“ appears during scan. Or if you want to search
within the 01 agency and 01 fleet, while in trunking Pause Mode press 0, 1,
•/DELAY, 0, 1, then SCAN.
To stop the ID range search, press SCAN while talk group ID is not active.
Advanced Programming
Transferring Data To or From another Scanner or PC
You can clone your scanner by transferring the programmed data to or from
another PRO-160 scanner using a connecting cable. You can also upload or
download programmed data from a PC through wired programming.
Cloning Your Scanner
You can clone all the frequencies, trunking talk groups, and fleet maps
programmed in your PRO-160 to another PRO-160 or PRO-162 using an
interface cable with 1/8-inch phone plugs on both ends.
1. Make sure the scanners are turned off and then plug the cable into each
scanner’s PC/IF jack.
2. Turn on both scanners. “Clone Mode [UP] to send” appears.
3. Press S. “Confirm Send Data? [1] to Yes [CL] to No” appears.
4. Press 1 to send the data to the other unit or press CL key to cancel the
operation.
5. When the data transfer is completed, “Clone Mode Finished” appears. If the
data transfer is not successful, “Clone Mode Error” appears.
6. After the clone operation is complete, remove the cable, turn both units
off and then on again.
Wired Programming
You can transfer programming data to your scanner using your PC and an
optional interface cable and software (available at your local RadioShack or
www.radioshack.com).
1. Make sure your scanner is turned off.
2. Connect the interface cable to your computer and then connect the
other end of the cable to the PC/IF jack on the front of the scanner.
3. Install the software to your computer and run the program.
4. To set up the program, click on Tools, select Configuration, and select
PRO-160 (if necessary).
5. Turn the scanner on. The scanner automatically goes into the wired
Programming Mode and receives the data from the PC. “Wired
Programming” appears.
 Loading...