13
Use the power tool according to the manufacturer’s instructions only.
3. Noise level and vibration parameters.
Sound pressure: Lp
A
= 71.28 dB(A) K=3 dB(A)
Sound power: Lw
A
= 82.28 dB(A) K=3 dB(A)
Vibration acceleration: a
h
= 1.225 m/s
2
< 2,5 m/s
2
K=1.5 m/s
2
.
4. Preparation for operation.
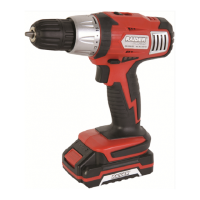
4.1. Inserting and removing the battery.
Set the direction selector switch (8) in middle position.
Push buttons (7) and slide the battery (5).
Insert charged battery (5) into the handle holder. You should hear when the lock buttons (6) snap.
4.2. Charging the battery.
Cordless drill is supplied with partially charged battery. Charge the battery full before use. Charging the
battery should be carried out in temperature between 4°C to 40°C. New battery, or one that have not been
used for a long time, will reach full eciency after approximately 5 charge/discharge cycles.
The mains voltage must match the voltage on the charger rating plate.
Always check technical condition of the charger, charging station and power cord before starting to
charge.
When charging the battery, use only the charger and the charging station supplied with the drill.
Do not expose the charger and charging station to rain or splashing.
4.2.1. Set the direction selector switch (8) in middle position.
4.2.2. Remove the battery (5) from the drill.
4.2.3. Insert the battery (5) into the socket of the charging station (10).
4.2.4. Connect charger power cord to the socket of the charging station.
4.2.5. Connect the charger to mains socket (220V).
Depending on battery discharge level, the battery will be charged after 3-5 hours.
4.2.6. Disconnect power supply before removing the battery from the charger. Avoid consecutive
short chargings. Do not charge the battery after short use of the drill. The battery and the charger heat up
during charging. This is normal. Signicant decrease of the period between chargings indicates the battery
is used up and should be replaced.
5. Operation and settings. Switching on. Switching o.
5.1. Switching on - press the switch button (7).
5.2. Switching o - release the switch button (7).
5.3. Rotational speed control.
Screwing or drilling speed can be controlled during operation by increasing or decreasing pressure on
the switch button (7). Speed control enables soft start, which prevents drill slip when drilling in gypsum or
glaze and helps to control the operation when screwing and unscrewing.
5.4. Overload clutch. Torque control.
Setting the ring (2) in given position causes permanent setting of the clutch to specied torque. When
the set torque is reached, overload clutch releases automatically. It prevents screwing screws t deep or
damaging the drill.
Dierent screws and materials require dierent torque to be applied.
The bigger number corresponding to given position, the bigger the torque.
Set the ring (2) to specied torque.
Always start operation with low torque.
Increase the torque gradually until appropriate value is set.
Use higher settings to unscrew screws.
When drilling chooses settings marked with the drill symbol. When this setting is set, the torque is the
greatest.
Knowledge how to choose appropriate settings comes with practice.
Setting the ring in the drilling position deactivates the overload clutch.
5.6. Change of gear.
 Loading...