Step 4: Connecting the Gateway to TTN
The Gateway EUI can be found via the Overview page in the Web UI.
Go to your TTN console (you need to register an account first) and register your
new gateway using the link below:
https://console.thethingsnetwork.org/gateways/register
Make sure to select the “I’m using the legacy packet forwarder” option, before
entering the Gateway EUI.
Select your Frequency Plan depending on your location. This should populate the
Router field. Optionally you can choose to enter the Gateway coordinates in the
map’s upper right corner and select if the gateway is indoor or outdoor via the
Antenna placement field below the map.
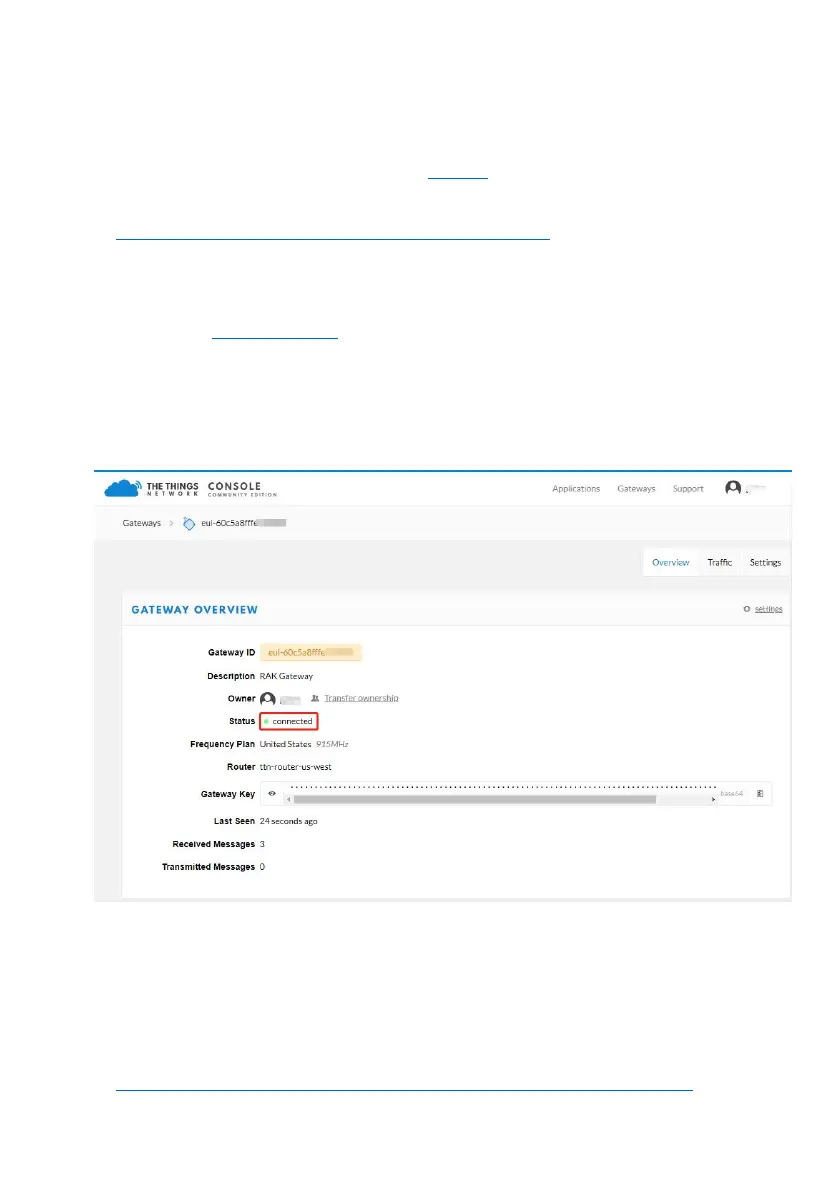
Upon successful registration you should see the following screen:
Your Gateway should now be registered with TTN and you should be able to
forward LoRa packets.
Note: By Default the Gateway is set to connect to TTN (using it as its LoRa
Network server). For detailed information about advanced configuration
options refer to the Configuration Guide via the link:
https://www.rakwireless.com/en/download/LoRa/DIY-Gateway-RAK7249
 Loading...
