COMPRESSOR OPERATION
WARNING: Bursting hazard! Do not overinflate any inflatable article. Do not
exceed the manufacturer’s recommended inflation pressure. Most tires are
properly inflated between 24-35 PSI. Some truck & bicycle tires require 40 PSI
or more.
WARNING: Do not operate the air compressor around flammable materials or in an
area where flammable fumes are present.
Each operation shall be within 4 to 10 minutes. Allow the compressor to cool down
between each continuous operation.
To inflate plastic inflatables (Balls, air mattresses, rubber rafts, etc.):
Remove the valve cap from the inflatable valve stem.
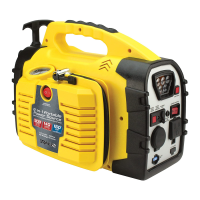
Connect the compressor air-hose nozzle (A) onto or into the inflatable valve
stem (B) and turn the locking thumb-lever (C) to the down position. Connect the
appropriate valve stem adapter (D) onto the air-hose nozzle (if needed).
Ensure that the air-hose nozzle and the valve stem adapter (if used) are properly
seated onto/into the inflatable valve stem.
Insert the air-hose nozzle with the valve stem adapter (if needed) into or onto the
inflatable air valve stem as far as practical.
Press the compressor power switch (E) to the On [ I ] position.
Monitor the pressure on the compressor air-pressure gauge (F). When the desired
pressure is reached, press the compressor power switch to the Off [ O ] position.
Unlock the air-hose nozzle thumb-lever to the up position.
Recap the inflatable air valve stem.
Stow the air-hose back into the device storage compartment (G).
To inflate tires:
Remove the valve cap from the tire air valve stem.
Ensure that the air-hose nozzle locking thumb-lever is in the up position. If
necessary, use the valve stem adaptor.
Insert the compressor air-hose nozzle (A) onto the tire air valve stem (B), make
sure that the nozzle is pushed onto the tire stem as far as possible and is seated
properly. Press down the locking-thumb lever (C) to engage as shown in the
illustration.
Press the compressor power switch (E) to the On [ I ] position.
In the event that the tire is completely flat, raise the vehicle using a recommended
rated jack and jack stands before inflating the tire.
Monitor pressure on the compressor air-pressure gauge (F). It is recommended to
use a separate air gauge to check the actual tire inflation pressure.
Press the compressor power switch Off [ O ] when the desired tire air pressure is
reached.
Disconnect the air-hose nozzle from the tire valve stem by lifting the locking thumb-lever
to the Up position. (Also, remove any air-hose nozzle adapter, if any).
Recap the tire air valve stem.
Stow the air-hose back into the device storage compartment (G).
RECHARGING OPERATION
WARNING: Do not charge the device on a boat, boat ramp or docks since the
electrical cords and outlets used for charging could cause severe electrical shock
if they get wet.
CAUTION: Make sure that any electrical outlet, located in a potentially wet or
moist area, and is to be used to charge the device, is protected by a Ground Fault
Interrupt switch.
CAUTION: Do not overcharge this unit. Overcharging may result in damage to the unit.
CAUTION: Do not recharge device near flammable materials or any location
which accumulate flammable fumes. Do not smoke, use matches, lighters or open
flame near the device when/during recharging. Recharge the device in a clear,
unobstructed open area.
NOTE: This device may arrive partially charged from the manufacturer. It is
recommended to fully charge the device immediately after purchase and before
using for the first time.
NOTE: Ensure both booster clamps (positive & negative) are placed in their storage
holders when not in use and during the portable power source recharging.
NOTE: Do not recharge device battery with damaged chargers, replace them
immediately. Use only the provided chargers and cables. Unauthorized parts may
damage the device.
• When using the 120 Volt AC or 12 Volt DC charger, pull on the plug and never
pull on the cord when disconnecting.
• For proper and safe operation of this device, do not place anything into the 12
Volt DC power socket except the plug of the 12 Volt DC accessory to be used.
• Do not place anything into the device’s charging port except the provided
plug from the charger unit.
• It is recommended that the device is in an upright position while charging. It is
important to know that the 120 Volt AC power unit (charger) is intended to be
correctly oriented in a vertical or floor mount position during connection to a
120 Volt AC receptacle.
• Fully recharge the device when the Red LED is illuminating.
• Ensure that the device power switches are in the Off ( ) positions.
• The charging LED indicator will be illuminated while charging. When charging
the red LED will change color to amber (mid-level charge) and finally to green
(fully charged). This light will not go out until the charging plug is removed.
• Do not charge device for more than 48 hours continuously
• Allow one (1) hour cool-down period before recharging.
CHARGING WITH 120 VOLT AC CHARGER:
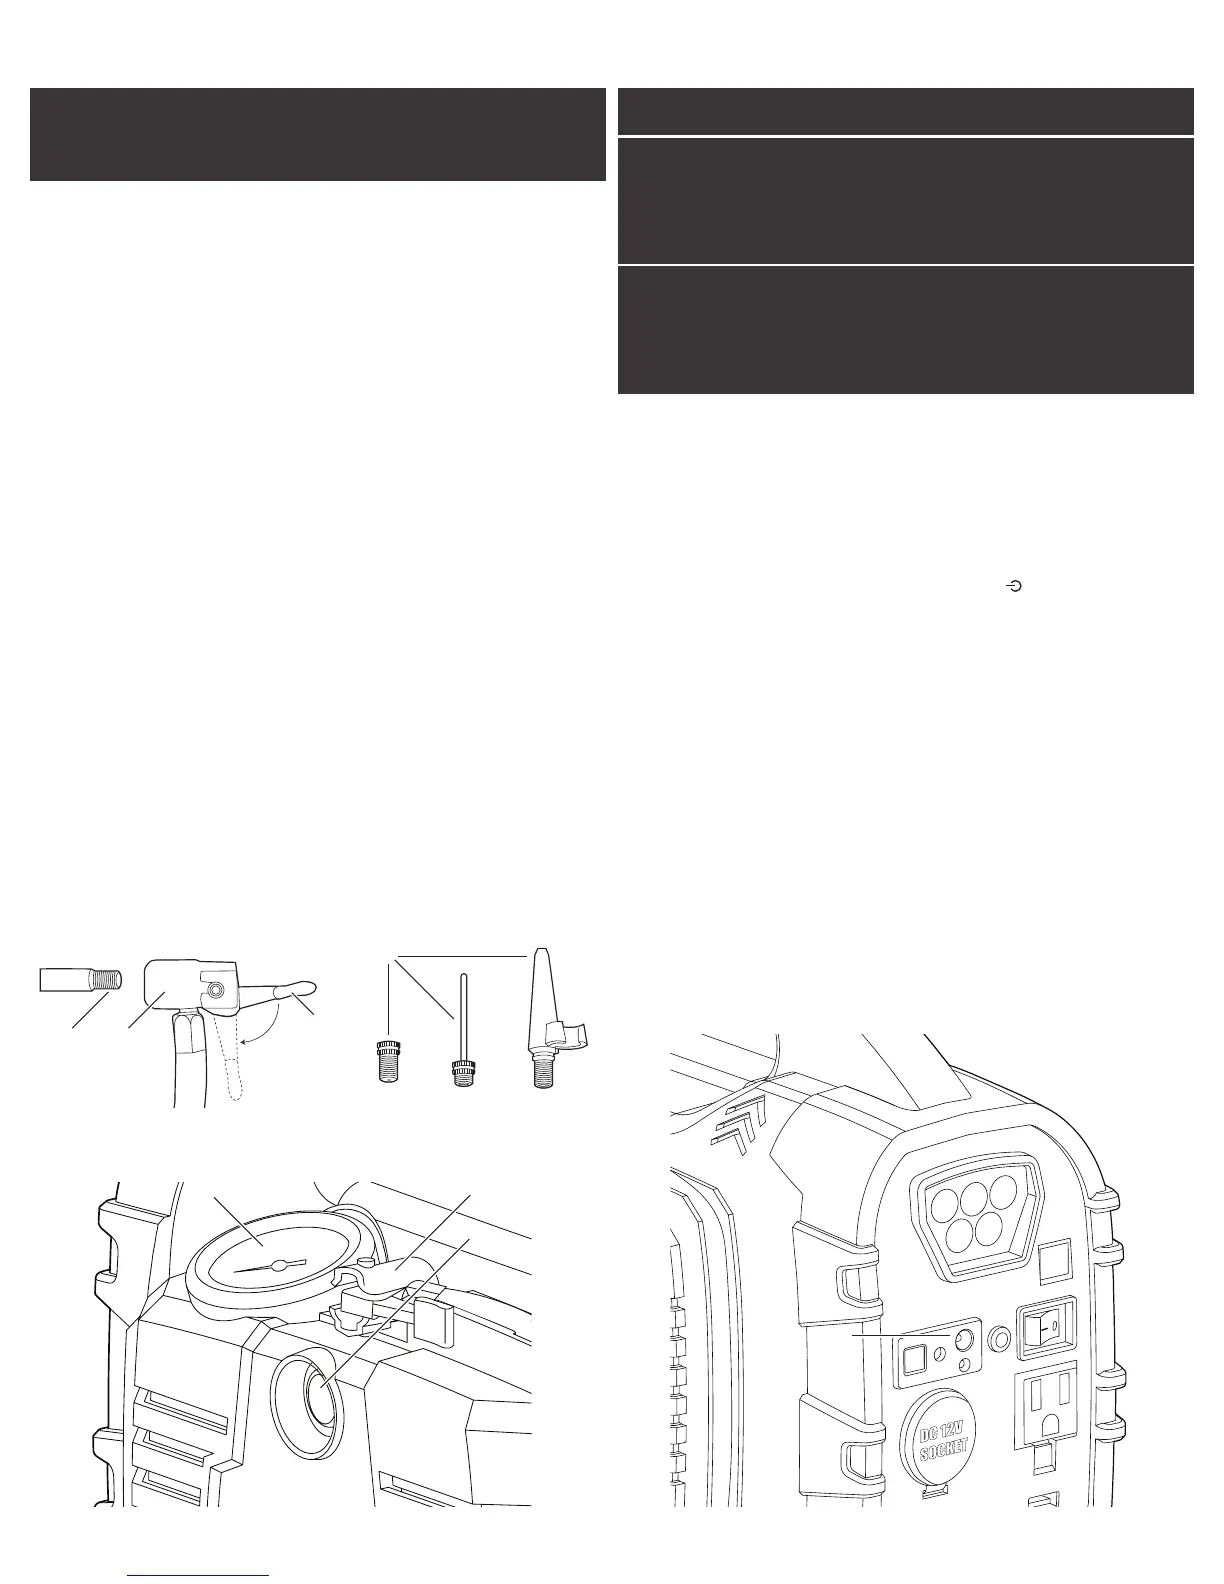
• Insert the 120 Volt AC charger plug into the device charging port (A).
• Insert the 120 Volt AC charger transformer plug into a 120 Volt AC receptacle.
• Fully charge the unit according to the following:
Initial & first time charge: 24 hours continuously.
Recharge or between each use: 15 hours continuously.
• When charging is complete unplug the 120 Volt AC charger transformer plug first
and then the 120 Volt AC charger plug from the charging port on the device.
RECHARGING WITH 12 VOLT DC CHARGER:
• Insert the 12 Volt DC charger plug into the device charging port (A).
• Insert the 12 Volt DC charger accessory plug into the vehicle cigarette lighter
or 12 Volt DC accessory socket.
• Fully charge the unit for 8 hours continuously, while vehicle engine is running.
• When charging is complete unplug the 12 Volt DC charger accessory plug first
and then the 12 Volt DC charger plug from the charging port on the device.
E
G
F
C
B A
Small diameter
to regular size
stem
Ball
stem
Inflatables
stem
D
DC 12V
SOCKET
A
 Loading...