EasyManua.ls Logo

Ranein RA65L - User Manual

Ranein RA65L
16 pages
Print Icon
To Next Page IconTo Next Page
Loading...
RV TANKLESS WATER HEATER
Instruction For Installation And Use
Model:RA65L
Scan QR codeto
start a chat
Question and Answer IconNeed help?

Do you have a question about the Ranein RA65L and is the answer not in the manual?

Summary

Warranty Information

Limited Warranty

Details Ranein's one-year warranty for customers purchasing via Amazon or the official website.

Warranty Period

Specifies that the warranty begins from the original purchaser's date of purchase.

Tips for Product Issues

Advice on providing pictures and videos for problem confirmation and exchange services.

Customer Support Channels

Provides contact email and website for customer support.

Safety Warnings and Precautions

Actions if Gas is Smelled

Immediate steps to take if you smell gas to prevent fire or explosion.

Explanation of Safety Symbols

Defines DANGER, WARNING, and CAUTION symbols used in the manual.

Critical Safety Instructions

Essential guidelines for safe operation, including suffocation and fire hazards.

Operator Responsibilities

Outlines the operator's duties for safe use, maintenance, and health considerations.

Safety During Driving

Checks and procedures to ensure safety when the RV is in motion.

Product Overview and Features

Product Overview Diagram

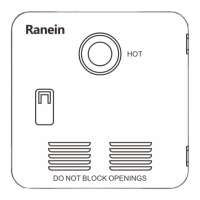
Visual representation of the water heater's components and access door.

Key Product Features

Details safety devices like flame monitoring, anti-freeze, and over-current protection.

Basic Functional Description

Explains how the tankless heater works in RVs for efficient heating.

Package Contents and Specifications

Items Included in the Box

Lists all components provided with the water heater.

Technical Product Specifications

Provides detailed technical data for the appliance.

Required Tools for Installation

Lists tools that are not included but necessary for installation.

Installation Guide

General Installation Safety Rules

Safety precautions to follow during the installation process.

Preparing the Cutout Opening

Instructions for creating or verifying the opening for the appliance.

Handling Existing Cutouts

Guidance for fitting the unit into a pre-existing opening.

Utility Connections

Gas Connection Procedure

Details on how to connect the gas supply to the unit.

Electrical Wiring Connections

Instructions for connecting the 12V DC power supply.

Water Plumbing Connections

Steps for connecting the cold and hot water lines.

Plumbing and Wiring Details

Gas Plumbing Requirements

Specifics on gas line requirements, pressure, and fittings.

Electrical Wiring Safety

Guidelines and warnings for safe electrical hookup and wire sizing.

Water Plumbing Specifications

Details on water pressure requirements and connection types.

Wall Controller Installation Steps

Instructions for mounting the wall-mounted control unit.

Water Heater Assembly

Preparing the Water Heater Unit

Steps for removing the unit from packaging and preparing connectors.

Water Heater Placement and Sealing

Guidance on positioning the heater and applying sealing materials.

Connecting Water and Gas Lines

Instructions for connecting the water and gas service lines to the unit.

Final Installation Steps

Electrical Connection Procedure

Finalizing the power connections to the water heater.

Door Frame Installation

Steps for attaching and opening the appliance door assembly.

Securing the Water Heater Unit

Instructions for fastening the appliance to the RV wall.

Wall Controller Mounting

Wall Controller Installation Steps

Detailed steps for disassembling, mounting, and assembling the wall controller.

Post-Installation Checks and Testing

Wiring Diagram Overview

Schematic illustrating the electrical connections of the appliance.

Gas Leak Detection

Procedure for checking gas connections for leaks using detection liquid.

Water Leak Detection

Procedure for checking water connections for leaks after turning on supply.

Functional Test Procedure

Steps to verify the appliance operates correctly after installation.

Operating the Water Heater

Controller Operation Guide

How to use the wall controller to set temperature and operate the unit.

Safe Operation Practices

Guidelines for safe use, including scald hazard prevention.

High Altitude Usage

Information regarding the appliance's performance at high altitudes.

Winterizing the Water Heater

Instructions to protect the unit from freezing temperatures.

Winterization and Storage Procedures

Manual Winterizing by Draining

Steps to drain all water from the unit for long-term storage.

Winterizing with Antifreeze Fluid

Procedure for using antifreeze fluid for winter protection.

Preparation for Storage and Transit

Guidance on preparing the RV and water heater for storage or transport.

Maintenance and Inspection

Preparing for Next Seasons Use

Steps to flush and prepare the system after storage.

Routine Inspection Schedule

Checks for gas, water, and installation integrity before seasonal use.

Pressure Safety Valve Maintenance

Procedure for testing and maintaining the pressure relief valve.

Hard Water and Decalcification

Advice on managing hard water and decalcification frequency.

Troubleshooting Common Issues

Interpreting Error Codes

Explains how error codes are displayed and how to resolve them.

Overview

The Ranein RV Tankless Water Heater, Model: RA65L, is designed exclusively for use in recreational vehicles, providing on-demand hot water by connecting to the vehicle's fresh water supply and hot water plumbing system. Unlike conventional tank water heaters that waste fuel during re-heat cycles and have limited volume output, this tankless system monitors critical sensors to regulate thermal energy over a large heat exchanger, heating incoming cold water to the desired output temperature. This creates a more valuable and energy-efficient heating system.

Usage Features:

The appliance is equipped with several safety devices and features to ensure safe and efficient operation:

  • Flame Monitoring Device: If the flame goes out, the device automatically switches off the gas supply to the burner, preventing gas leaks.
  • Anti-freeze Function: The unit has an anti-freeze device that automatically heats the water system to 32°F (0°C) when the outdoor temperature drops below freezing. It stops heating once the water temperature reaches 90°F (32°C). For this function to work, the power and gas supply must be turned on.
  • Power Positive and Negative Wires Reverse Protection: If the positive and negative connection cables are incorrectly connected, the unit will reduce its ability to protect the PCB (Printed Circuit Board).
  • Low-voltage/Over-voltage Shutdown: The appliance automatically shuts off if the voltage drops below 10V DC or rises above 17V DC, protecting internal components from electrical damage.
  • Over-current Protection: In the event of a short circuit exceeding 10 A, a fuse on the control unit activates, and the appliance switches off.
  • Hot Water Temperature Monitoring: A water over-temperature switch prevents excessively high water temperatures, safeguarding users from scalding.
  • Flue Fan Monitoring: If the flue fan fails, the gas supply to the burner is switched off, ensuring safe combustion.
  • Temperature Fluctuation Eliminator: This feature helps prevent scalding injuries by eliminating sudden temperature rises. For example, if water flow suddenly decreases to a small flow (0.4 GPM), which would typically cause a high temperature spike, the eliminator stabilizes the temperature for a comfortable bathing experience.
  • Over Pressure Protection: The appliance includes a pressure relief valve that complies with the Relief Valves for Hot Water Supply Systems standard, ANSI Z21.22, to prevent over-pressurization.

Controller Operation:

The wall controller allows users to manage the water heater settings. Before regular operation, a basic functional test should be performed each time the RV and water system are set up for use, ensuring electric, water, and gas supplies are standard.

  1. Power On: Touch the power button to turn on the appliance. The display will show the current temperature setting.
  2. Temperature Unit Switch: A touch button allows switching the temperature display between °F and °C.
  3. Temperature Adjustment: Use the touch buttons to adjust the temperature to the desired settings. The wall controller settings range from 95°F (35°C) to 124°F (51°C). The default factory setting is 108°F (42°C).

Safe Operation Guidelines:

  • Scald Hazard: Never allow infants, children, or the elderly to adjust the water temperature or be left unsupervised when using hot water. Always check the water temperature by display and hand touch before bathing or other hot water uses.
  • Water Pressure: Install an RV water regulator to the coach's inlet, operating between 35-70 PSI water pressure.
  • Temperature Variation: Be aware that there may be a variation between the temperature delivered from the appliance and the temperature at the faucet due to water conditions between seasons or the length of the pipe from the apparatus.
  • High Altitude Use: The appliance can be used at high altitudes and has been tested up to 2000ft. For prolonged use at higher altitudes, contact Ranein customer service.

Maintenance Features:

Routine Inspection:

Routine inspection is crucial for maintaining the proper operation of the appliance. The following items should be reviewed yearly or before each season:

  1. Gas and Water Systems: Inspect the gas system, water system, and installation every two years or as restricted by the RV coach manufacturer.
  2. Seals: Inspect for cracks, separation, and peeling of seals to the RV wall. Remove and re-seal as necessary (caulking or tape) between the side wall and the water heater door and ensure the unit is solidly mounted to the vehicle.
  3. Air Intake Openings: Before actively using the vehicle, pre-inspect that the air intake openings (louvers) are completely open and clear of any debris, including mud, leaves, twigs, insects, etc. Remove all obstructions to allow total airflow.
  4. Housing Interior: Open the door and verify that no debris or extraneous combustible materials are present anywhere (especially in the area of the burner and gas controls). Remove any item present and wipe clean the bottom of the housing.
  5. Exhaust Tube and Screen: Verify that the exhaust tube and screen are completely clear of obstructions, including mud, leaves, twigs, insects, nests, etc. Clean by gently breaking it up and using a vacuum. Use only water and apply gently from a spray bottle; never spray directly with high-pressure water. Run the appliance to dry any moisture and blow out loose debris. Using any aftermarket protective screen is prohibited and will void the warranty.
  6. Interior Surface: Inspect the interior surface of the housing for any cracks or corroded areas that could allow the penetration of gases into or out of the vehicle's interior. Check especially around the hot water, cold water, gas, and electrical connections. If damages are found, contact a technician or Ranein customer service.
  7. Wire Connections: Check that all wire connections are firmly in place and that there are no signs of chafing or cracks on the insulation. Verify that the spark ignition cable between the Control Board and the igniter is securely in place and not shorted to any metal component.
  8. Pressure Safety Valve: Inspect the pressure safety valve to ensure it has not been leaking (no water residue).
  9. Water Inlet Filter: Inspect, clean, or replace the water inlet filter as necessary. Use a brush to clean the filter.

Pressure Safety Valve Maintenance:

The unit is equipped with a water pressure safety valve that must operate once yearly to ensure its effectiveness. This valve is a safety component and must not be removed for any reason other than replacement. A certified service technician must replace the pressure relief valve if defective. Tampering with the pressure relief valve will void the warranty. To check, lift the pressure safety valve handle upward and verify if water is dripping out of the valve.

Hard Water and Decalcification:

For prolonged usage in areas with higher water hardness concentrations, it is advised to provide a proper water treatment device for the incoming water. Hard water can lead to a reduction in appliance performance over time. Contact Ranein for decalcification instructions and recommended decalcification frequency per year (ranging from 1 to 4 times depending on water hardness: soft, moderately hard, hard, very hard).

Winterizing Operation:

To winterize the appliance for long-term storage, all water must be drained from the instrument.

  • Manual Winterizing (Draining Water):

    1. Close valves A and B, and open valve C at the back of the appliance.
    2. Open the door and pull out the baffle from the door frame.
    3. Open the safety valve by hand and allow water to drain completely. Unscrew the water inlet filter to clean it.
    4. Ensure all water has drained, then screw the drain plug and filter back in.
    5. Flush the RV's water system with a suitable winterizing fluid according to the supplier's or RV manufacturer's guidelines. The appliance is protected against freezing once the water has been drained.
  • Winterizing with Fluid (Optional):

    • This is only possible with an installed bypass kit (not included).
    • Follow RV coach manufacturer instructions for the winter water system.
    • Compressed Air Pressure: Do not exceed 30 PSI when air pressure is in the water heater. Isolate the water heater by closing all drain plugs and faucets, and only opening the water heater drain plug and filter cover for complete evacuation.
    • Anti-freeze: Use a non-toxic antifreeze recommended by the RV coach manufacturer. Antifreeze can be used directly in the water heater, requiring an additional 1L to fill the system.
    • Bypass Valve (Optional): A bypass valve can be installed to bypass filling the water heater with antifreeze. Before bypassing, the water heater must be evacuated with compressed air.

Storage and Transit:

When the RV is not in use, it is considered in storage or transit. To prepare the water heater:

  1. Turn off the gas supply.
  2. Turn off the water heater main switch.
  3. Drain the water out of the system and water heater by removing the filter cover and drain plug. If freezing conditions could occur, winterize according to the "Winterizing Water Heater" instructions.

For Next Season Using:

Thoroughly flush the water heater and system with clean drinking water through the hot and cold sides before using. Drain water several times out of the water heater drain plug. Sanitize the water system per the recommendations of your coach manufacturer.

Ranein RA65L Specifications

General IconGeneral
Power2000W
Voltage220-240V
MaterialStainless Steel
ThermostatAdjustable
Capacity65 liters
Frequency50 Hz
Safety FeaturesPressure Relief Valve