Chapter 1: DSM300 Installation 21
Configuring the DSM300 with C Series Displays
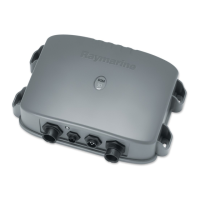
The C Series system uses cables with a round 4-pin twist-lock network connector.
A 3m-long C Series cable is included with your DSM300. If a longer cable is
required, an optional 10m C Series cable (part number E65011) is available from
Raymarine.
Figure 1-13: Configuring a New C Series System
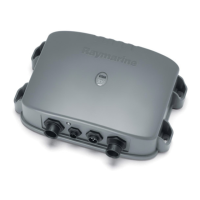
The product that the DSM300 replaces—the DSM250 sounder module—has a
triangular 3-pin network connector. If you are replacing an old DSM250 with a
new DSM300 in an existing C Series network, you will need to install the supplied
4-pin to 3-pin hsb
2
adapter. Connect the 4-pin end of the adapter to the DSM300
and then connect the 3-pin end of the DSM cable to the DSM300.
Unlike the DSM250, however, the DSM300 network connection is internally
terminated. When replacing a DSM250 with a DSM300, DO NOT USE
the hsb
2
Inline Terminator that was connected to the DSM250.
Figure 1-14: Replacing a DSM250 in an Existing C Series System
P
O
W
E
R
S
E
A
T
A
L
K
2
S
E
A
T
A
L
K
R
A
D
A
R
N
M
E
A
D
S
M
R
G
Y
IN
/ O
U
T
C Series Display
DSM300
4-pin to 4-pin C Series Cable
D7592-1
P
O
W
E
R
S
E
A
T
A
L
K
2
S
E
A
T
A
LK
R
A
D
A
R
N
M
E
A
D
S
M
R
G
Y
IN
/ O
U
T
C Series Display
4-pin to 3-pin DSM cable
DSM300
R69081
4-pin to 3-pin hsb
2
adapter (supplied)
D7603-1
 Loading...