Do you have a question about the Raymarine E62355- e7D MFD and is the answer not in the manual?
| Display Size | 7 inches |
|---|---|
| Resolution | 800 x 480 pixels |
| Touchscreen | Yes |
| Chartplotter | Yes |
| Waterproof Rating | IPX6 |
| Display Type | LCD |
| NMEA 2000 | Yes |
| GPS Receiver | Built-in 50 channel |
| Sonar Support | Yes |
| Wi-Fi | Yes |
| Bluetooth | Yes |
| Networking | Ethernet |
| Cartography | Navionics, C-MAP |
| Video Input | Yes |
| Operating Voltage | 12 V DC / 24 V DC |
| Radar Compatibility | Yes |
| Weight | 1.25 kg (2.75 lbs) |
Contains important disclaimers regarding product use, chart data, and compatibility.
Provides guidelines for minimizing electromagnetic interference between equipment during installation.
Provides information on recommended safe distances for WiFi/Bluetooth antenna usage.
Contains FCC compliance statements and interference statements.
Details Industry Canada compliance and operational conditions for the device.
Instructions on how to register Raymarine product ownership for full warranty benefits.
States that information is accurate at time of production but may change without notice.
Provides information regarding the multifunction display and the scope of this handbook.
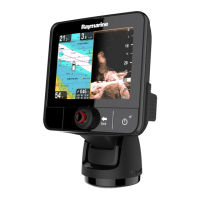
Lists available Raymarine multifunction display variants, their controls, and features.
Explains the conventions used in the handbook for icons, menus, and controls.
Details how to operate the display using touchscreen or physical buttons depending on the model.
Details compatible devices and protocols for connecting to the multifunction display.
Lists the activities involved in installing the system.
Outlines the maximum number of system components that can be connected.
Describes networking limitations and restrictions when connecting displays and systems.
Illustrates examples of possible system configurations with compatible devices.
Explains the data protocols used for sharing information between system components.
Lists the tools necessary for the installation process.
Provides guidance on cable types, routing, strain relief, circuit isolation, and shielding.
Details the connections available on various Raymarine multifunction displays and their compatibility.
Describes how to connect digital devices using SeaTalkhs/RayNet connectors and network switches.
Explains how to connect cameras or video devices to compatible displays.
Describes how to connect and control a Bluetooth-compatible media player wirelessly.
Explains how to connect and use a Raymarine Bluetooth remote control unit.
Explains how to connect to Raymarine mobile apps and synchronize with Navionics.
Provides guidelines for choosing an optimal location considering ventilation, interference, and GPS signal.
Details the product dimensions and mounting procedures for New a Series displays.
Provides product dimensions and mounting procedures for New c and e Series displays.
Instructions on how to power the display on, off, and use PowerSave mode.
Identifies the controls for the New a Series multifunction display.
Identifies the controls for the c/e Series multifunction displays.
Explains how to operate the unit using both touchscreen and physical keys.
Describes the homescreen layout and access to applications for New a Series.
Guides on how to check GPS operation and radar status.
Explains fundamental operations for touchscreens, including locking and unlocking.
Details the initial setup procedures, including language, vessel type, and date/time preferences.
Provides instructions on how to insert memory or chart cards into the display.
Guides on how to save waypoints, routes, tracks, and system settings to a memory card.
Details how to reset the system to factory default settings, including settings and data.
Introduces the PDF document viewer and how to open and browse documents.
Explains how to engage, disengage, and control the autopilot using the multifunction display.
Details how the autopilot function provides alarms and how to silence them.
Explains how to activate and cancel the Man Overboard (MOB) alarm and its effects.
Describes how alarms alert the user to situations requiring attention and how to configure their behavior.
Explains how to connect a DSC VHF radio to display distress messages and GPS position.
Details how to enable DSC alerts from connected VHF radios.
Explains how the fuel manager estimates fuel remaining, distance to empty, and logs fuel fills.
Introduces the AIS feature for receiving vessel information and displaying targets on charts and radar.
Lists the necessary AIS hardware and GPS connection for functionality.
Guides on enabling AIS overlay in chart and radar applications.
Explains how to display AIS vectors indicating target movement and heading.
Describes how to enable/disable AIS transmissions for privacy.
Explains how to view detailed AIS target information such as MMSI, CPA, and ETA.
Details how to use Safe Zones and safety messages to help avoid collisions.
Explains how AIS functions generate alarms for dangerous or lost targets.
Explains what waypoints are, how to place, navigate, and manage them.
Details how to build, navigate, and manage routes using waypoints.
Explains how to create, review, and edit tracks which record vessel passage.
Introduces the chart application's features for passage planning and navigation using cartographic information.
Explains how to zoom in/out and pan the chart area using controls or touchscreen.
Describes how the vessel symbol is displayed and how to locate it on the chart.
Explains how to switch between 2D and 3D chart views and manipulate the 3D view.
Details how to access and use the chart context menu for positional data and options.
Explains features for managing data like waypoints, routes, and tracks within the chart application.
Outlines navigation features like Goto Cursor, Goto Waypoint, Follow Route, and Create Track.
Explains the display of vectors for heading, COG, wind, and tide direction.
Details presentation options affecting chart detail, layers, view, orientation, and motion mode.
Introduces radar usage, features, and compatibility with different scanner types.
Explains how to select radar scan speed (24 RPM or Auto) for SuperHD and HD radars.
Discusses factors affecting radar image quality and maximum usable range.
Provides an overview of the radar display elements and additional functionalities.
Explains how to view two ranges simultaneously using HD or SuperHD scanners.
Describes radar orientation modes (Head-Up, North-Up, Course-Up) and motion modes (Relative, True).
Explains how to enable/disable and use on-screen controls for Gain, Rain, and Sea clutter.
Details gain presets, color gain, sea clutter, antenna boost, and power boost adjustments.
Describes how to use Guard Zone, VRM/EBL, and MARPA functions for target tracking and collision avoidance.
Details scanner set-up options for configuring timed transmit, tune adjust, and sea clutter.
Explains how the fishfinder uses sonar modules and transducers to create an underwater view.
Provides an overview of the fishfinder application, its functions, and how to interpret the sonar image.
Describes the four preset configurations for quick selection of tailored fishfinder settings.
Explains how to change the range of depth displayed and use Range Shift.
Details sensitivity settings like Gain, Color Gain, TVG, and Power Mode to enhance the display.
Explains how to determine depths and distances using features like depth reading, depth lines, and VRM.
Instructions on how to restore sonar settings to factory default values.
Introduces the data application for viewing system and instrument data using NMEA or SeaTalkng protocols.
Lists default datapages and the data items available for different display variants.
Guides on customizing datapages, changing order, adding custom pages, and setting engine details.
Explains how to control a thermal camera and display its image for low-light navigation.
Lists the controls for the thermal camera application on Raymarine displays.
Details power up/down, pause, and standby functions for the thermal camera.
Explains how to adjust thermal camera image settings like contrast, brightness, color, and scene presets.
Shows the menu options for pan and tilt cameras with the new interface.
Explains how to control a fixed mount thermal camera and display its image on your multifunction display.
Details power up/down, pause, and standby functions for the thermal camera.
Explains how to adjust thermal camera image settings like contrast, brightness, color, and scene presets.
Explains how to view camera or video feeds directly connected or via IP camera feeds on the network.
Describes how to control a connected Fusion 700 series entertainment system from the multifunction display.
Details the layout and controls for various media sources like iPod, USB, DVD, and Radio.
Explains how to adjust volume levels for each zone individually or all zones simultaneously.
Describes how to select which zone the main screen will control.
Explains how the weather application overlays historical, live, and forecasted weather graphics on a world map.
Details the steps required to set up the weather application, including connecting a receiver and specifying graphics.
Illustrates the main features of the weather display, including range, animation, and weather symbols.
Explains how to move around the weather map and place waypoints.
Explains how to view various weather reports like tropical statements, marine warnings, and forecasts.
Describes how to view animated weather graphics like radar, wind, and waves.
Explains how to control a Raymarine Sirius marine weather/satellite radio receiver using the Sirius audio application.
Introduces Raymarine mobile apps for viewing and controlling the multifunction display via Wi-Fi.
Guides on enabling Wi-Fi on the multifunction display for mobile app connectivity.
Explains how to encrypt the Wi-Fi connection using WPA2 and set a passphrase.
Allows selection of the system operating language from a list of available languages.
Explains how to customize display functions by setting boat type, number of engines, and fuel capacity.
Allows specification of preferred units of measurement for distance, speed, depth, temperature, pressure, and volume.
Covers display preferences like Key Beep, Cursor Autohide, Range Controls, Shared Brightness, and Screenshot File.
Explains how to customize data displayed in on-screen cells, databar, and expanded databar.
Lists the system set-up menus available for configuring the display and external devices.
States that the product has no user-serviceable components and refers to authorized dealers for repair.
Provides best practices for cleaning the product, including the display case and screen.
Provides information on possible causes and corrective actions for common marine electronics installation problems.
Describes problems at power up, their causes, and solutions related to the power supply.
Details common radar problems, their causes, and solutions, including scanner messages and bearing alignment.
Addresses GPS issues like 'No Fix' status, connection faults, and antenna placement.
Covers sonar issues such as data unavailability, problematic readings, and incorrect speed.
Addresses common thermal camera problems like video not displayed, unresponsive controls, and image issues.
Covers common Wi-Fi issues like no wireless connection, slow app performance, and weak signal.
Details touchscreen problems like touch lock, poor finger contact, and saltwater deposits.
Provides contact information for Raymarine customer support via website, telephone, and email.
Lists contact details for third-party suppliers like Navionics and Sirius.
Provides detailed physical and power specifications for various Raymarine display models.
Lists available transducer accessories and their part numbers.
Provides a list of RayNet connector network cables with part numbers and lengths.
Lists available SeaTalkhs network cables with part numbers and lengths.
Specifies the required video cable for e95/e97/e125/e127 displays.
Lists spare parts available for a65 and a67 models.
Lists spare parts available for e7 and e7D models.
Lists spare parts available for e95, e97, c95, and c97 models.
Lists spare parts available for e125, e127, c125, and c127 models.
Lists spare parts available for the e165 model.