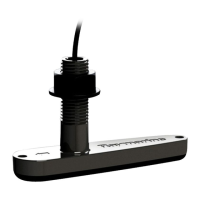
40 Transducers for Fishfinders
➤ To attach the transducer cable connector:
1. Slip the nut over the connector cable end. Push it past the connec-
tor and overthe cable.
2. Insert the wedge tool into the groove in the splitof thesplit ring
and slide the wedge tool until its squared endis flush withthe
larger edge of the split ring.
3. Slip the split ring and wedgetool over the connectorbody until
aligned with the mounting grooveon the connector.
4. Remove the wedge tool and seat the split ring in the mounting
groove, making sure the connector protrusion falls into the split.
5. Slipthe nut forward until it stops.Twist until the protrusionson
the inside of the nut alignwith the grooves on the split ring.
6. Slip the nut forward and snap into place.
The transducer cable is attached to the 7 pin male connector marked
TRANSDUCERonthe fishfinder. Howyouconnectthecableto theunit
depends on the type of transduceryou have installed:
• Combined depth/speed/temptransducers have a 7 pin female
connector. Attach the transducercable connector directly to the
fishfinder.
• Combined speed/temperature transducers have a 3 pin female
connector that requires the use of an additional Y-shaped cable
(Raymarinepart numberE66022) toattach to the 7pin connector
on the fishfinder. This Y-cable is included with yourspeed/tem-
perature transducer.
Attach the7 pin female connectoron the Y-cable tothe fishfinder
unit then attach the transducer cable to the 3 pin male connector
on the Y-cable.
• Depth-only transducers have a 7 pin female connector.
Attach the transducer cable connector directly to the fishfinder.
or
• If being installedin conjunction with a speed/temperaturetrans-
ducer, attach the 7pin female connector on theY-cableto thefish-
finderthenattachthe transducercabletothe7 pinmaleconnector
on the Y-cable.
Note:If your system requires both a Y-cable and a transducerexten-
sion cable, ensure that you connect the Y-cable to the fishfinder and
the extension cable to the transducer.
 Loading...