Need Help? Visit our web site at www.razor.com or call toll-free at 866-467-2967 Monday - Friday 8:00 AM - 5:00 PM PST.
2
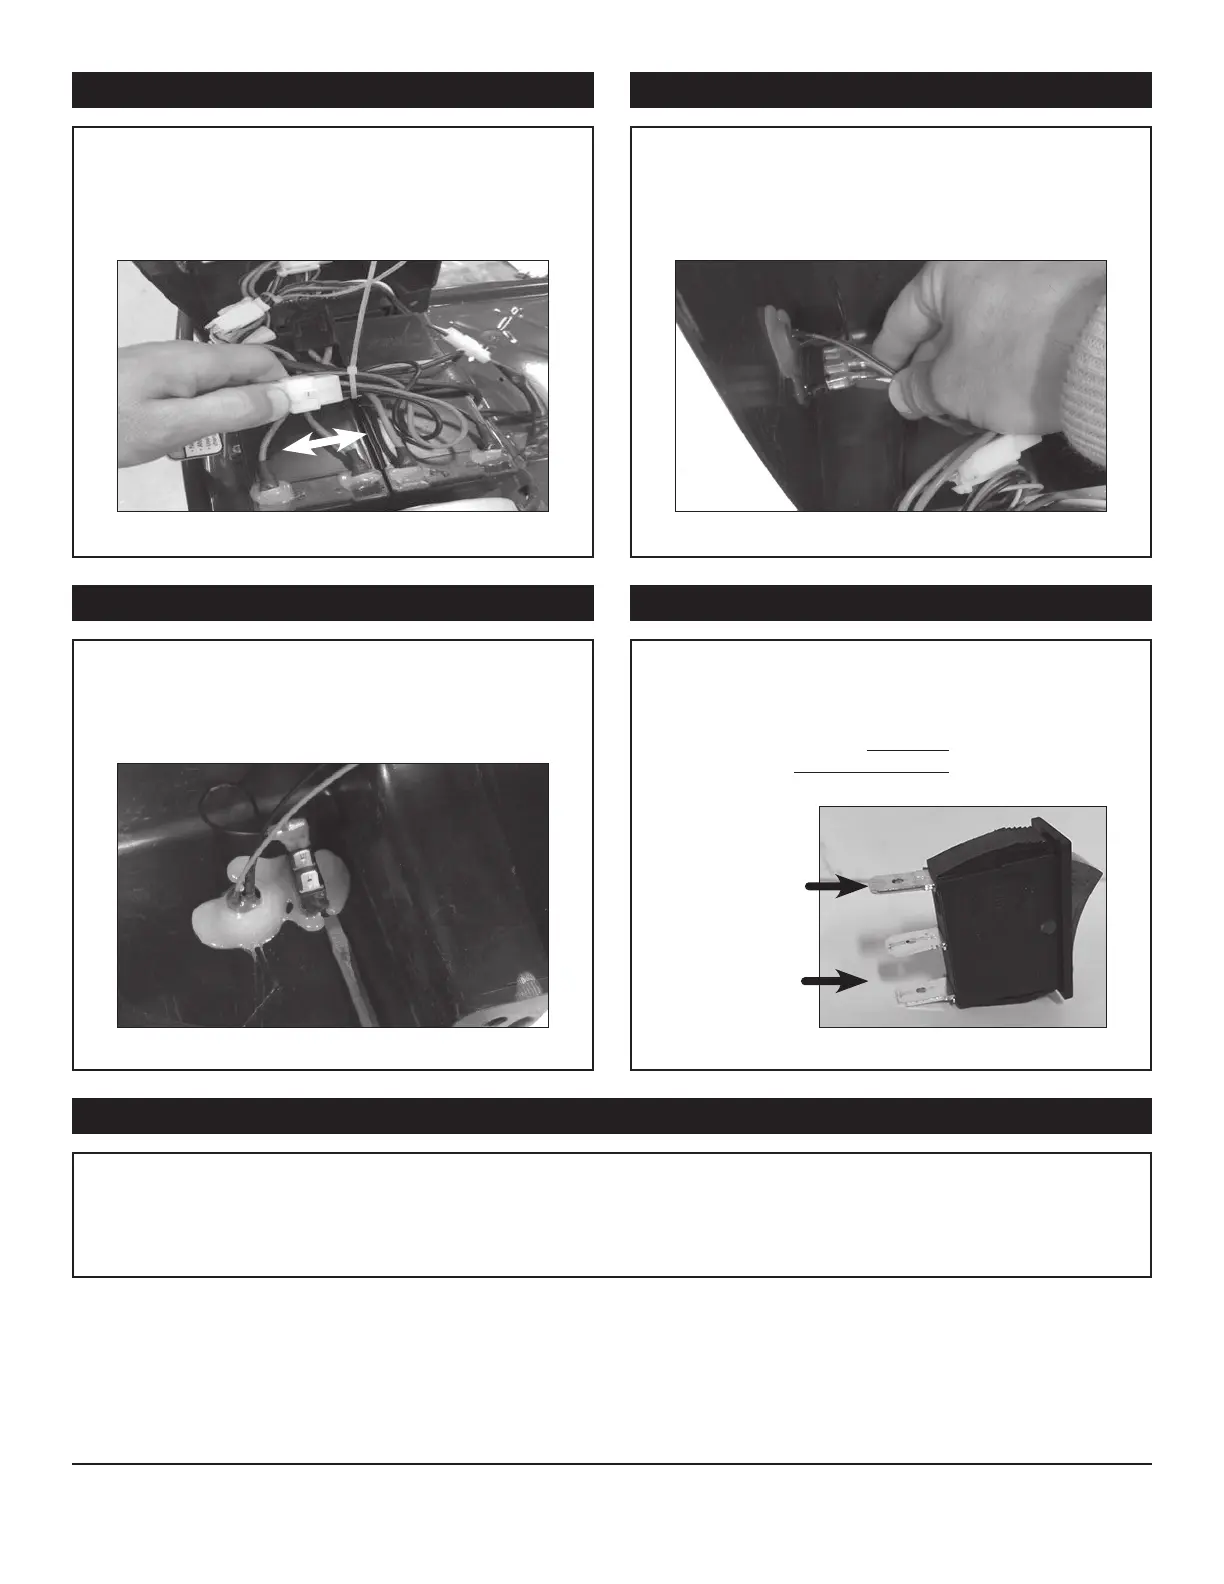
Step 6
Step 3 Step 4
Figure 4
Disconnect the two (2) red wires going from
the control module to the on/off switch and the
single black wire from the on/off switch to the
charger port.
Step 5
Figure 5
Using a flat head screwdriver; carefully remove
the silicone from the back of the on/off switch and
remove from battery cover.
Note
Figure 6
Place replacement on/off switch in the battery cover.
Re-connect the wires as shown above. NOTE: The two (2)
red wires from the on/off switch go on the two (2) silver
prongs (in any order). The black wire from the charger
port goes on the gold colored prong.
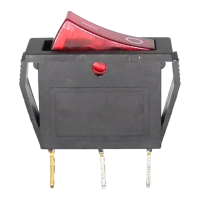
(1) Gold prong -
black wire
charger port
(2) Silver prongs -
red on/off switch
Reverse steps 1 through 4 to install the replacement on/off switch.
ATTENTION: Charge battery 12 hours before initial use.
Figure 3
Locate the white plastic connector on the battery
and disconnect it from the control module.
150209