INSTALLATION INSTRUCTIONS:
LIMITED WARRANTY:
RectorSeal, LLC makes the Limited Express Warranty that when the instructions for storage and handling of our products are followed we warrant our products to be free from defects. THIS
LIMITED EXPRESS WARRANTY IS EXPRESSLY IN LIEU OF ANY OTHER EXPRESS OR IMPLIED WARRANTIES, INCLUDING ANY IMPLIED WARRANTY OF MERCHANTABILITY OR
FITNESS FOR A PARTICULAR PURPOSE, AND OF ANY OTHER OBLIGATION ON THE PART OF RECTORSEAL, LLC. The sole remedy for breach of the Limited Express Warranty shall
be the refund of the purchase price. All other liability is negated and disclaimed, and RectorSeal, LLC shall not be liable for incidental or consequential damages.
MANUFACTURED BY
RectorSeal
• 2601 Spenwick Drive • Houston, Texas 77055, USA
Telephone: 713/263-8001 or 800/231-3345 Fax: 713/263-7577 or 800/441-0051
C-17
For Additional Technical Information, Call Toll Free 1-800-231-3345
www.rectorseal.com
EASY KLEAR
Three Way Clean Out Valve
EASY KLEAR
™
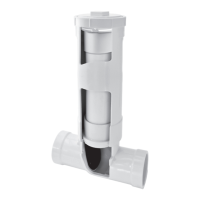
1. Install clean out valve in drain line at outlet of evaporator drain pan and before the "P"-trap.
Note: EASY KLEAR™ should be installed with the arrows on the valve facing the installer, top of
valve should never be lower than drain pan.
2. Position clean out valve so that the 1/4" opening is at the top and clean out valve is vertical with the A/C
unit. (See illustration below)
3. Cut out 2" length from drain line and cement clean out valve to PVC pipe. Caution: Do not allow
cement to enter valve assembly. Excess cement will damage the valve.
4. Check valve operation after cementing.
5. Insulate bottom of clean out valve.
6. Place the enclosed orange-colored sticker on A/C unit near EASY-KLEAR™ clean out valve.
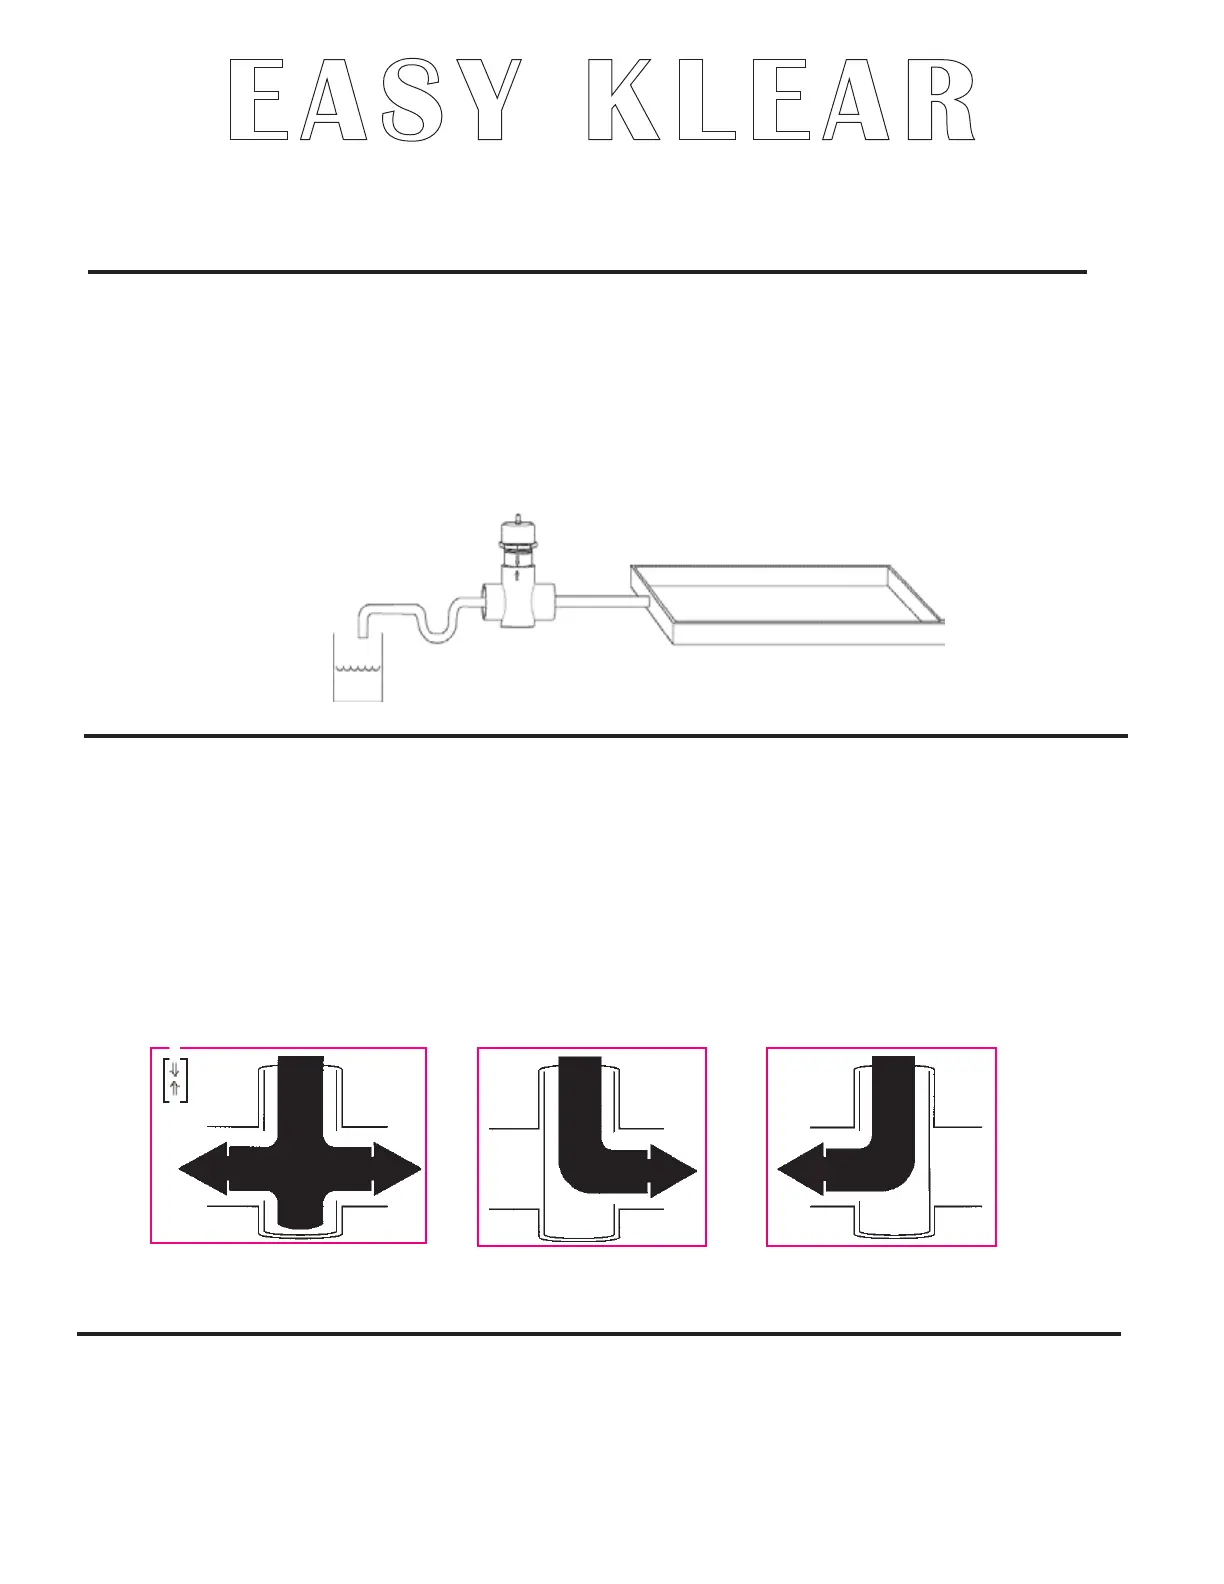
1. Lift stem and rotate top of clean out valve so that the top arrow points in the direction of clog,
either upstream or downstream.
2. Unscrew top of clean out valve to vacuum out clog or remove black cap from 1/4" opening to blow out clog
using intermittent nitrogen or CO
2
charge. Note: Do not apply more than 30 PSI pressure.
3. Vacuum or blow out condensate drain line.
4. Return black cap to 1/4" opening, or tighten top of clean out valve to valve body.
5. When nished, lift stem, turn and reseat to align arrows to allow for normal drainage. Failure to
align arrows will result in blockage to line and damage to property.
6. Check for proper drainage by flushing line with water when finished.
OPERATING INSTRUCTIONS:
Align arrows on unit for nor-
mal operating flow position
Lift stem and rotate top of valve so top arrow points in
direction of clog, either upstream or downstream.
Normal Operating Flow Position Clean-Out Upstream
Clean-Out Downstream
align
arrows
 Loading...