2
OPERATION
CAUTION: DO NOT RUN THE PUMP BEFORE PRIMING IT. THE SEAL AND IMPELLER COULD BE PERMANENTLY DAMAGED.
a) PREPARING THE ENGINE: Follow the engine manufacturer's
instructions before operating.
b) PRIMING THE PUMP: Remove the priming plug, ll the casing
with water until full, and replace the plug. If the pump is below
the level of the water that will be pumped (ooded suction), the
pump will automatically ll up when the valves are open.
CAUTION: DO NOT OPERATE THIS PUMP DRY!
c) START-UP: Start the pump. In a ooded suction situation, the
pump will discharge the water almost immediately. If the suction
line is above the water level being pumped, it will take a few
minutes to lift the water to the casing and then to discharge it. If
the suction line is quite long, the pump may overheat before the
water in the suction line reaches the pump. In this case, turn the
pump off and drain the casing. Wait a few minutes for the seal
in the pump casing to cool down. CAUTION: If the overheated
casing is lled while hot, damage to the seal will occur. Replace
the drain plug and rell the casing with water. Replace the priming
plug and restart the pump.
REPLACEMENT PARTS
ITEM
# DESCRIPTION
KIT
GROUP
ID* PART #
1 Adapter A 617103
2 O-ring, 195mm NBR A 617103
B 617100
3 Mechanical seal A 617103
B 617100
4 Impeller A 617103
B 617100
5 Volute casing A 617103
6 Volute packing A 617103
B 617100
7 Pump casing A 617103
8 Gasket A 617103
C 617101
9 Discharge flange A 617103
C 617101
10 Flapper A 617103
D 617102
11 Suction flange A 617103
D 617102
12 O-ring, 24mm NBR A 617103
C 617101
D 617102
13 Cap plug A 617103
C 617101
D 617102
14 Roll frame E 617104
Items with like identifiers are sold/packaged together
As a convenience, all repair kits contain the fasteners
needed for the reassembly of their components.
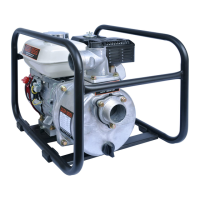
FIGURE 1
Typical water pump
Discharge
head
Total head
Suction head
25 ft. (8 m) max
FIGURE 2
 Loading...