GB
9
Note:
The device can also be connected to the network at a later point in time.
5. If you have selected "Yes", the device goes to the network settings.
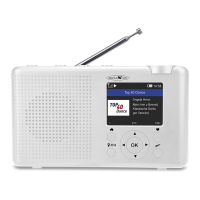
6. Use the [▲ / ▼] buttons to select the "Add / Remove AP" menu item and press
the [OK] button.
7. Now use the [▲ / ▼] buttons to select the menu item "Add AP (Scan)" and press
the [OK] button.
8. Select your WLAN with the [▲ / ▼] buttons and press the [OK] button.
Enter WiFi password:
9. Use the [▲ / ▼] button to scroll through the characters.
10. Press the [OK] key to confirm the character.
11. Repeat the process until the password has been entered.
12. When entering the last character, keep the [OK] button pressed to confirm and
complete the entry.
13. The device is now connected to the WLAN and then the home menu opens.
14. The first installation is complete.
Note:
Pay attention to upper and lower case letters when entering the password.
Please make sure you have the following ready: You have a broadband
internet connection.
A wireless broadband router is successfully connected to the Internet.
The TRA23i device supports the B / G / N wireless network connection (the
N wireless router can also be used with the setting to B or G).
You know the network password (network key) for WEP (Wired Equivalent
Privacy) or WPA (Wi-Fi Protected Access).
If you do not know the code / password, please contact the person /
technician who set up the router / network for you.
The radio works via a wireless network connection (Wi-Fi connection).
HOME MENU
My favorite:
Shows the radio stations (FM, DAB, Internet) saved as favourites.
Internet radio:
Internet radio playback.
Media centre:
Network UPnP music playback.
DAB radio:
DAB radio playback