54
C GETTING STARTED
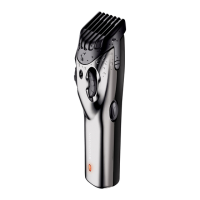
, CHARGING YOUR HAIRCLIPPER
• Ensuretheproductisswitchedo
• Connectthechargingadaptortotheproductandthentothemains.
• Iftheproductisnotgoingtobeusedforanextendedperiodtime(2–3months),
unplug it from the mains and store.
• Fullyrechargeyourproductwhenyouwouldliketouseitagain.
• Allow16–20hoursforafullcharge.
• ThisapplianceshouldbechargedbyapprovedsafetyisolatingadaptorsPA-3215E(for
EUversion)orPA-3215U(forUKversion)withtheoutputcapacityof3.2Vdc;1500mA.
, CORDED USE
• Connectthechargingadaptortotheproductthentothemains.
FCAUTION:Extendedmainsonlyusewillresultinthereductionofthebatterylife.
Keep the appliance dry.
, CORDLESS USE
When the unit is switched on and fully charged, the product can be used in cordless mode
for up to 40 minutes.
C HOW TO USE
, BEFORE STARTING THE CUT
• Inspecttheclippermakingsurethatitisfreefromhairanddirt.
• Seatthepersonsothattheirheadisapproximatelyatyoureyelevel.
• Beforecutting,alwayscombthehairsoitistanglefreeanddry.
Comb position Short comb Long comb
1 3 mm 24 mm
2 6 mm 27 mm
3 9 mm 30 mm
4 12 mm 33 mm
5 15 mm 36 mm
6 18 mm 39 mm
7 21 mm 42 mm
, TO ATTACH A COMB
• Holdthecombwithitsteethupward.
• Slideitontoandalongtheclipperbladeuntilthefrontofthecombrmlysitsagainst
the clipper blade.
, TO REMOVE THE COMB
• Holdingtheclipperwiththebladesfacingawayfromyou,rmlypushthecomb
upward and away from the blades.
, INSTRUCTIONS FOR HAIR CUTTING
Note:Forevencutting,allowthecombattachment/bladetocutitswaythroughthe
hair.Donotforceitthroughquickly.Ifyouarecuttingforthersttime,startwiththe
maximum comb attachment.
, STEP 1 – Nape of the neck
• Setthecombto3mmor6mm.
• Holdtheclipperwiththebladeteethpointingupwards.Beginstartingatthecentreof
the head at the base of the neck.
• Slowlylifttheclipper,workingupwardsandoutwardsthroughthehair,trimmingjusta
little at a time.
, STEP 2 – Back of the head
• Withthecombsetat12mmor18mm,cutthehairatthebackofthehead.
, STEP 3 – Side of the head
• Setthecombto3mmor6mm,trimsideburns.Thenchangethesettingto9mmand
continue to cut the top of the head.
, STEP 4 – Top of the head
• Usethelongerlengthcombattachmentandsetitto24mmor27mmthencuthairon
top of the head against the direction in which the hair normally grows.
• Forlongerhairontop,usethelongerlengthcombattachment(24–42mm)toachieve
the desired style.
• Alwaysworkfromthebackofthehead.
, STEP 5 – The finishing touches
• Usetheclipperwithoutanattachmentcombforclosetrimmingaroundthebaseand
sides of the neck.
• Toproduceacleanstraightlineatthesideburns,reversethehairclipper.Placethe
reversed clipper at right angles to the head, tips of the blades lightly touching the skin
and then work downwards.
 Loading...
